IONIC ERP Tutorial
Selling Modules
Selling
Selling is the communication that happens with the customer prior to and during the sale. You might be managing all the communication yourself or you may have a small team of sales people to handle this. IONIC ERP helps you track the communication leading up to the sale by keeping all your documents in an organized and searchable manner.
1 Sales
- Selling Module
- Customer
- Product Bundle
- Sales Cycle
- Pricing Rule
3 Other
- Discounts
- Taxes
Quotation
A quotation is an estimated cost of the products/services you’re selling to your future/present customer.
During a sale, a customer may request for a note about the products or services you are planning to offer along with the prices and other terms of engagement. This has many names like “Proposal”, Estimate”, “Pro Forma Invoice” or a Quotation.
To access the Quotation list, go to:
Home > Selling > Sales > Quotation
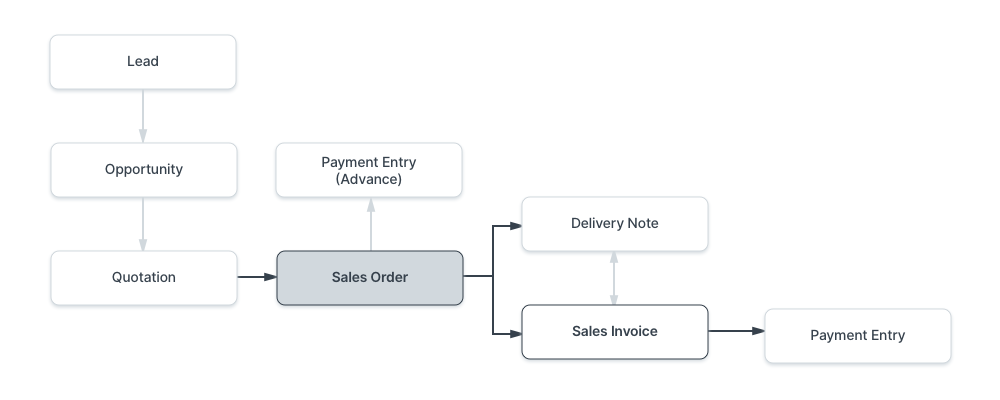
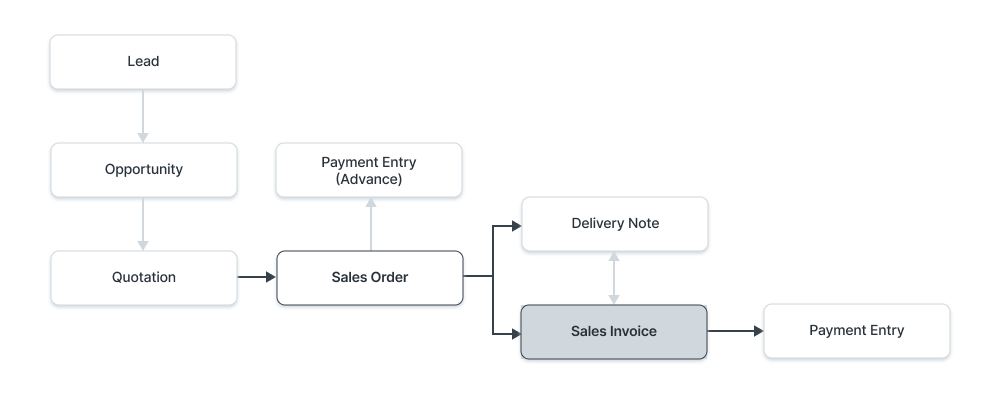
A typical sales flow looks like:
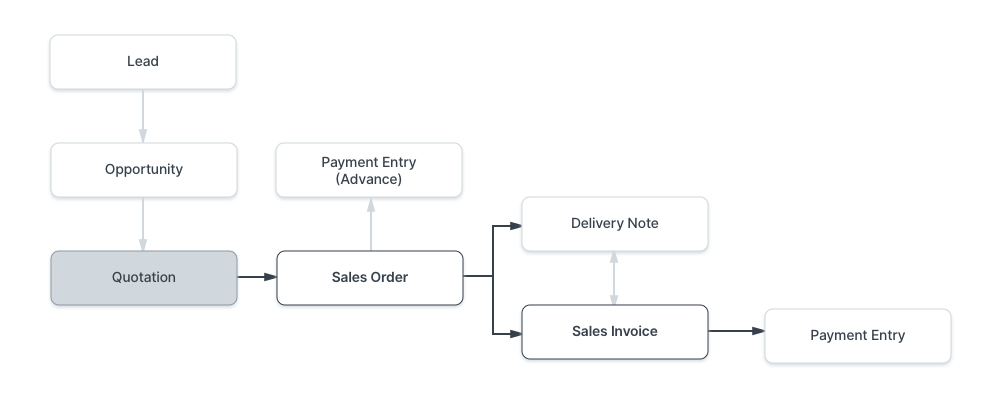
A Quotation contains details about:
- The recipient of the Quotation
- The Items and quantities you are offering.
- The rates at which they are offered.
- The taxes applicable.
- Other charges (like shipping, insurance) if applicable.
- The validity of contract.
- The time of delivery.
- Other conditions.
Tip: Images look great on Quotations. Make sure your items have an image attached.
1. Prerequisites
Before creating and using a Quotation, it is advised that you create the following first:
- Customer
- Lead
- Item
2. How to create a Quotation
- Go to the Quotation list, click on New.
- Select if the Quotation is to a Customer or a Lead from the ‘Quotation To’ field.
- Enter Customer/Lead name.
- Enter a Valid till date after which the quoted amount will be considered invalid.
- Order Type can be Sales, Maintenance, or Shopping Cart. Shopping Cart is for website shopping cart and is not intended to be created from here.
- Add the Items and their quantities in the items table, the prices will be fetched automatically from Item Price. You can also fetch items from an Opportunity by clicking on Get Items from > Opportunity.
- Add additional taxes and charges as applicable.
- Save.
You can also create a Quotation from an Opportunity shown as follows.
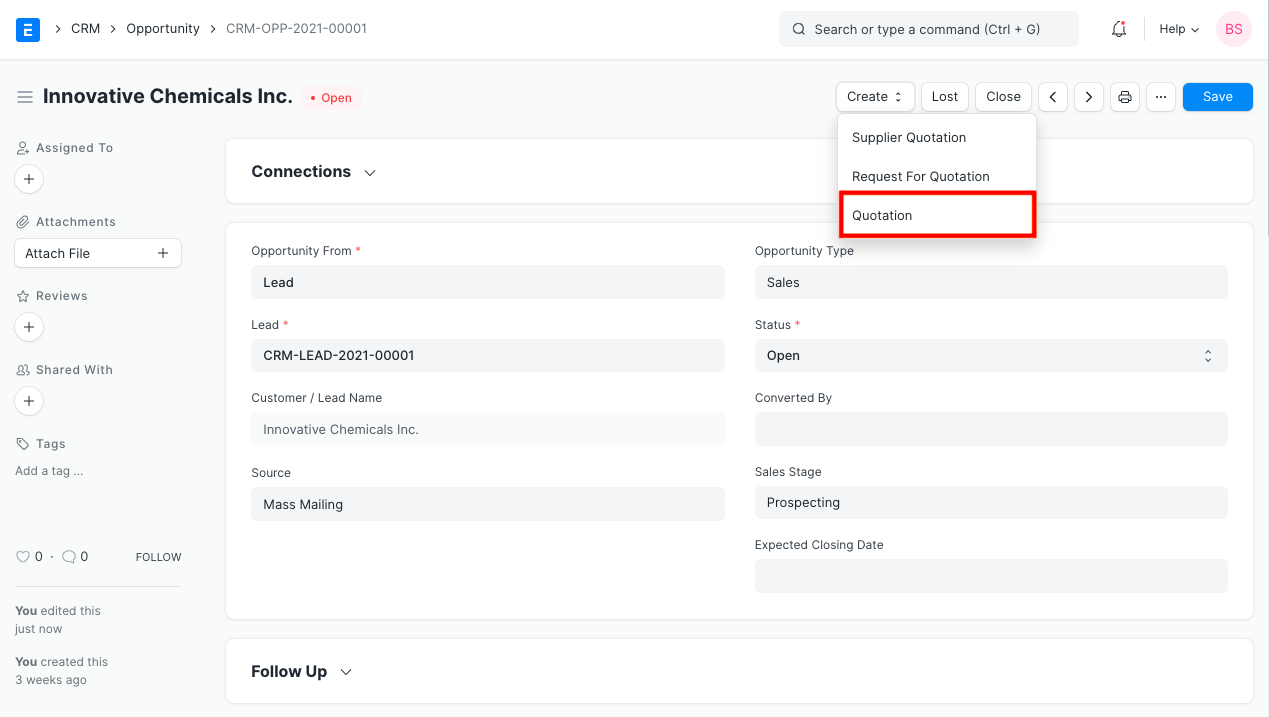
3. Features
3.1 Address and Contact
In this section there are four fields:
- Customer Address: This is the Billing address of the customer.
- Shipping Address: Address where the items will be shipped to.
- Contact Person: If your customer is an organization, then you can add the person to contact in this field.
- Territory: Region where the customer belongs to. Default is All Territories.
3.2 Currency and Price List
You can set the currency in which the quotation/sales order is to be sent. If you set a Pricing List, then the item prices will be fetched from that list. Ticking on Ignore Pricing Rule will ignore the Pricing Rules set in Accounts > Pricing Rule.
Read about Price Lists and Multi-Currency Transactions to know more.
3.3 The Items Table
This table can be expanded by clicking on the inverted triangle present rightmost of the table.
- On selecting Item Code, the following will be fetched automatically: item name, description, any image if set, quantity default as 1, the rates. You can add discounts in the Discounts and Margin section.
- Under Discount and Margin you can add extra margin for profit or give a discount. Both can be set based on either amount or percentage. The final rate will be shown below in the Rate section. You can assign an Item Tax Template created specifically for an item.
- Item weights will be fetched if set in the Item master.
- In Warehouse and Reference, the warehouse will be fetched from the Item master, this is the warehouse where your stock is present.
- Under Planning you can see the Projected quantity and the actual quantity present. To know more about these fields, click here. If you click on the ‘Stock Balance’ button, it’ll take you to a doctype where you can generate a stock report for the item.
- Shopping cart, additional notes is for website transactions. Notes about the item will be fetched here when added via a shopping cart. For example: make food extra spicy. Introduced in v12
- Page Break Will create a page break just before this item when printing.
- You can insert rows below/above, duplicate, move, or delete rows in this table.
- Tip: You can also Download the items table in CSV format and Upload it to another transaction.
The total quantity, rate, and net weight of all items will be shown below the item table. The rate shown here is pre-tax.
3.3.1 Alternative Items
You can manually add Items and mark them as alternatives by checking the Is Alternative checkbox in the Items Table row. These items will not be counted towards the taxes and totals of the Quotation.

It is important to maintain the right order i.e. alternative item rows must follow a non-alternative item row (the item that they are alternatives to). Grouping will be done on this basis.
FSH-ROD-001, FSH-ROD-002 and FSH-ROD-003 are treated as a group to select from. In this way you can provide alternatives to your Customer/Lead and they can select from among those.
Selection of items to proceed with occurs after the Quotation is submitted. Visit the Selecting Alternatives section of this page to know more.
3.4 Taxes and Charges
To add taxes to your Quotation, you can select a Sales Taxes and Charges Template or add the taxes manually in the Sales Taxes and Charges table.
The total taxes and charges will be displayed below the table. Clicking on Tax Breakup will show all the components and amounts.
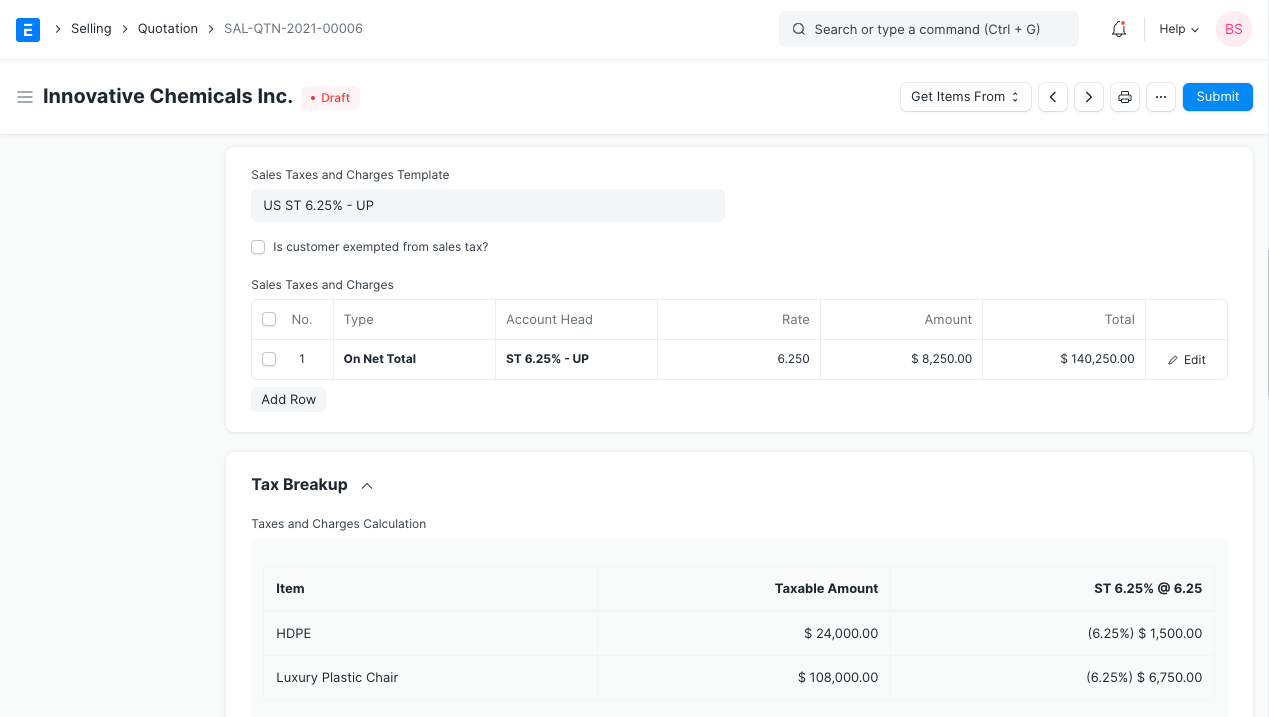
To add taxes automatically via a Tax Category, visit this page.
Shipping Rule
A Shipping Rule helps set the cost of shipping an Item. The cost will usually increase with the distance of shipping. To know more, visit the Shipping Rule page.
3.5 Additional Discount
Other than offering discount per item, you can add a discount to the whole quotation in this section. This discount could be based on the Grand Total i.e., post tax/charges or Net total i.e., pre tax/charges. The additional discount can be applied as a percentage or an amount.
Read Applying Discount for more details.
3.6 Payment Terms
Sometimes payment is not done all at once. Depending on the agreement, half of the payment may be made before shipment and the other half after receiving the goods/services. You can add a Payment Terms template or add the terms manually in this section.
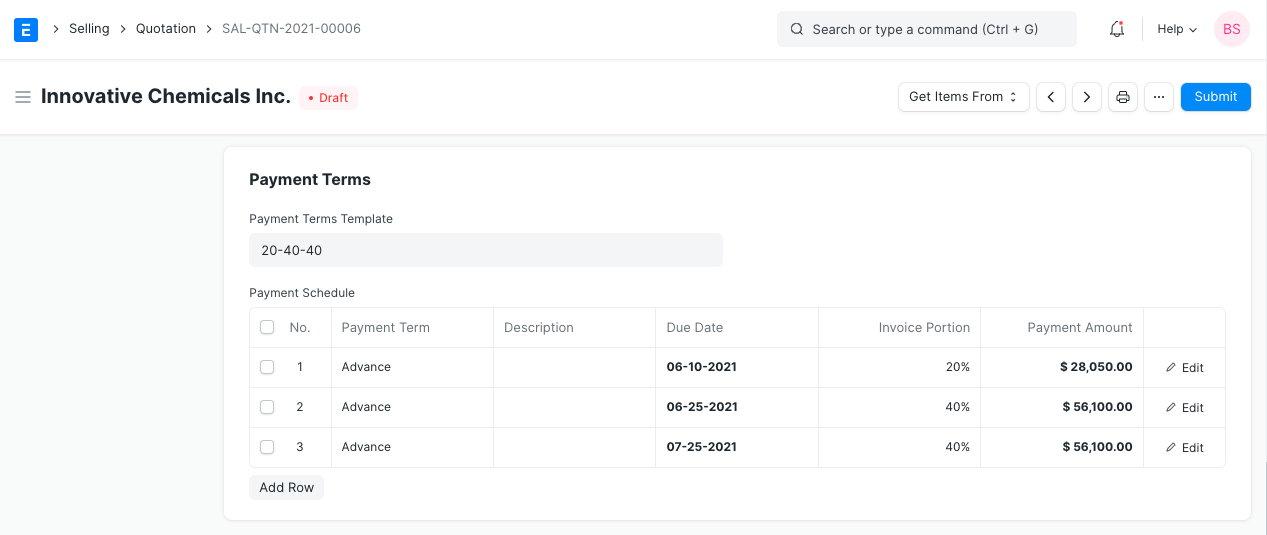
Read Payment Terms to know more.
3.7 Terms and Conditions
In Sales/Purchase transactions there might be certain Terms and Conditions based on which the Supplier provides goods or services to the Customer. You can apply the Terms and Conditions to transactions to transactions and they will appear when printing the document. To know about Terms and Conditions,
3.8 Print Settings
Letterhead
You can print your quotation/sales order on your company’s letterhead.
‘Group same items’ will group the same items added multiple times in the items table. This can be seen when your print.
Print Headings
Quotations can also be titled as “Proforma Invoice” or “Proposal”. You can do this by selecting a Print Heading. To create new Print Headings go to: Home > Settings > Printing > Print Heading. K
3.9 More Information
- Campaign: A Sales campaign can be associated with the quotation. A set of quotations can be part of a sales campaign.
- Source: A Lead Source type can be linked if quoting to a lead, whether from a campaign, from a supplier, an exhibition etc,. Select Existing Customer if quoting to a customer.
- Supplier Quotation: A Supplier Quotation can be linked for comparing with your current quotation to a buyer. You can get an idea of profit/loss by comparing the two.
3.10 Submitting the Quotation
Quotation is a “Submittable” transaction. When you click on Save, a draft is saved, on submitting, it is submitted permanently. Since you send this Quotation to your Customer or Lead, you must freeze it so that changes are not made after you send the Quotation.
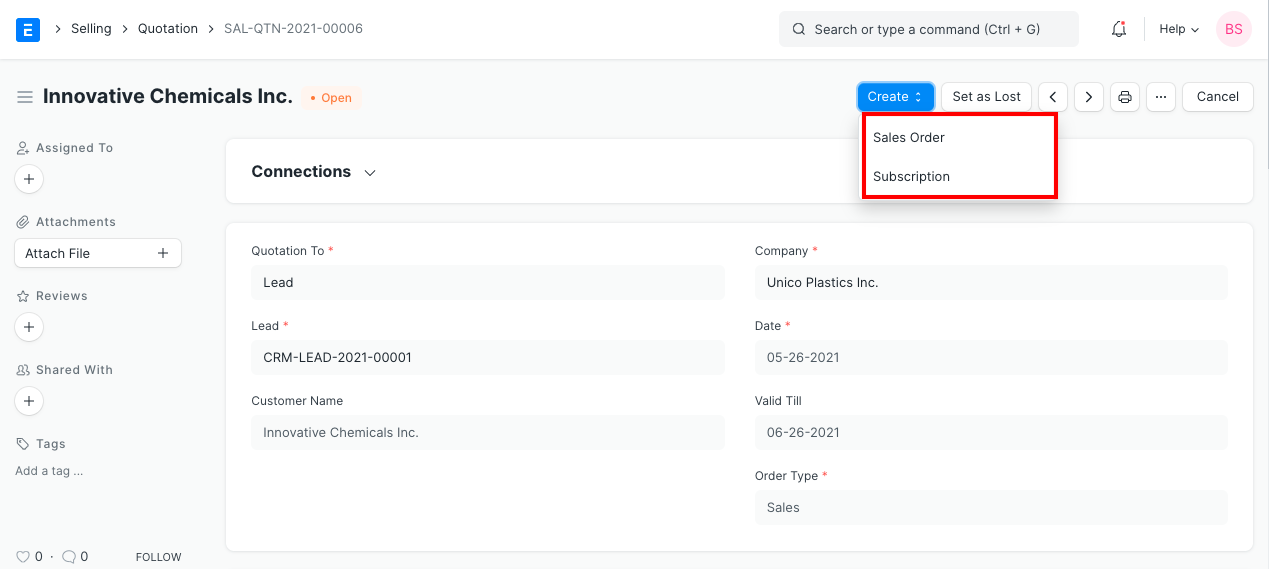
On submitting, you can create a Sales Order or a Subscription from the Quotation using the Create button. In the Dashboard present on the top, you can go to the Sales Order linked with this Quotation. In case it didn’t work out, you can set the Quotation as lost by clicking on the ‘Set as Lost button’.
3.10.1 Selecting Alternatives
If the Quotation contains alternative items, you will be prompted to select from among alternatives while creating a Sales Order from the Quotation.

As you can see, FSH-ROD-002 and FSH-ROD-003 are alternatives to FSH-ROD-001 that are offered to the Customer.
One of these will be agreed upon and selected, following which the selected item will be mapped. 
If simple items are involved (without alternatives), they will mapped as usual.
Provision to select alternative items before mapping is only available while creating Sales Orders from individual Quotations. If ‘Get Items From’ is used in a Sales Order or Sales Invoice to fetch Quotation items, only non-alternative items will be fetched and no item selection will be prompted.
Sales Order
A Sales Order is a confirmation of an order from your customer.
It is usually a binding Contract with your Customer. Once your customer confirms the Quotation you can convert your Quotation into a Sales Order.
To access Sales Order, go to:
Home > Selling > Sales > Sales Order
1. Prerequisites
Before creating and using a Sales Order, it is advised that you create the following first:
- Customer
- Item
2. How to create a Sales Order
- Go to the Sales Order list, click on New.
- Select the Customer.
- Set the ‘Delivery Date’ – applied to the whole order.
- With Order Type, you can set whether it’s a Sales order, Maintenance order, or from the online Shopping Cart of your website. By default, this value is set to “Sales”.
- In the “Customer’s Purchase Order” you can enter the Customers Purchase Order No. or other details which may be useful as a reference.
- Enter the items and quantities to be delivered in the Item table. If Item Prices are set for the items, the Rate field will be populated automatically. If not, enter the item Rate manually. You can also overwrite the auto-populated Item Rate in case you want to change that value.
- Click “Save” to save a draft of the Sales Order.
- “Submit” to submit the Sales Order to the System.
2.1 Other ways to create a Sales Order
- You can also create a Sales Order from a submitted Quotation via the Create button on the top right.
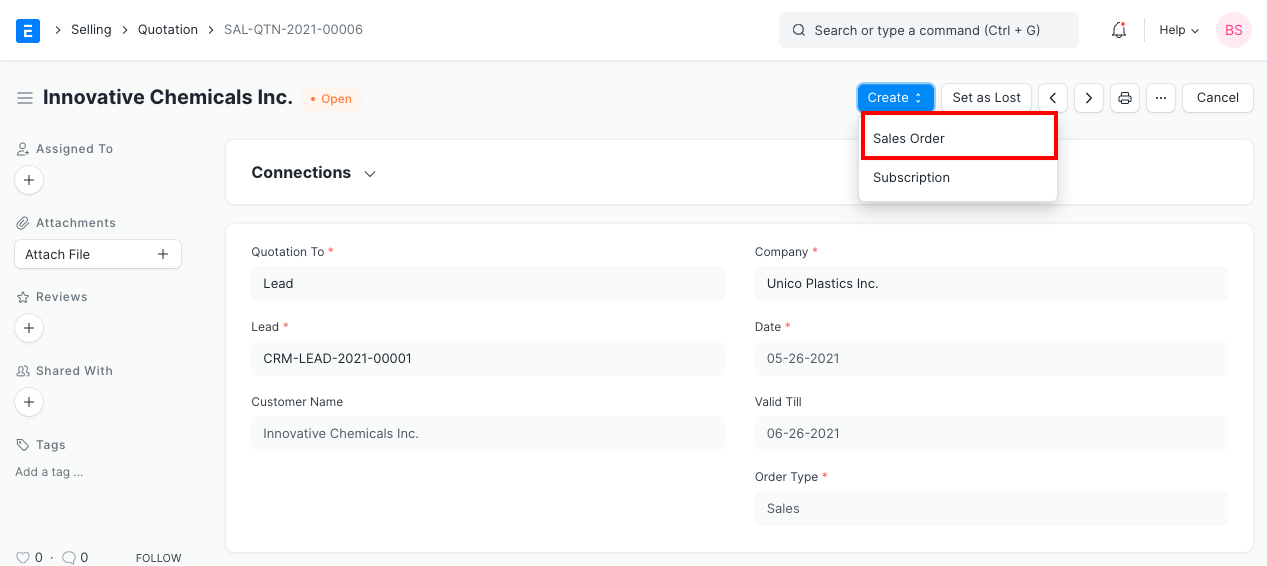
- Or you can create a new Sales Order and pull details from a Quotation.
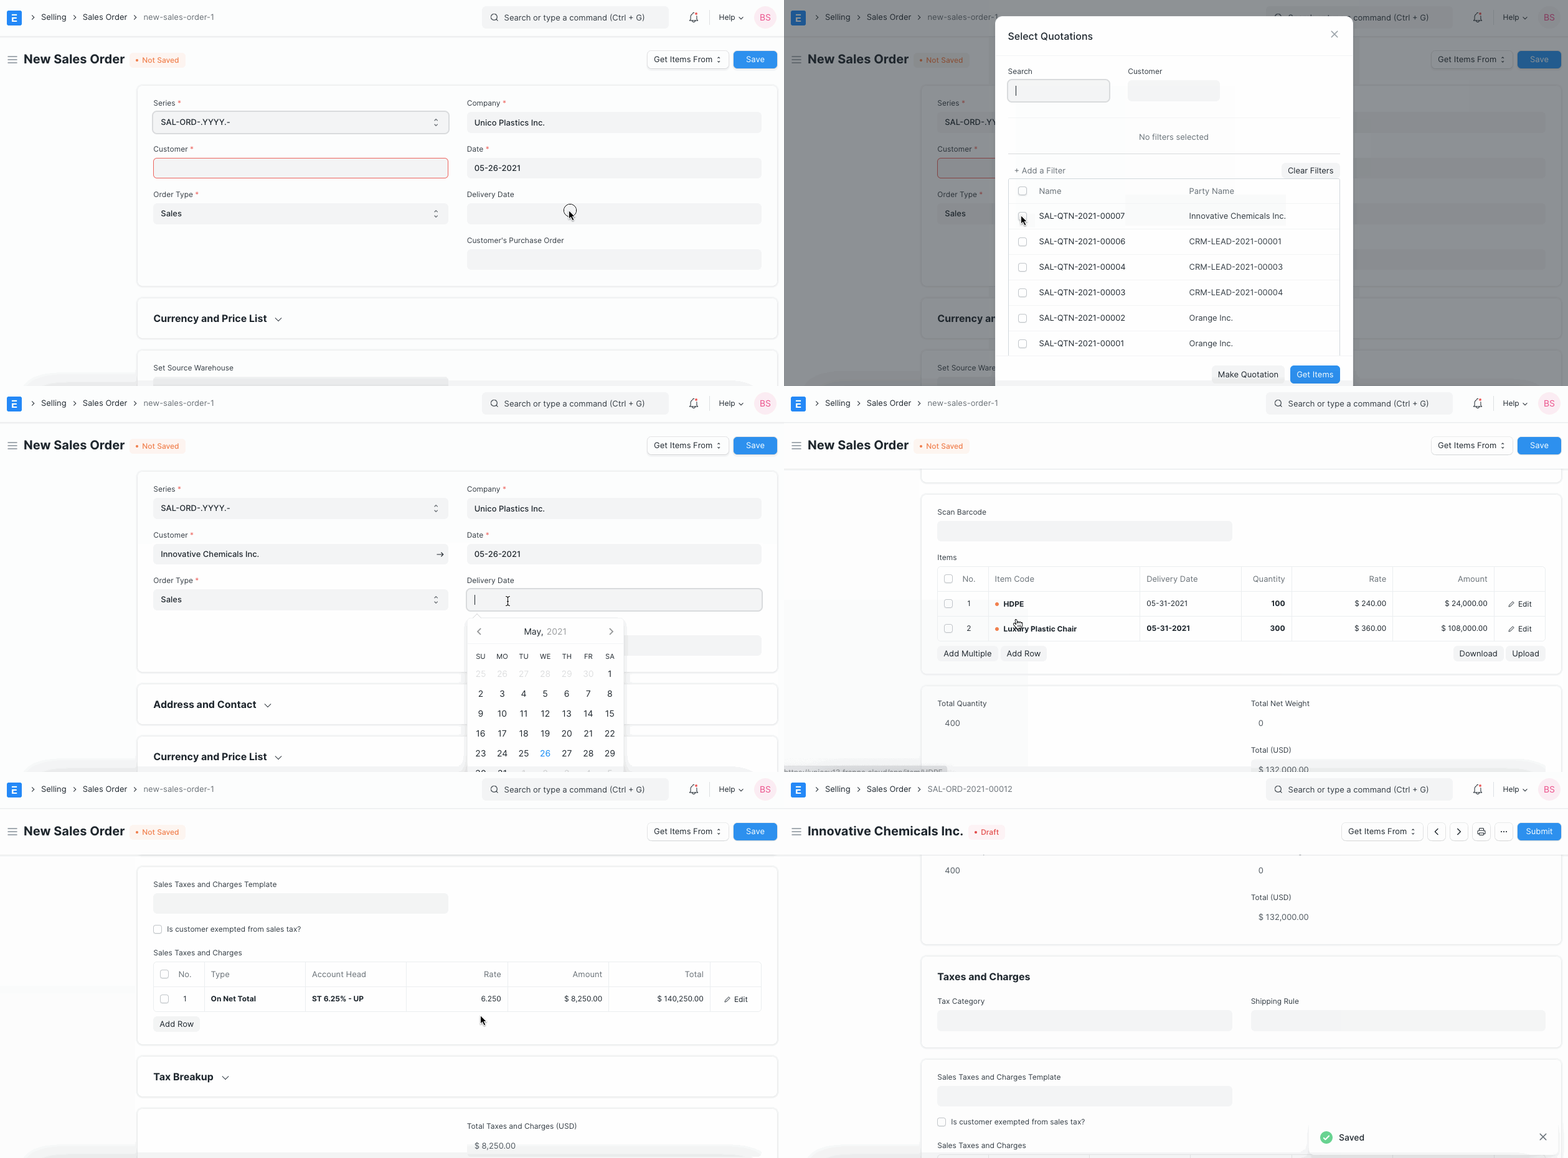
To allow for per-Customer, per-Item Pricing Rules, (“Customer A” pays $1.00 for “Item 1” but “Customer B” pays $1.25 for “Item 1”), there’s a check box called ‘Allow User to Edit Price List Rate in Transaction’ in Selling Settings. This enables saving the specific item price per customer when you change a price in the Sales Order.
3. Features
3.1 Currency and Price List
You can set the currency in which the quotation/sales order is to be sent. If you set a Pricing List, then the item prices will be fetched from that list. Ticking on ‘Ignore Pricing Rule’ will ignore the Pricing Rules set in Accounts > Pricing Rule.
Read about Price Lists and Multi-Currency Transactions to know more.
3.1 Set Source Warehouse
If you have the same stock in multiple warehouses, setting a warehouse here will cause all the items from the item table to be fetched from this warehouse. You need to have stock available in this ‘source warehouse’ you’re setting. Note that this option will override the ‘Default Warehouse’ you’ve set in the Item master.
3.2 The Items Table
- Delivery Date against each item: If there are multiple items and if you enter a delivery date in the first row, the date will be copied to other rows as well where it is blank. You’ll have to set these if not set globally at the top of the Sales Order.A Sales Order displays the billed amount, valuation rate, and gross profit in the items table when you click on the inverted triangle to expand a row.You can also add Items in the Items table by scanning their barcodes if you have a barcode scanner. Read documentation for tracking items using barcode to know more.
- Delivery Warehouse: This is the warehouse from where the stock will be picked to be delivered to your customer.
- Drop Ship: This is a situation where you do not keep items in stock in your own Warehouse but deliver items directly to a customer from a distributor. To enable drop shipping for an item tick on the ‘Supplier delivers to Customer’. When you tick on this, the Delivery Warehouse option will disappear since you’re not shipping the item. Select your supplier in the ‘Supplier’ field.Further, if you create a purchase order from this sales order, it’ll be created for the supplier you selected here and only the items which are valid for drop shipping.
- Planning: Read Projected Quantity to know about the fields under planning.
The other fields in the item table are similar as explained in Quotation.
3.3 Packing List
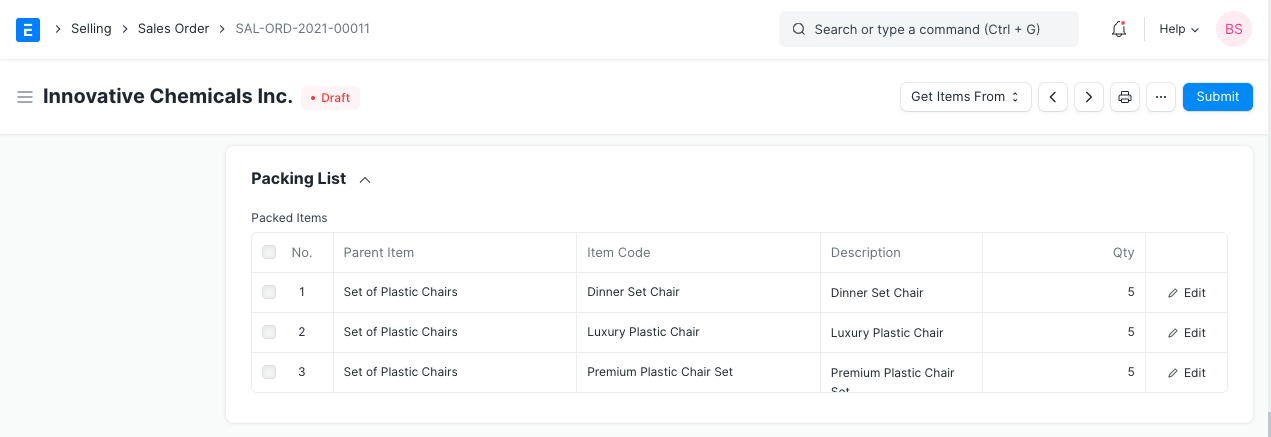
This is linked to the Product Bundle and appears only when the transaction involves a product bundle.
The “Packing List” table will be automatically updated when you “Save” the Sales Order. If any Items in your table are Product Bundle (packets), then the “Packing List” will contain the exploded (detailed) list of your Items.
You will be asked to select a Delivery Warehouse even for a product bundle item, this warehouse will be then updated in the Packing List items. You can change the warehouse, serial number, and batch in the packing list items in case items in your product bundle come from different warehouses.
Here is what a Packing List looks like:
3.4 Taxes and Charges
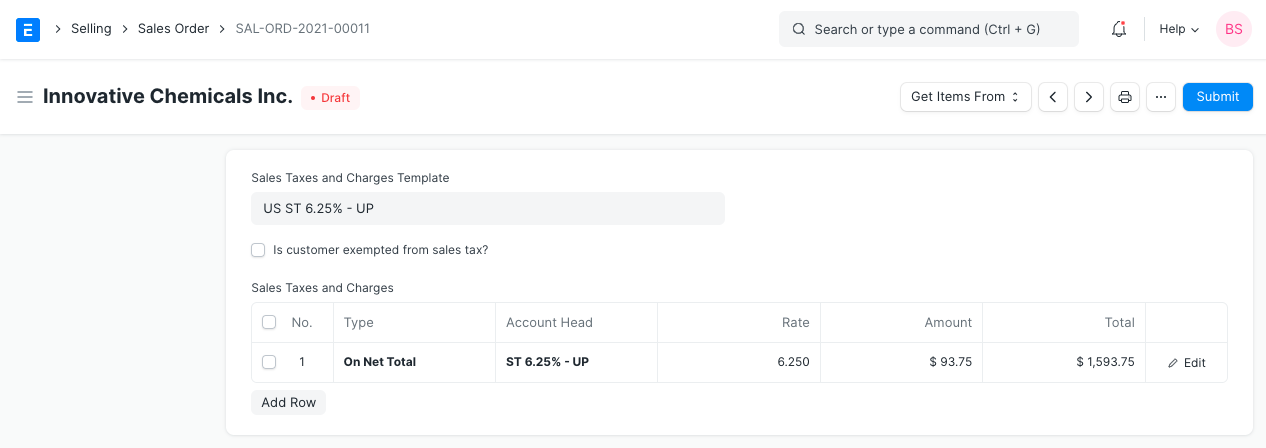
To add taxes to your Sales Order, you can select a Sales Taxes and Charges Template or add the taxes manually in the Sales Taxes and Charges table.
The total taxes and charges will be displayed below the table. Clicking on Tax Breakup will show all the components and amounts.
Shipping Rule
A Shipping Rule helps set the cost of shipping an Item. The cost will usually increase with the distance of shipping. To know more, visit the Shipping Rule page.
If a Tax Category is selected, the template and tax table will be automatically populated.
3.5 Additional Discount
Other than offering discount per item, you can add a discount to the whole sales order in this section. This discount could be based on the Grand Total i.e., post tax/charges or Net total i.e., pre tax/charges. The additional discount can be applied as a percentage or an amount.
Read Applying Discount for more details.
3.6 Payment Terms
Sometimes payment is not done all at once. Depending on the agreement, half of the payment may be made before shipment and the other half after receiving the goods/services. You can add a Payment Terms template or add the terms manually in this section.
Read Payment Terms to know more.
3.7 Terms and Conditions
In Sales/Purchase transactions there might be certain Terms and Conditions based on which the Supplier provides goods or services to the Customer. You can apply the Terms and Conditions to transactions to transactions and they will appear when printing the document. To know about Terms and Conditions,
3.8 Print Settings
Letterhead
You can print your quotation/sales order on your company’s letterhead.
‘Group same items’ will group the same items added multiple times in the items table. This can be seen when your print.
Print Headings
Quotations can also be titled as “Proforma Invoice” or “Proposal”. You can do this by selecting a Print Heading. To create new Print Headings go to: Home > Settings > Printing > Print Heading.
3.9 More Information
- Campaign: A Sales campaign can be associated with the quotation. A set of quotations can be part of a sales campaign.
- Source: A Lead Source type can be linked if quoting to a lead, whether from a campaign, from a supplier, an exhibition etc,. Select Existing Customer if quoting to a customer.
- Inter Company Order Reference: If two of your companies are part of the same organization or have a parent-child relationship, you can link a Purchase Order to this Sales Order. Know more about inter-company invoicing here.
- Project: If your Sales Order is part of a project, you can link it here and the Project progress will be updated.
3.10 Billing and Delivery Status
- Status: The status of the Sales Order whether a Draft, On Hold, To Deliver and Bill, To Bill, To Deliver, Completed, Cancelled, or Closed.
- Amount Billed and Delivered percent: The percentage of amount billed and the items delivered from the Sales Order.
3.11 Commission
If the sale took place via one of your Sales Partners, you can add their commission details here. Enter the commission rate and the commission amount will be displayed below.
3.12 Sales Team
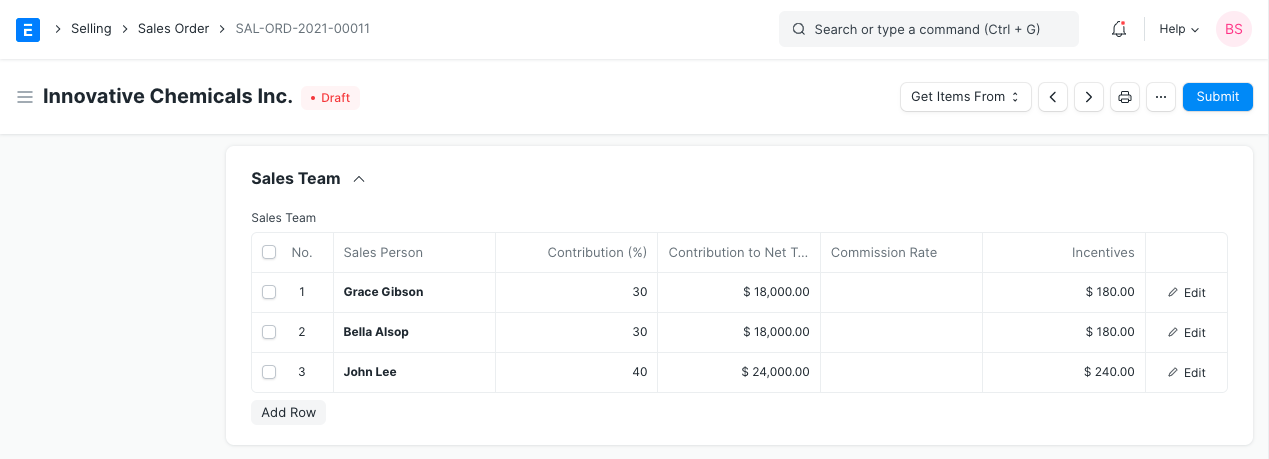
Sales Persons: IONIC ERP allows you to add multiple Sales Persons who may have worked on this deal. You can change the contribution percentage of the Sales Persons and track how much incentives they earned on this deal.
3.13 Auto Repeat Section
Auto repeating Sales Orders is like a subscription. Set a start and end date for the auto-repeat. Select the Auto Repeat created. To know more about auto repeat
3.14 After Submitting
Sales Order is a “Submittable” transaction. You will be able to execute further steps (like making a Delivery Note) only after “Submitting” a Sales Order.
Once you “Submit” your Sales Order, you can trigger actions from the Sales Order:
- You can Add, Update, Delete items in the Sales Order by clicking on the Update Items button. However you cannot delete items which has already been delivered or has work order assigned to it.
- Status: Once submitted, you can hold a Sales Order or Close it.
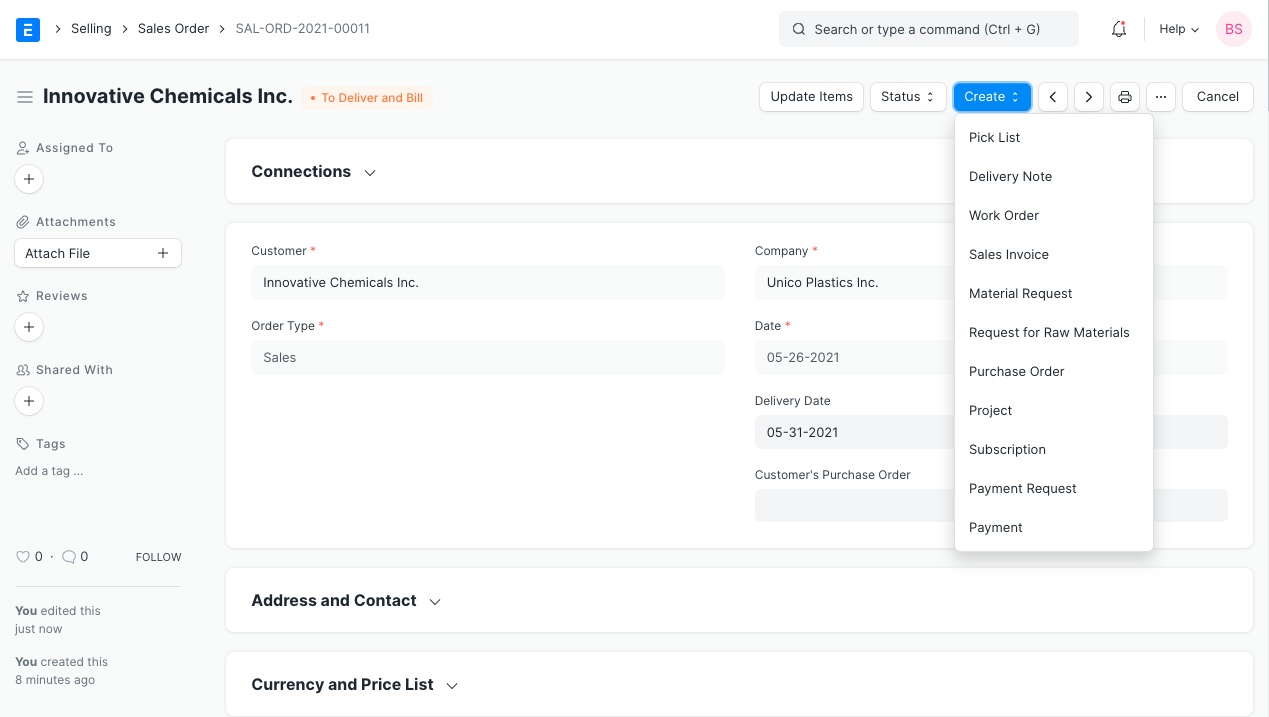
- Create: From a submitted Sales Order, you can create the following:
- Delivery Note – To make a shipment entry. You can also make Delivery Note for selected items based on the delivery date.
- Work Order – To start a Work Order with the raw materials.
- Sales Invoice – To bill the Order.
- Material Request – To request re-stocking materials if out of stock.
- Request for Raw Materials – To request raw materials required for manufacturing.
- Project – To create a project based on the Sales Order.
- Subscription – To auto repeat the Sales Order, i.e., make it a subscription.
- Payment Request – To make a Payment Request.
- Payment – To record payment against the Sales Order.
These actions can also be seen at the top of the Dashboard. You can also make an accounting Journal Entry based on the Sales Order from the dashboard.
3.15 Sales Order with Order type ‘Maintenance’
When the ‘Order Type’ of the Sales Order is ‘Maintenance’ follow these steps:
- Enter Currency, Price list, and Item details.
- Mention taxes and other information.
- Save and Submit the form.
- Once the form is submitted, the Create button will provide these choices specific to the maintenance Order Type.i) Maintenance Visit ii) Maintenance Schedule.
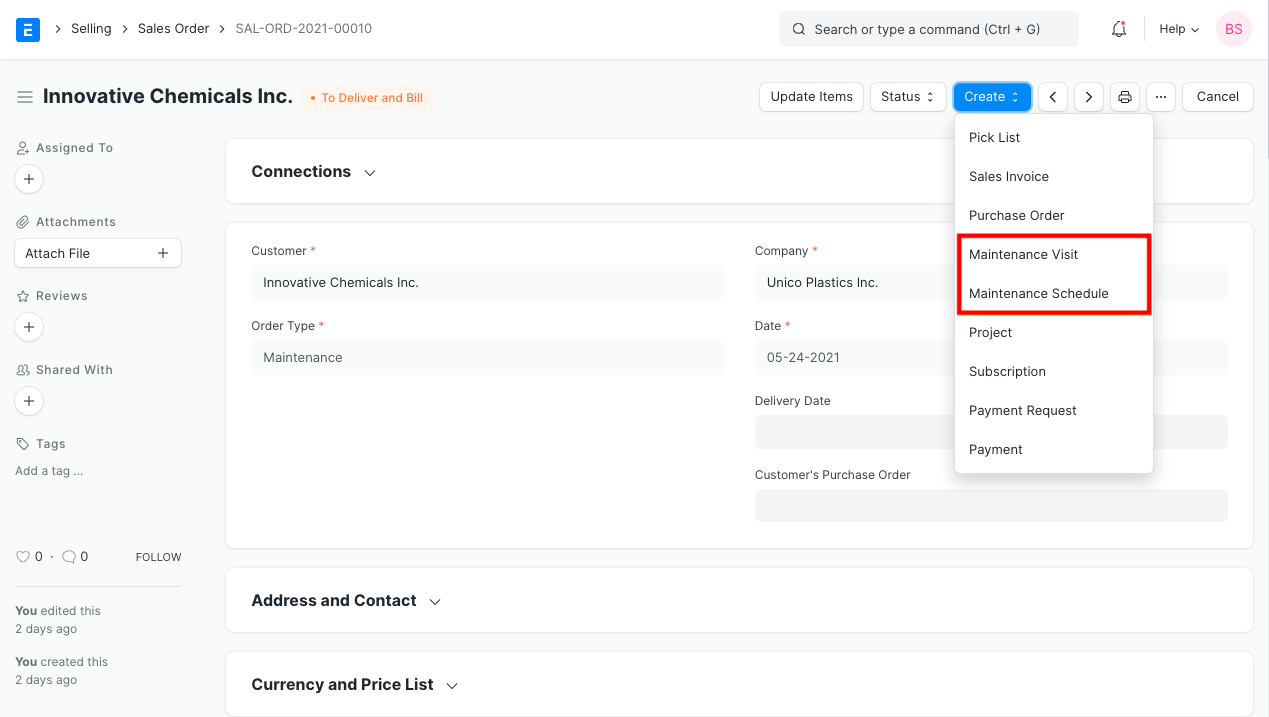
Note 1: By clicking on the Action button and selecting ‘Maintenance Visit’ you can directly fill the visit form. The Sales Order details will be fetched directly.
Note 2: By clicking on the Action button and selecting ‘Maintenance Schedule’ you can fill the schedule details. The Sales Order details will be fetched directly.
Note 3: By clicking on the Invoice button you can make an Invoice for your services. The sales orders details will be fetched directly.
Sales Partner
Sales Partners are people or companies that assist you in getting business.
Sales Partners can be represented by different names in IONIC ERP. You can call them Channel Partner, Distributor, Dealer, Agent, Retailer, Implementation Partner, Reseller, etc.
For each Sales Partner, you can define a commission rate. When a Sales Partner is selected in transactions, their commission is calculated over Net Total of Sales Order/Invoice or Delivery Note.
To access Sales Partner, go to:
Home > Selling > Sales Partner
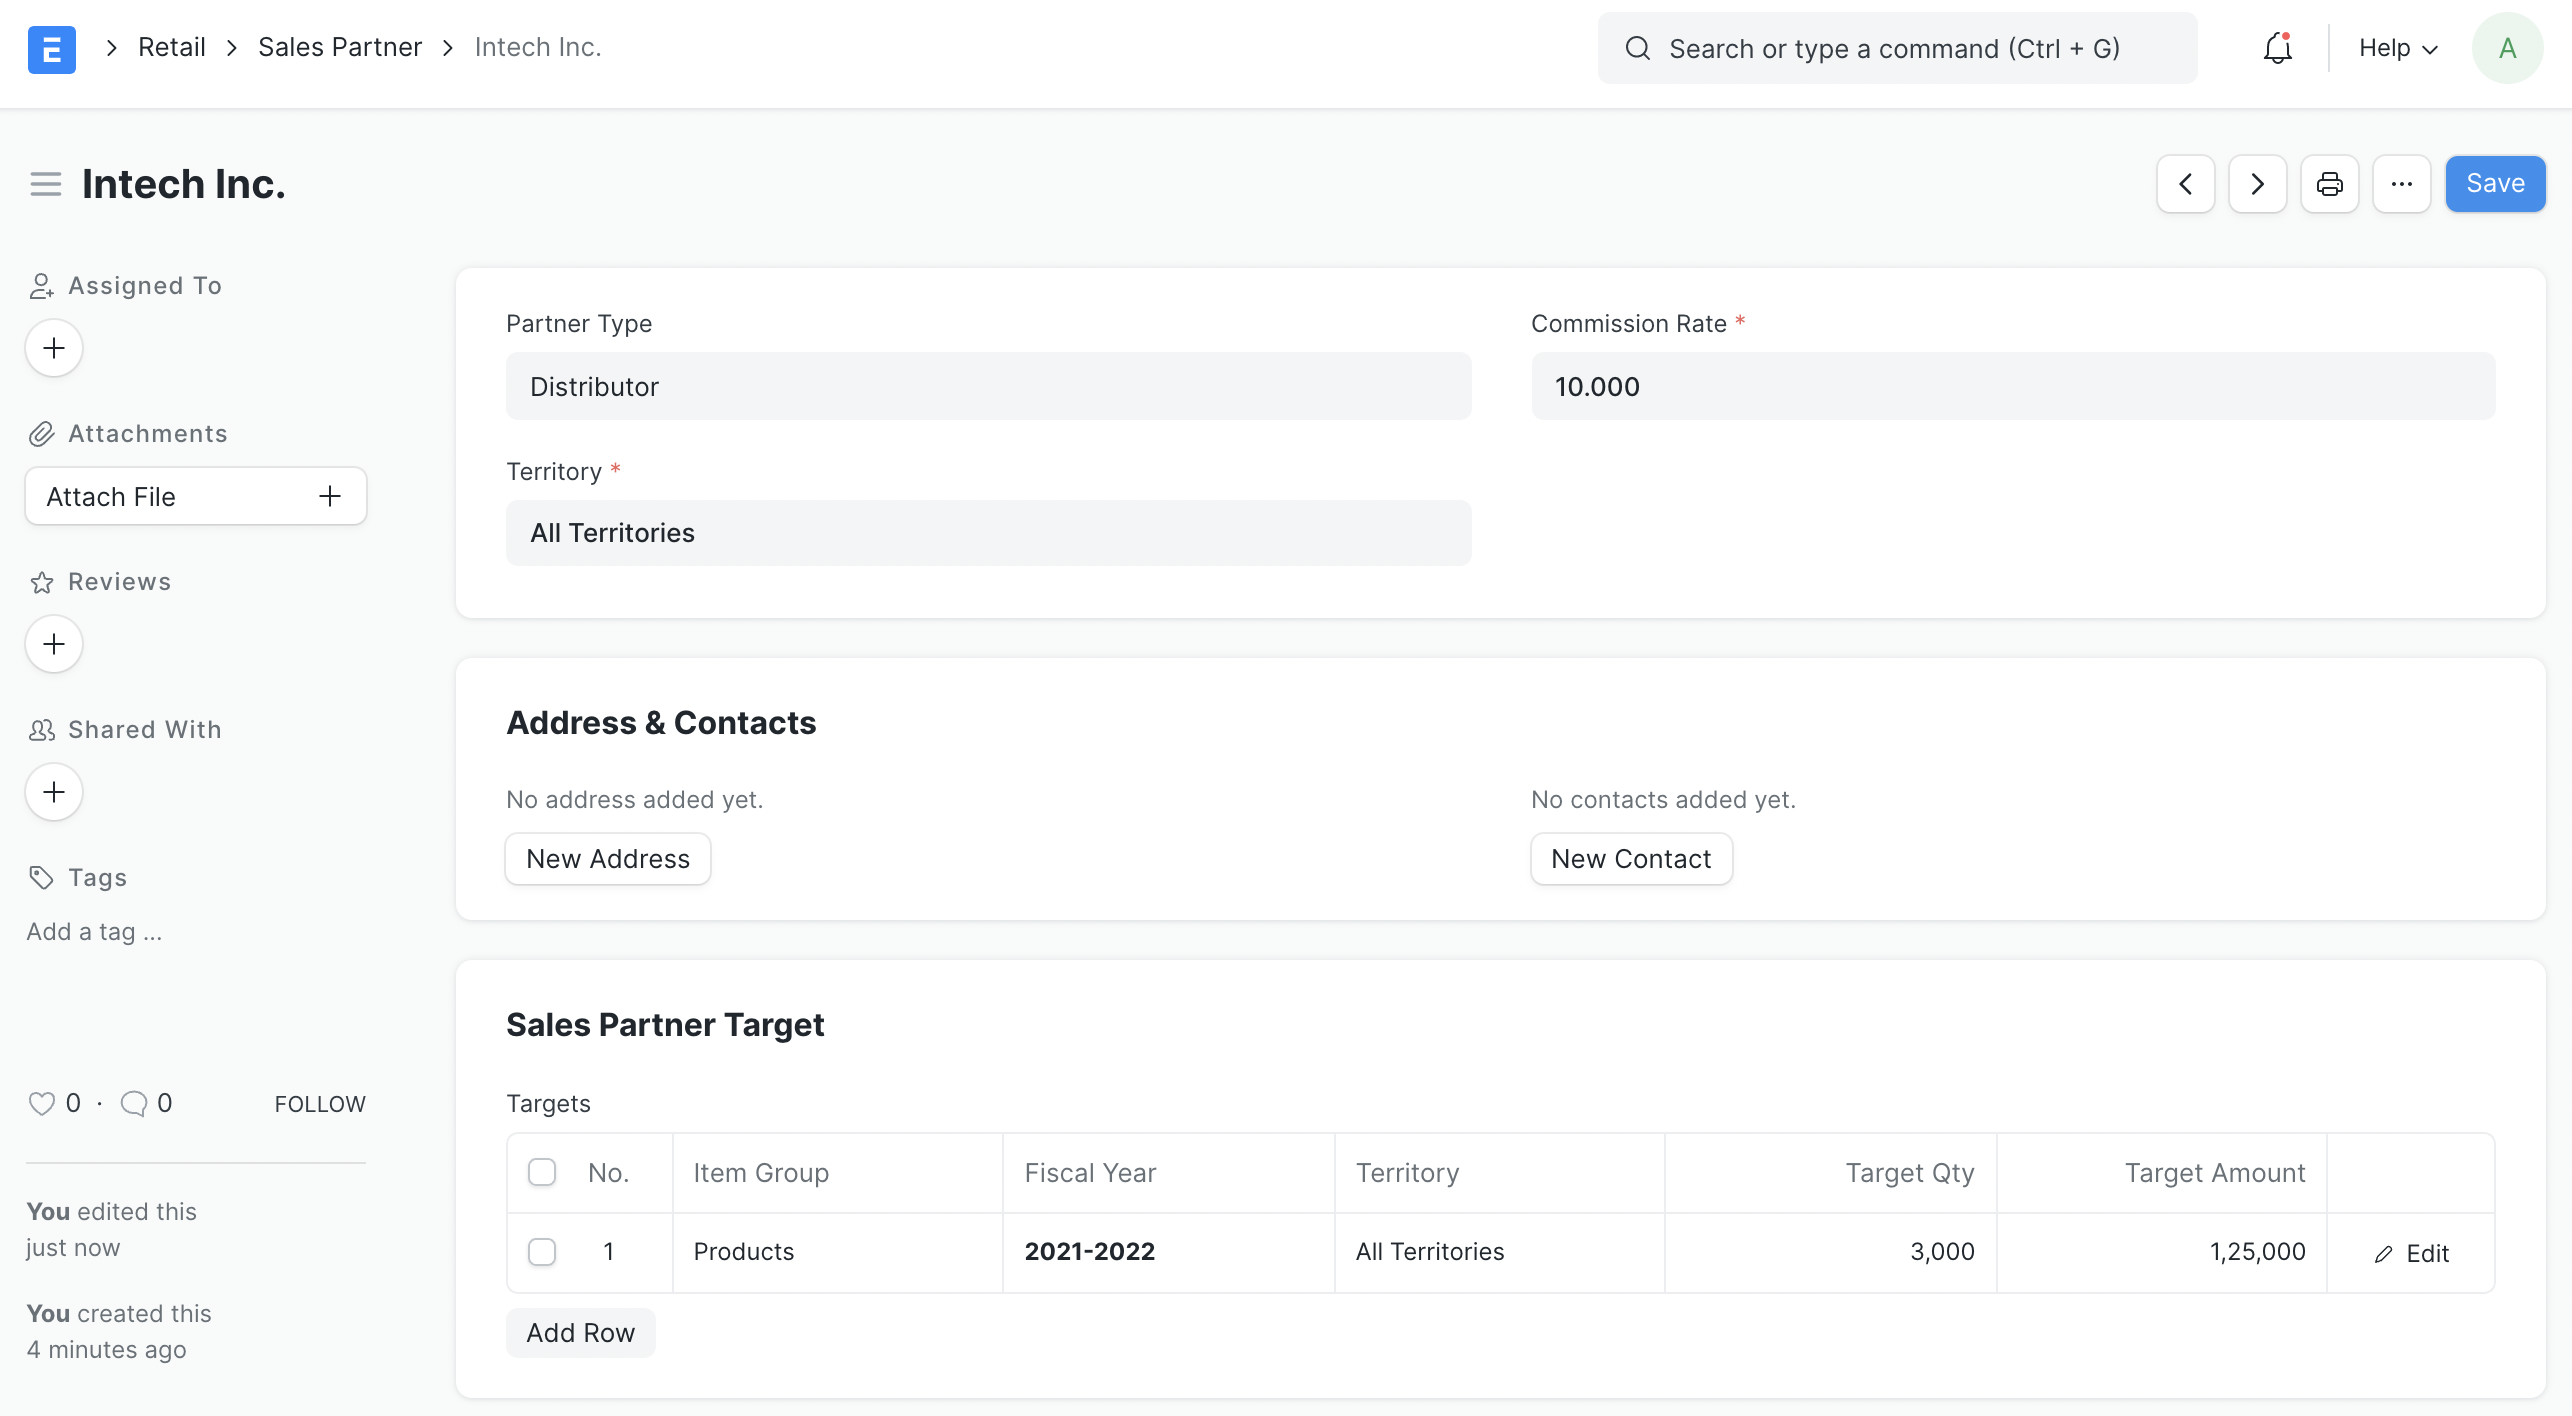
1. How to Create a Sales Partner
- Go to the Sales Partner list, click on New.
- Enter the Sales Partner name and the Commission Rate.
- You can also select the type of Sales Partner you’re creating to identify if they’re a Reseller or Retailer, and so on.
- Save.
2. Features
2.1 Address and Contact
You can add and track a Sales Partner’s Addresses and Contact details. These can be added in the Address & Contacts section in a Sales Partner:

2.2 Sales Partner Target
You can allocate Targets for each Item Group and Territory, based on Qty and Amount. You can allocate targets Territory- or Month-wise, to know more see Related Topics. 
2.3 Including Sales Partners in Your Website
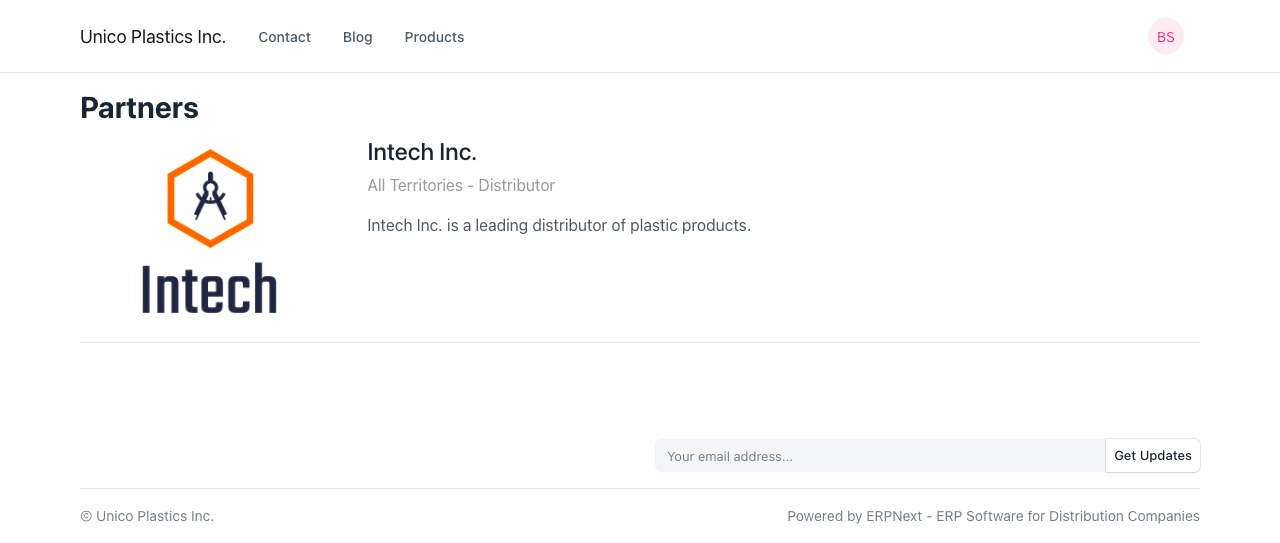
To include the name of your Partner on your website, tick the “Show in Website” checkbox. When you click on “Show in Website”, you will see a field where you can attach the logo of your partner’s company and enter a brief introduction of the partner, and optionally add a description for internal purposes/references. 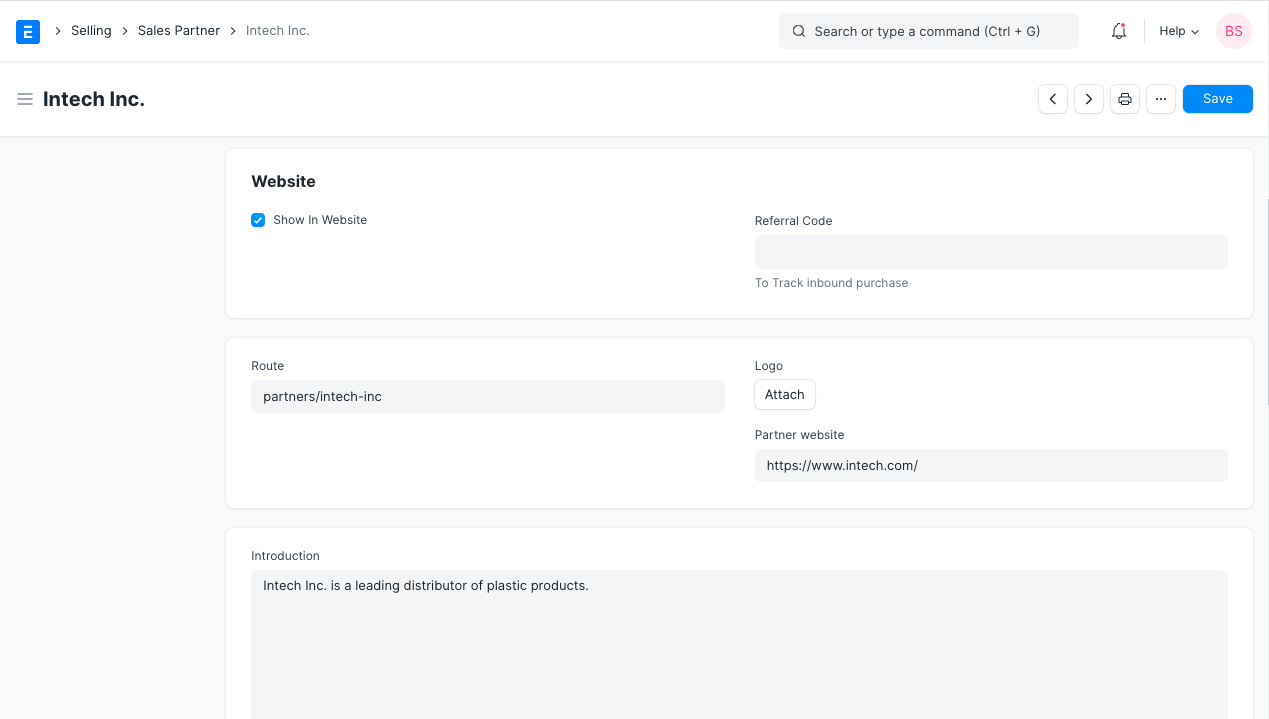
To see the listing of partners, go to:
https://yourCompanyName.ionicerp.xyz/partners
2.4 Track Sales via Sales Partner
Sales Partner can actively generates leads for your company products/ services. To track the performance of each sales partner use Referral Code and their URL as below
URL as shown below should be sent to the sales partner to use in their website/campaign.
e.g. A URL having “sp” as parameter like this http://xyz.ionicerp.xyz?sp=speed will capture the Sales Partner Information in the Sales Order generated via Shopping Cart.

3. Sales Partner Reports
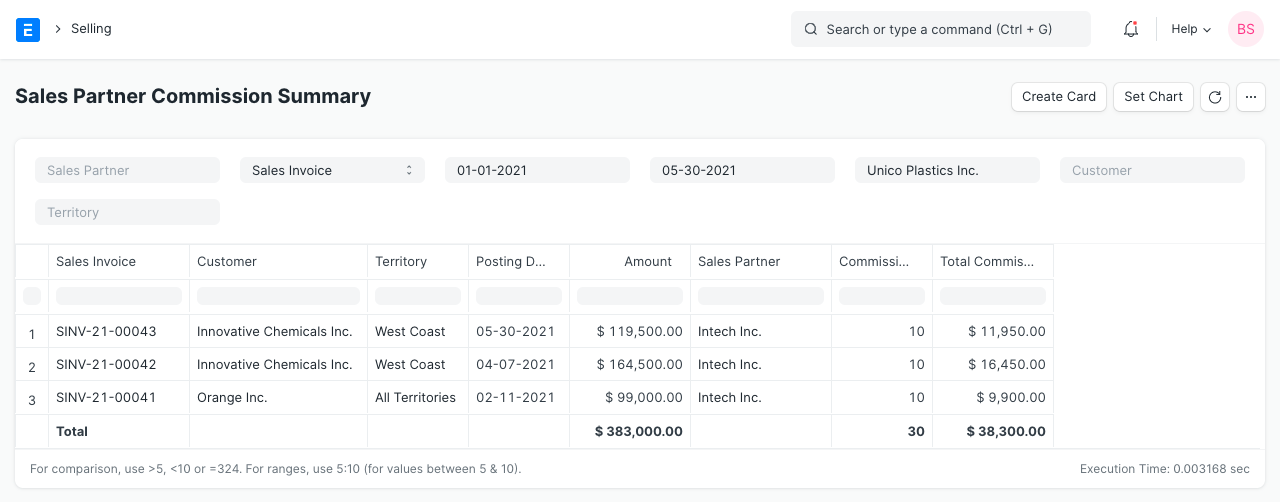
3.1 Sales Partner Commission Summary
To get Sales Order wise Sales Partner commission data.
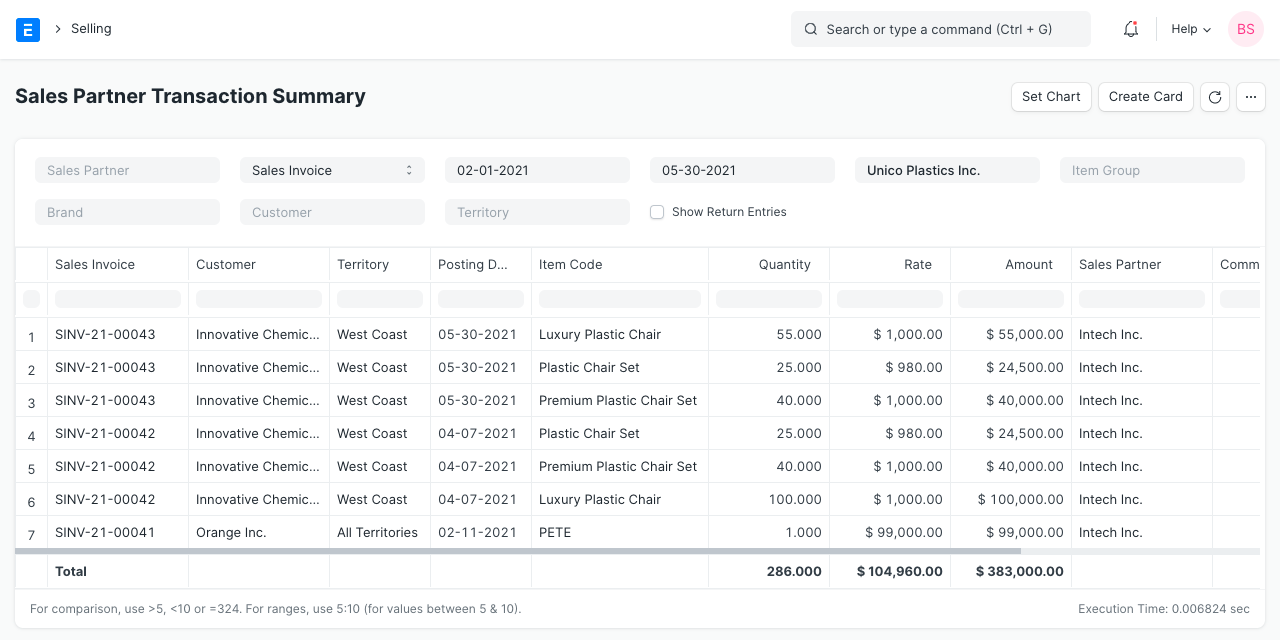
3.2 Sales Partner Transaction Summary
To get Sales Order item-wise Sales Partner commission data.
3.3 Sales Partner Target Variance
This report will provide you variance between target and actual performance of the Sales Partner based on the Sales Order / Sales Invoice / Delivery Note data. User can view this report period wise like Monthly, Quarterly, Half-Yearly, or Yearly.
Brand
A Brand identifies items with a specific name.
Usually, a Brand is the manufacturer or packer of a specific product. For example, Apple is a brand that manufactures laptops. A Brand is not necessarily the Manufacturer of an Item, it’s only the name under which a product is sold. For example, if you manufacture plastic cups, you may license it to a big brand so that they sell it under their Brand.
In IONIC ERP, Brands can be assigned to Items for identifying and assigning certain defaults.
To access the Brand list, go to:
Home > Selling > Sales > Brand
1. How to Create a Brand
- Go to the Brand list and click on New.
- Enter a Brand name and enter a description if needed.
- Save.

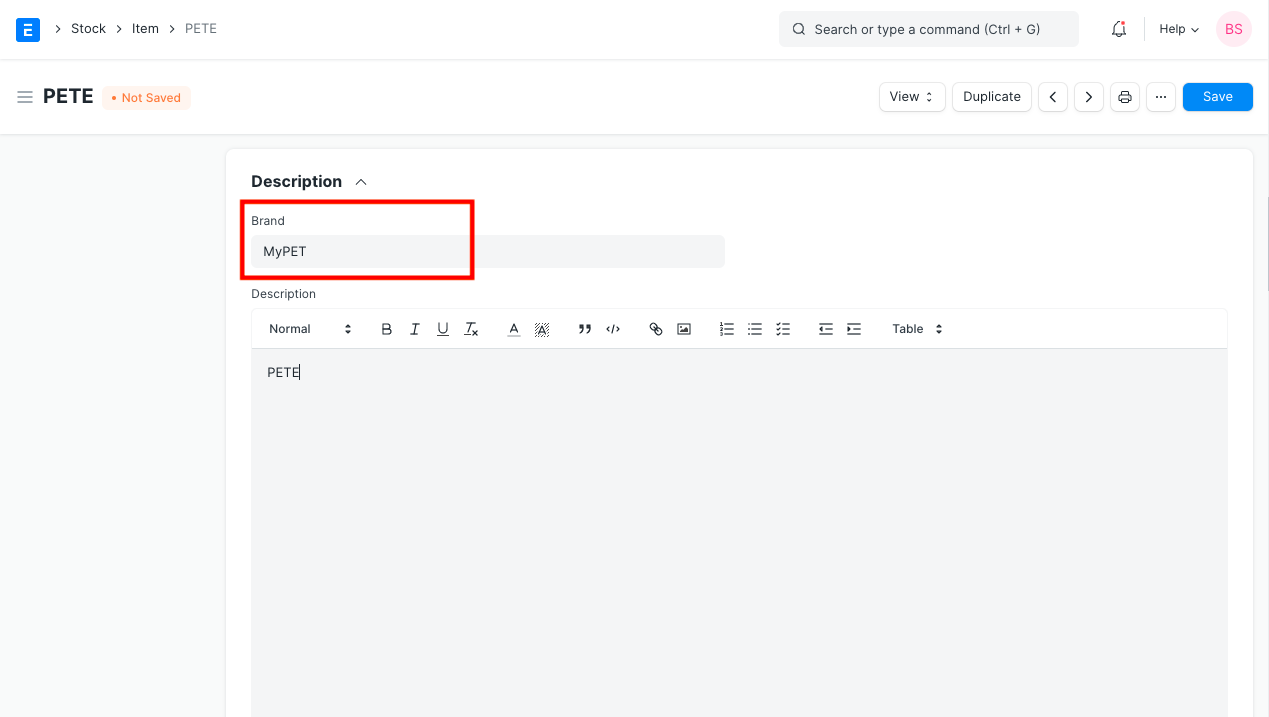
Now this Brand can be associated with different Items.
2. Features
2.1 Setting defaults for Items of this Brand
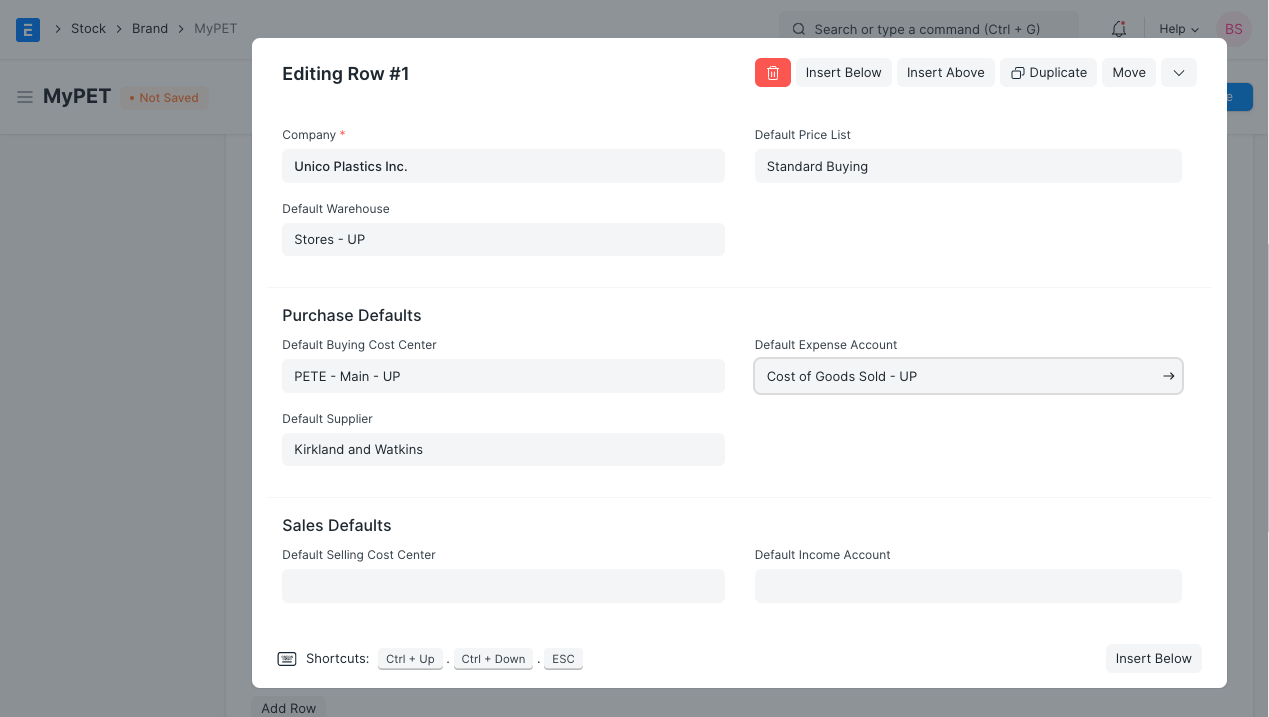
The following defaults can be set for a Brand. On assigning this brand to an Item, the set defaults will be fetched when performing Sales/Purchase transactions with Item of this Brand.
- Default Warehouse: The Warehouse from which the Item will be sourced/stored depending on the transaction.
- Default Price List: The Price List set here will be fetched in Purchase/Sales transactions.
Purchase Defaults
When performing Purchase transactions like Purchase Order, Purchase Receipt, or Purchase Invoice, the defaults set here will be fetched on selecting Item of this Brand.
- Default Buying Cost Center
- Default Supplier
- Default Expense Account
Sales Defaults
When performing Sales transactions like Sales Order, Delivery Note, or Sales Invoice, the defaults set here will be fetched on selecting Item of this Brand.
- Default Selling Cost Center
- Default Income Account
Blanket Order
A Blanket Order is an order from a customer to supply materials for specific items over a period of time at pre-negotiated rates.
From a blanket order, sales orders can be generated as per the delivery schedule provided by the customer. Blanket orders help customers avoid storing materials in huge quantities while allowing them to take advantage of fixed rates by committing volumes within a specific time period.
To access Blanket Order, go to:
Home > Selling > Sales > Blanket Order
1. Prerequisites
Before creating and using a Blanket Order, it is advised that you create the following first:
- Customer or Supplier
- Item
2. How to Create a Blanket Order for Sales and Purchase
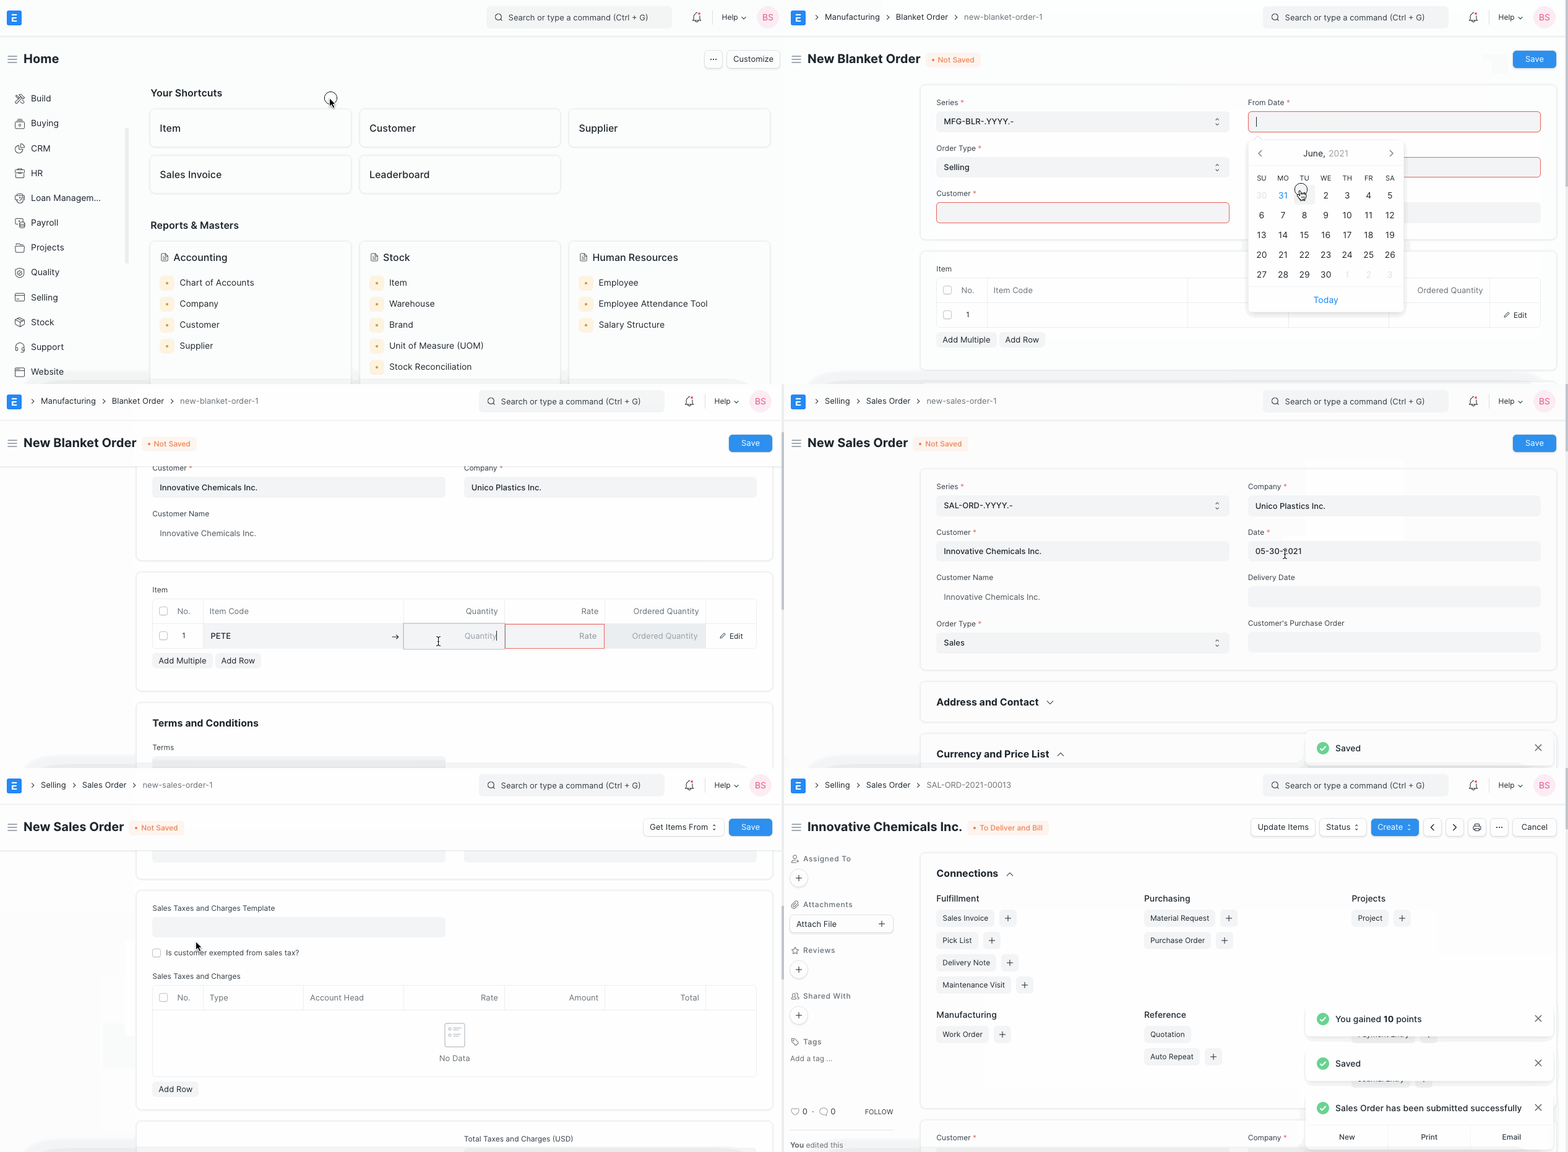
- Go to the Blanket Order list, click on New.
- Select Selling/Purchasing in Order Type.
- Select Customer/Supplier.
- Specify the validity period of the order by selecting From Date and To Date.
- Enter Item Code, Quantity and Rate in the Item table. You can also mention the Terms and Conditions for each item.
- Submit.
3. Features
3.1 Create Sales Orders
The ‘Ordered Quantity’ field will be updated once a Sales Order is placed. Once a Blanket Order is submitted, you can create new Sales Orders by clicking on Sales Order under the Create button.
3.2 Create Purchase Orders
The ‘Ordered Quantity’ field will be updated once a Purchase Order is placed. Once a Blanket Order is submitted, you can create new Purchase Orders by clicking on Purchase Order under the Create button.
3.3. Create Quotations
Once a Blanket Order is submitted, you can create new Quotations by clicking on Quotation under the Create button.
3.4. Dashboard
You can view Purchase Orders, Sales Orders and Quotations against this Blanket Order through the Dashboard.

Note- Multiple Sales Orders, Purchase Orders, and Quotations can be created against one Blanket Order.
Territory
A Territory is a geographical region you do business in.
In ERPNext, a Territory is used to classify Customers, Addresses, in accounting report, and to allocated sales targets.
To access the Territory list, go to:
Home > Selling > Settings > Territory
1. How to create a Territory
- Go to the Territory list, click on New.
- Tick ‘Group Node’ if there’ll be sub-territories under this Territory. For example, France is a group Territory and Paris is a sub-territory.
- Save.
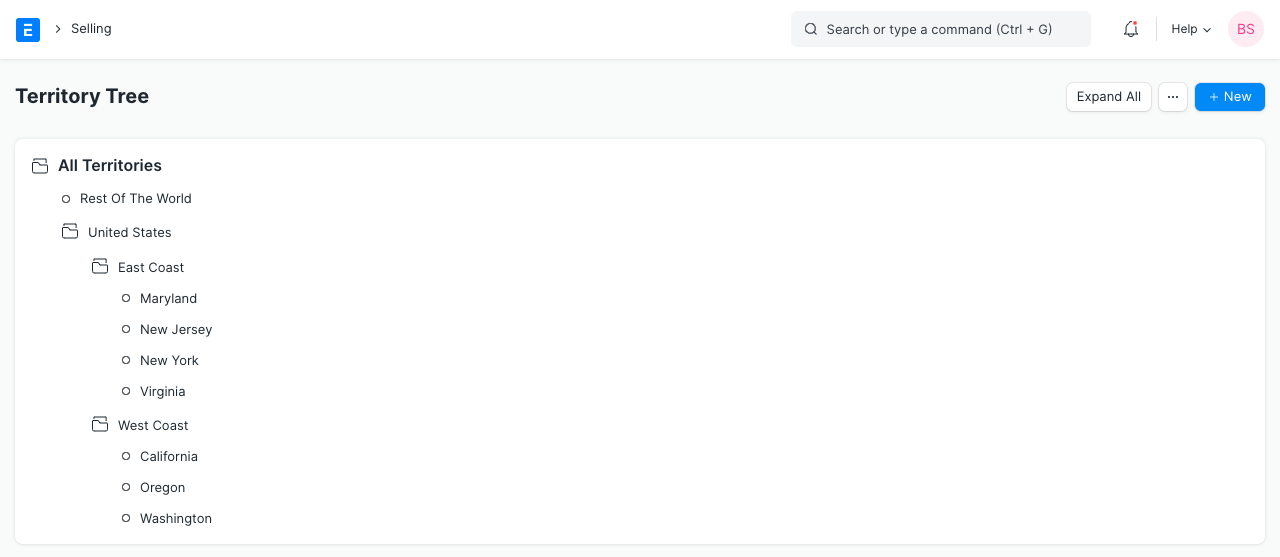
You can add multiple sub-territories under a parent territory. On saving, a territory can be selected in transactions and reports.
2. Features
2.1 Assigning a Territory manager
You can assign a Territory Manager who looks after the Sales of of this region. This isa
2.2 Setting Sales Targets
Here you can set specific sales targets based on the following fields:
- Item Group
- Fiscal Year
- Target Qty
- Target Amount
- Target Distribution
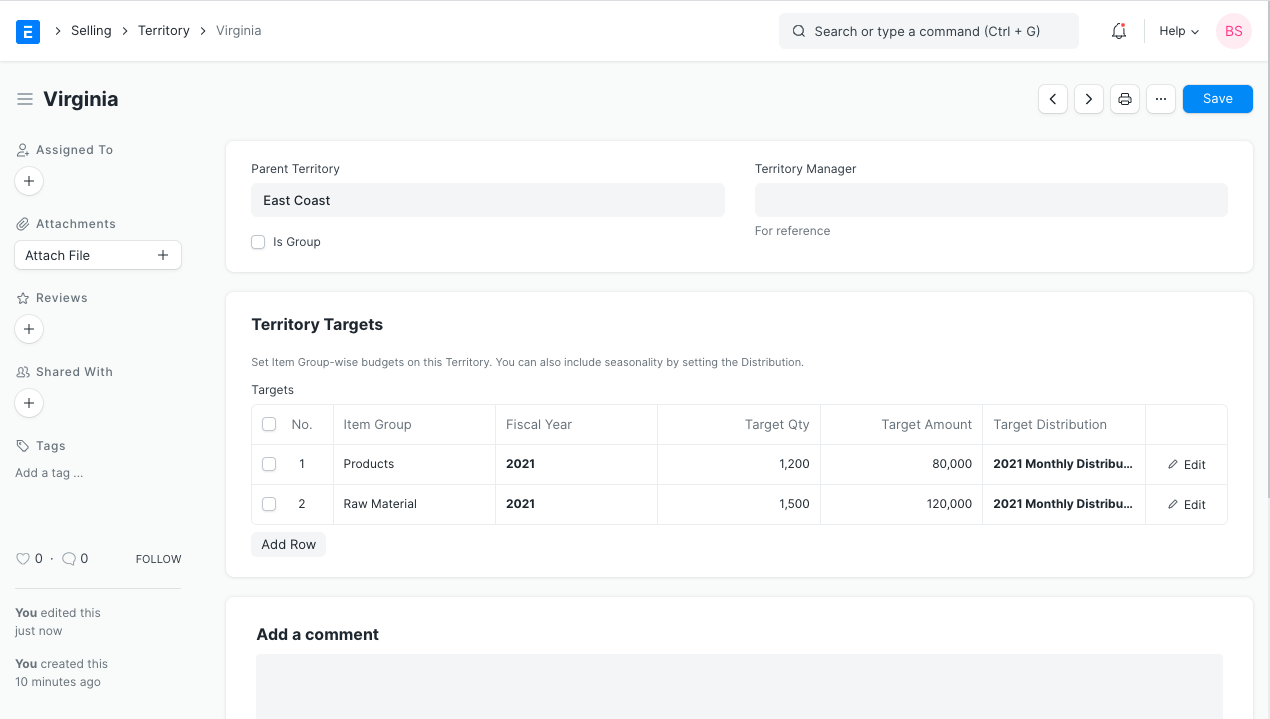
To know more about setting sales targets, visit the Sales Person Target Allocation page
Customer Orders Invoices And Shipping Status
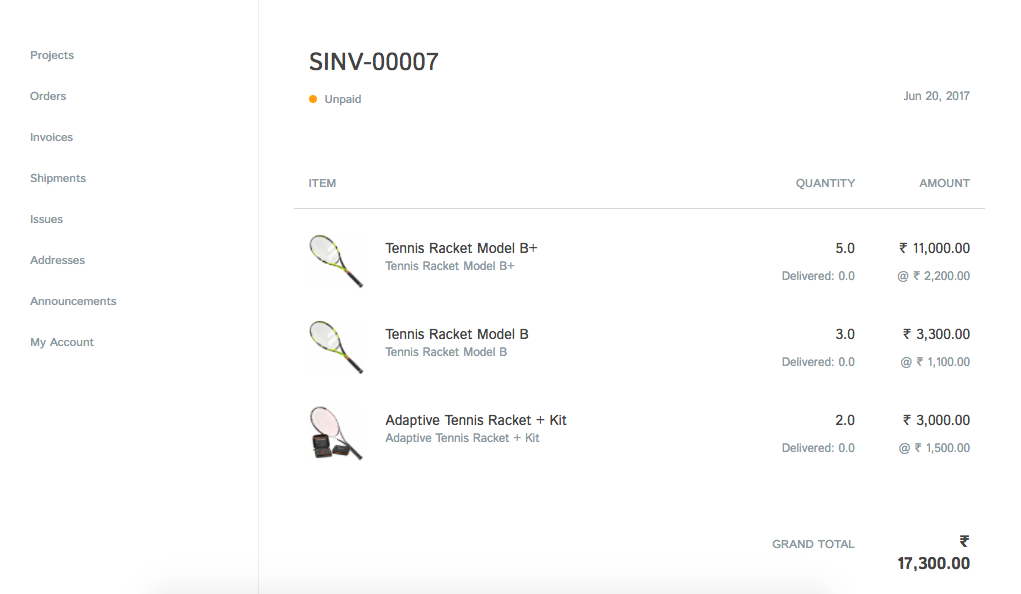
IONIC ERP Web Portal gives your customers quick access to their Orders, Invoices and Shipments Customers can check the status of their orders, invoices, and shipping status by logging on to the web.
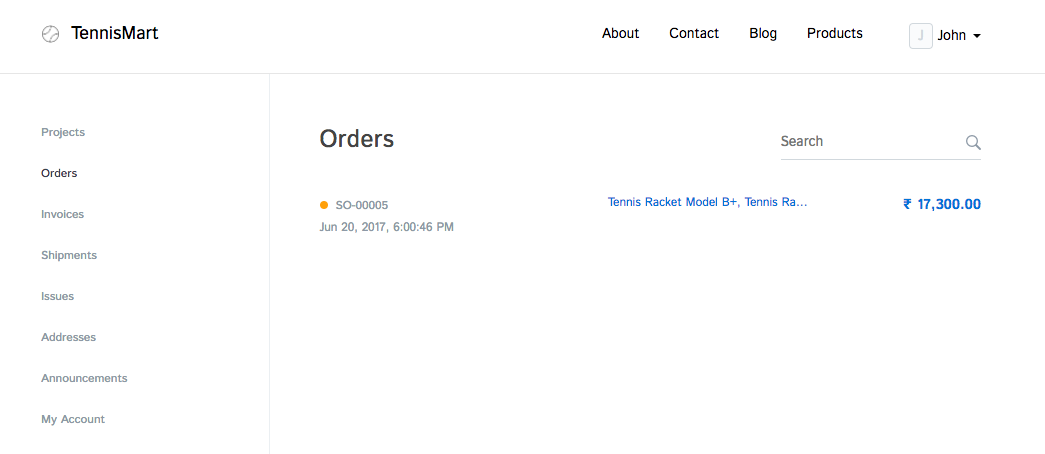
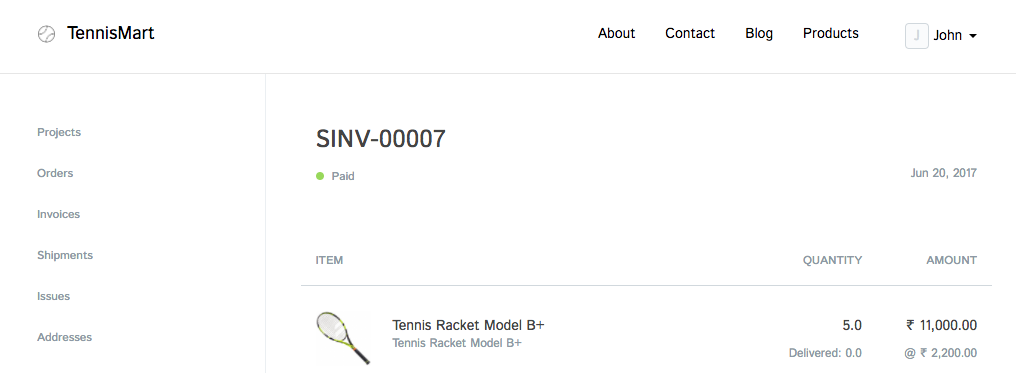
Once an order is raised, either using the Shopping Cart or from within IONIC ERP, your customer can view the order and keep an eye on the billing and shipment status. When the invoice and payment against these orders are submitted, the customer can see the updated status on the portal, at a glance.
Outstanding Sales Invoice
Paid Sales Invoice
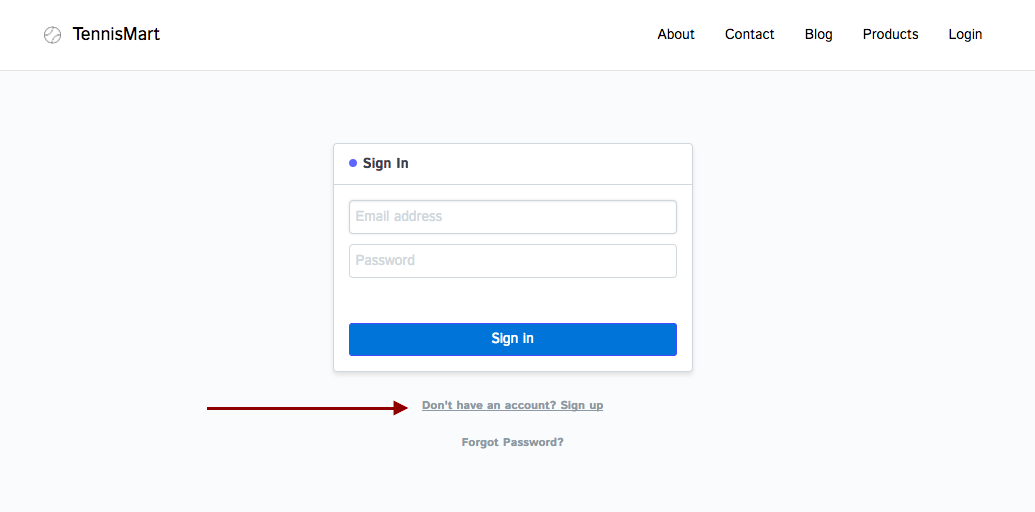
Portal Login
To login into the customer account, the customer has to use his Email Address and the password sent by IONIC ERP; generated through the sign-up process.

Sign Up
Your Customer and Suppliers can signup to your IONIC ERP account by following Signup option on the Login Page.
Step 1: Signup
On the Login Page, you will find option to Signup.

Step 2: Enter Customer Name and ID
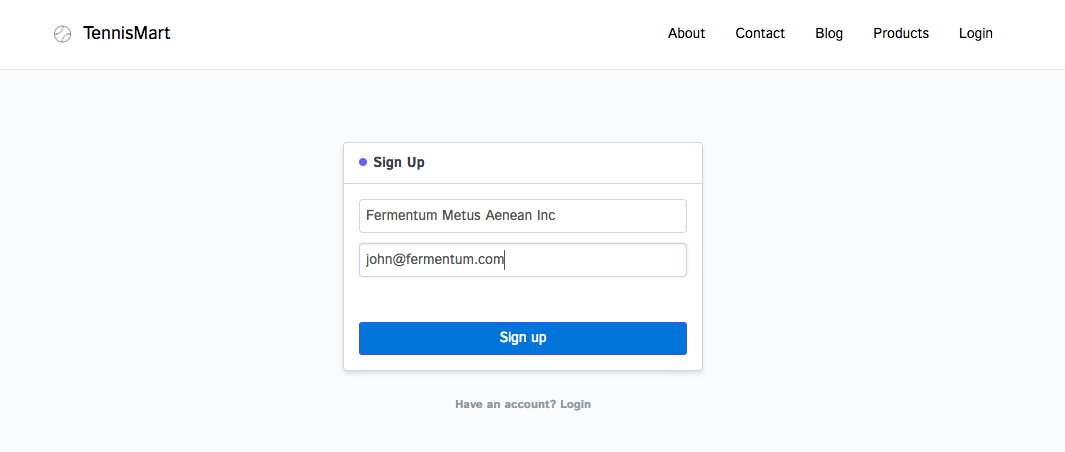
After the sign up process, an email will be sent to the customers Email Address with the password details.
Issues
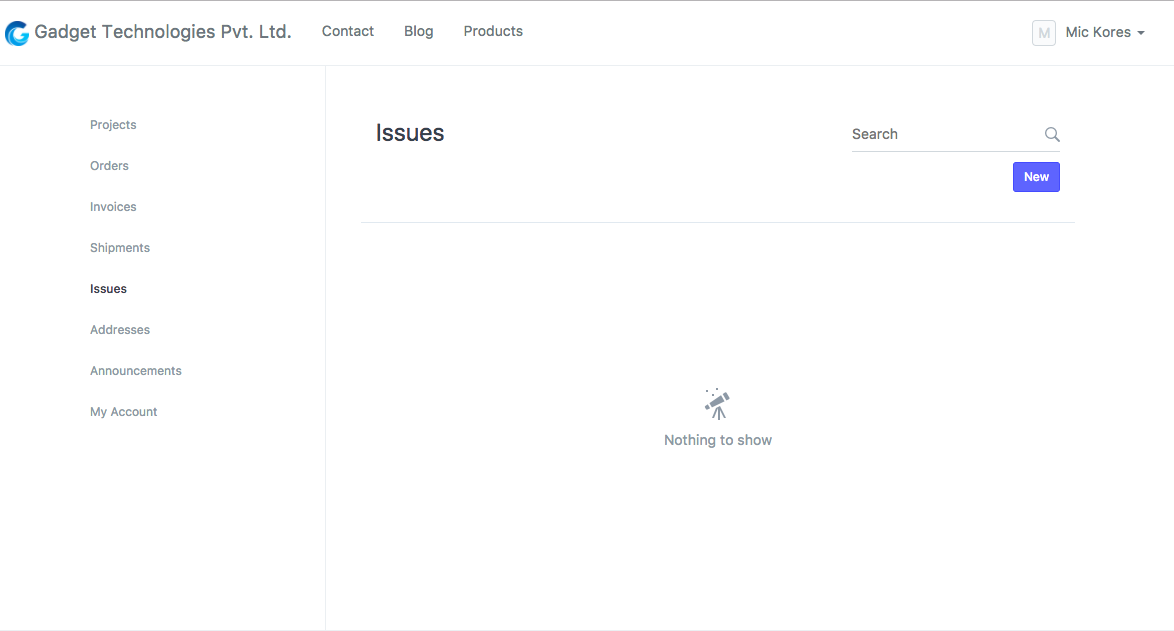
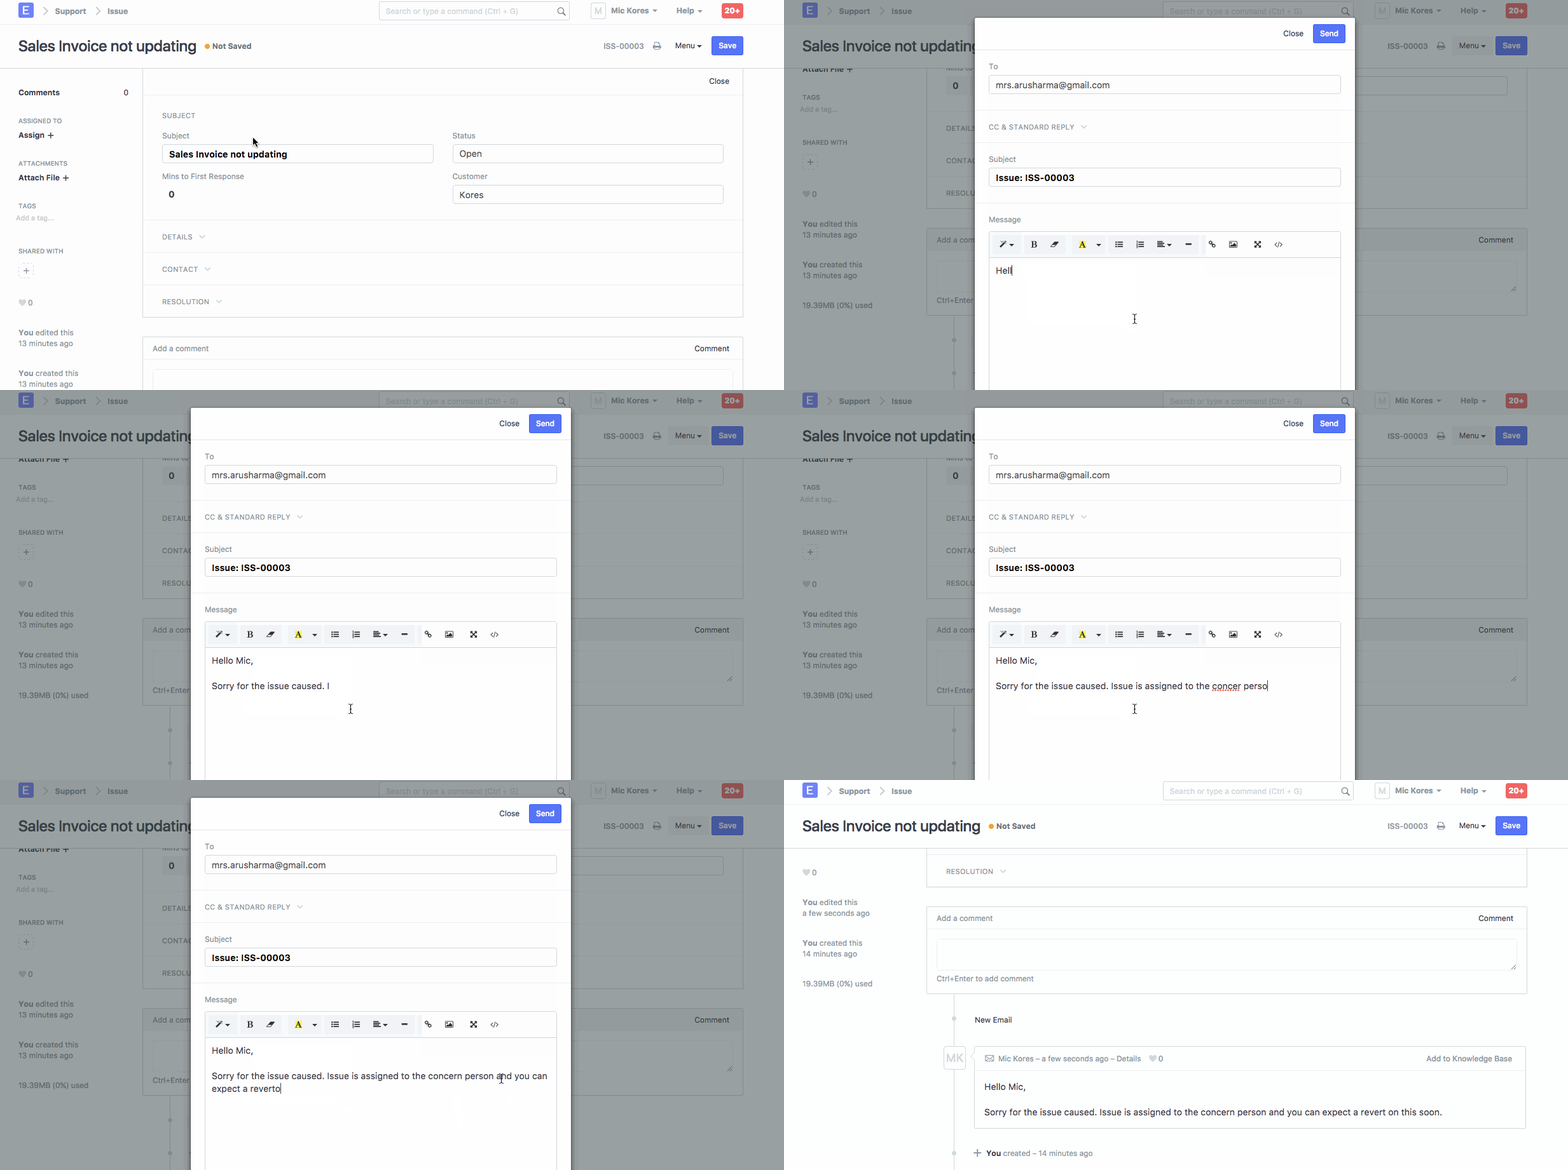
The customer portal makes it very easy for a customer to raise concerns. A simple and intuitive interface facilitates your customer to report their concerns as Issues. They can view the complete thread of their conversation.
Empty Issue List
New Issue
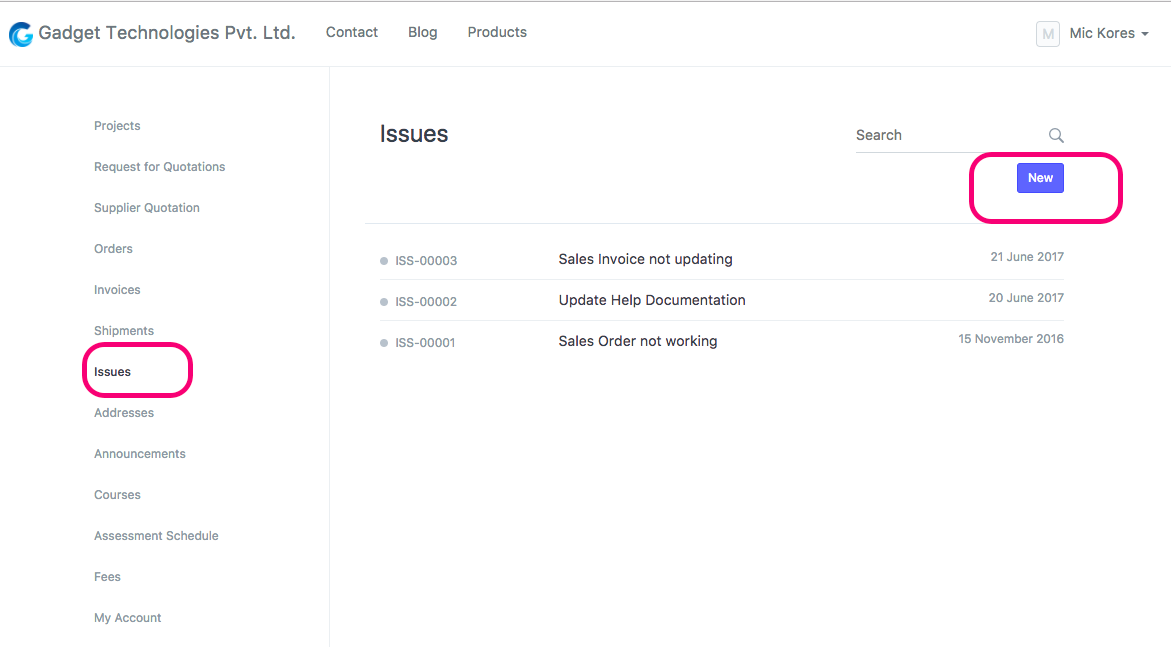
Open Issue
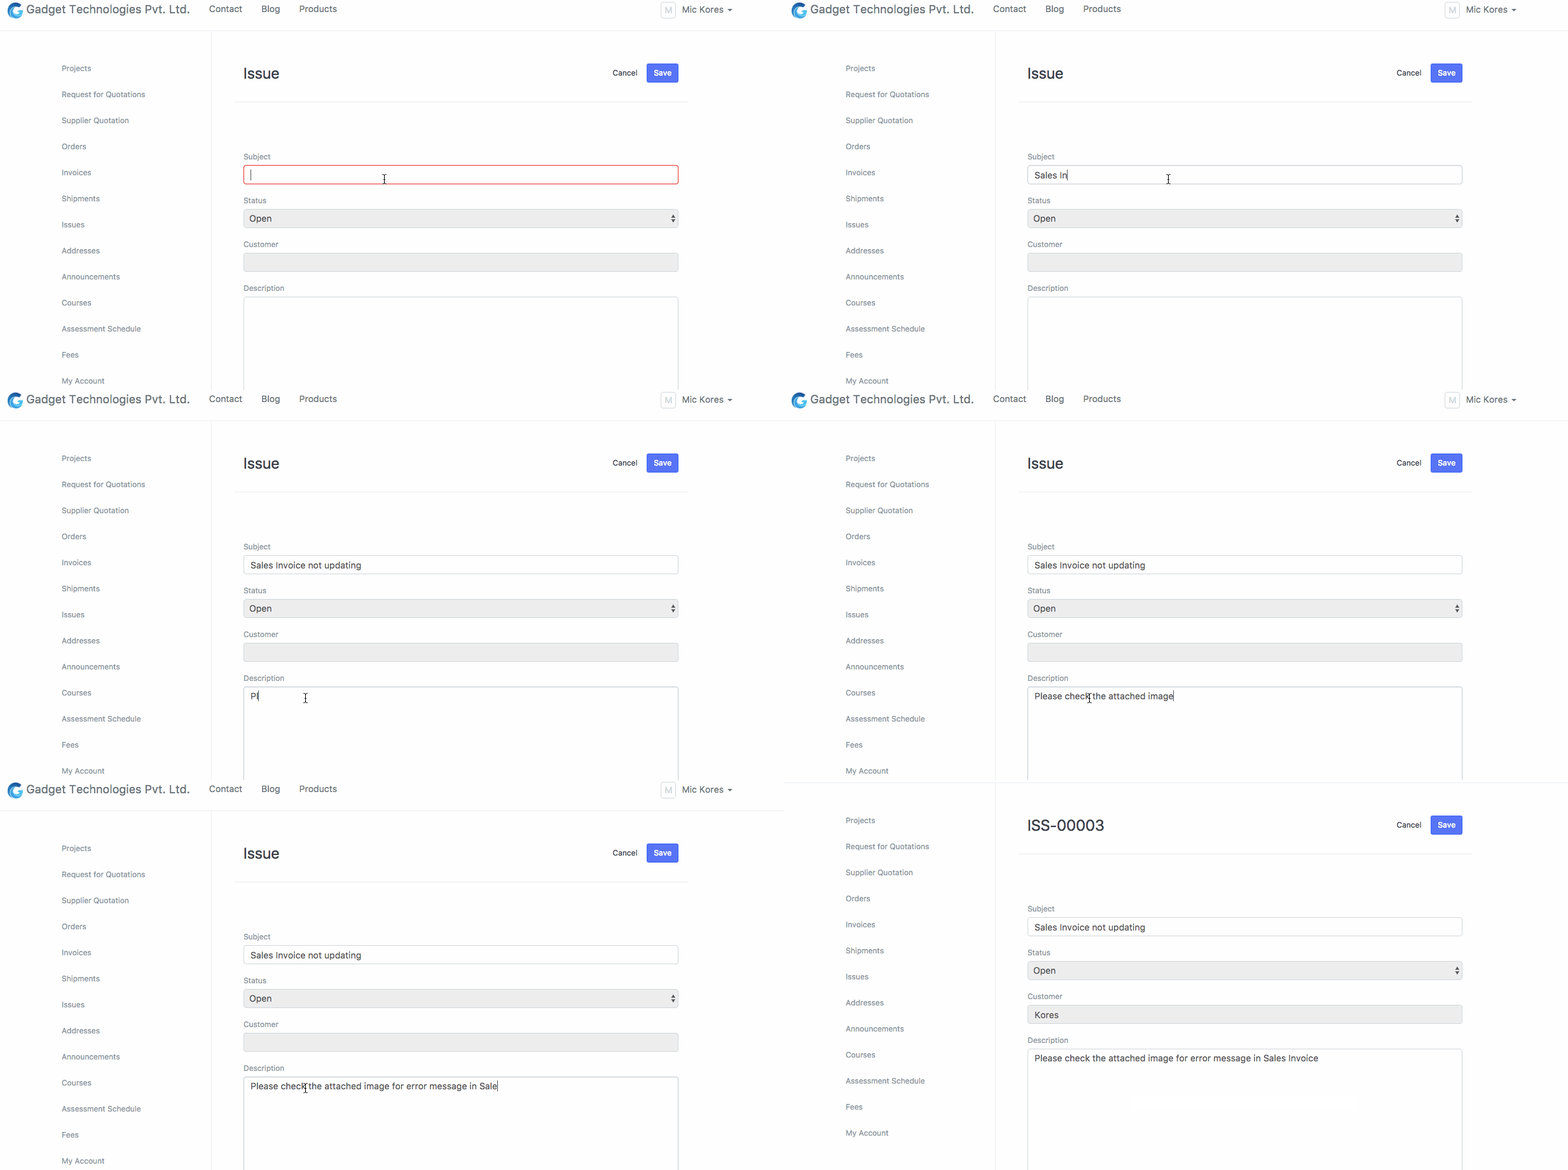
Reply on Issue
Sales Reports
You can view your company’s sales performance, analyze sales data in different views to see the sales performance. With filters, you can dynamically change what is displayed. There are three window areas that make up the Sales Analytics Report-The Filter Toolbar Window, the Graph Window and the Data Window shown as follows:
These analytics can be found under:
Home > Selling > Key Reports
1. Sales Analytics Report
Go to Selling > Analytics > Sales Analytics. The Sales Analytics report looks like this:
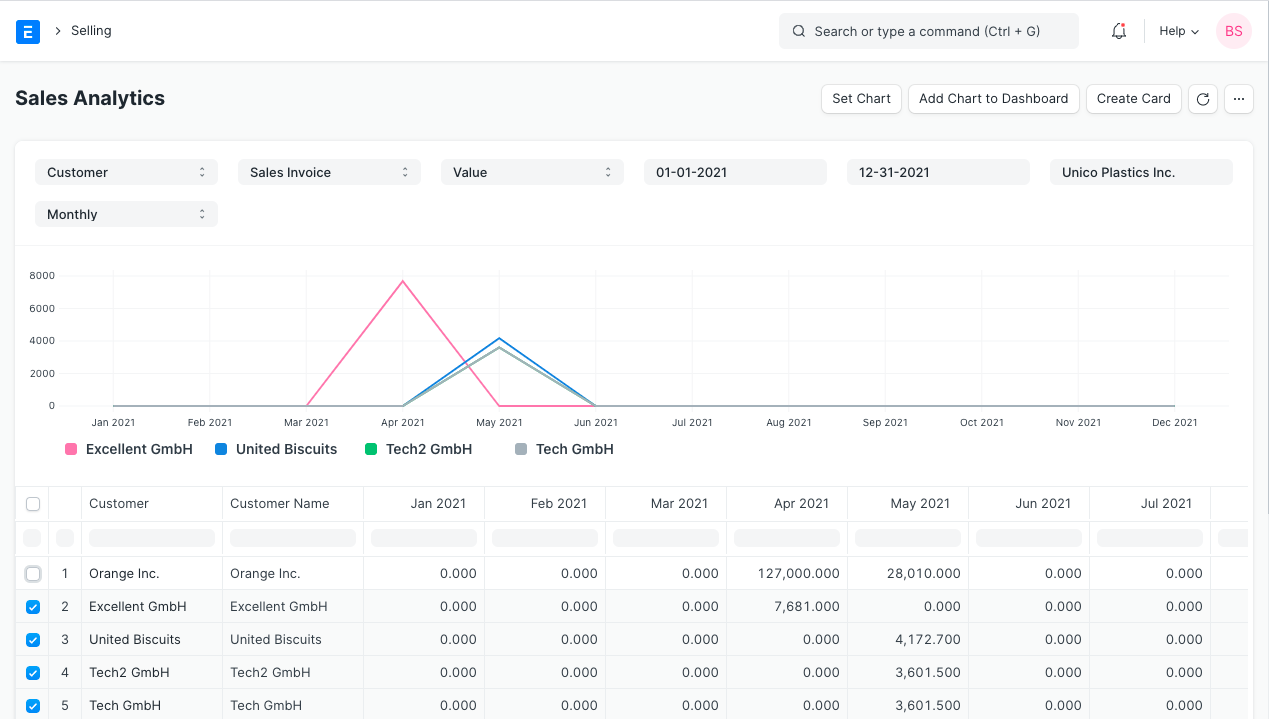
The toolbar provides filters to select what data is to be used. Using the dropdown selections, the data displayed can be refined. As the selections are made, data is reflected in the data window as well as the graph window.

Within the data window, selections can be made to expand or compress the data to be analyzed. Each box can be selected or unselected. There is no restriction for data comparison, so a higher level can be compared to a lower level.
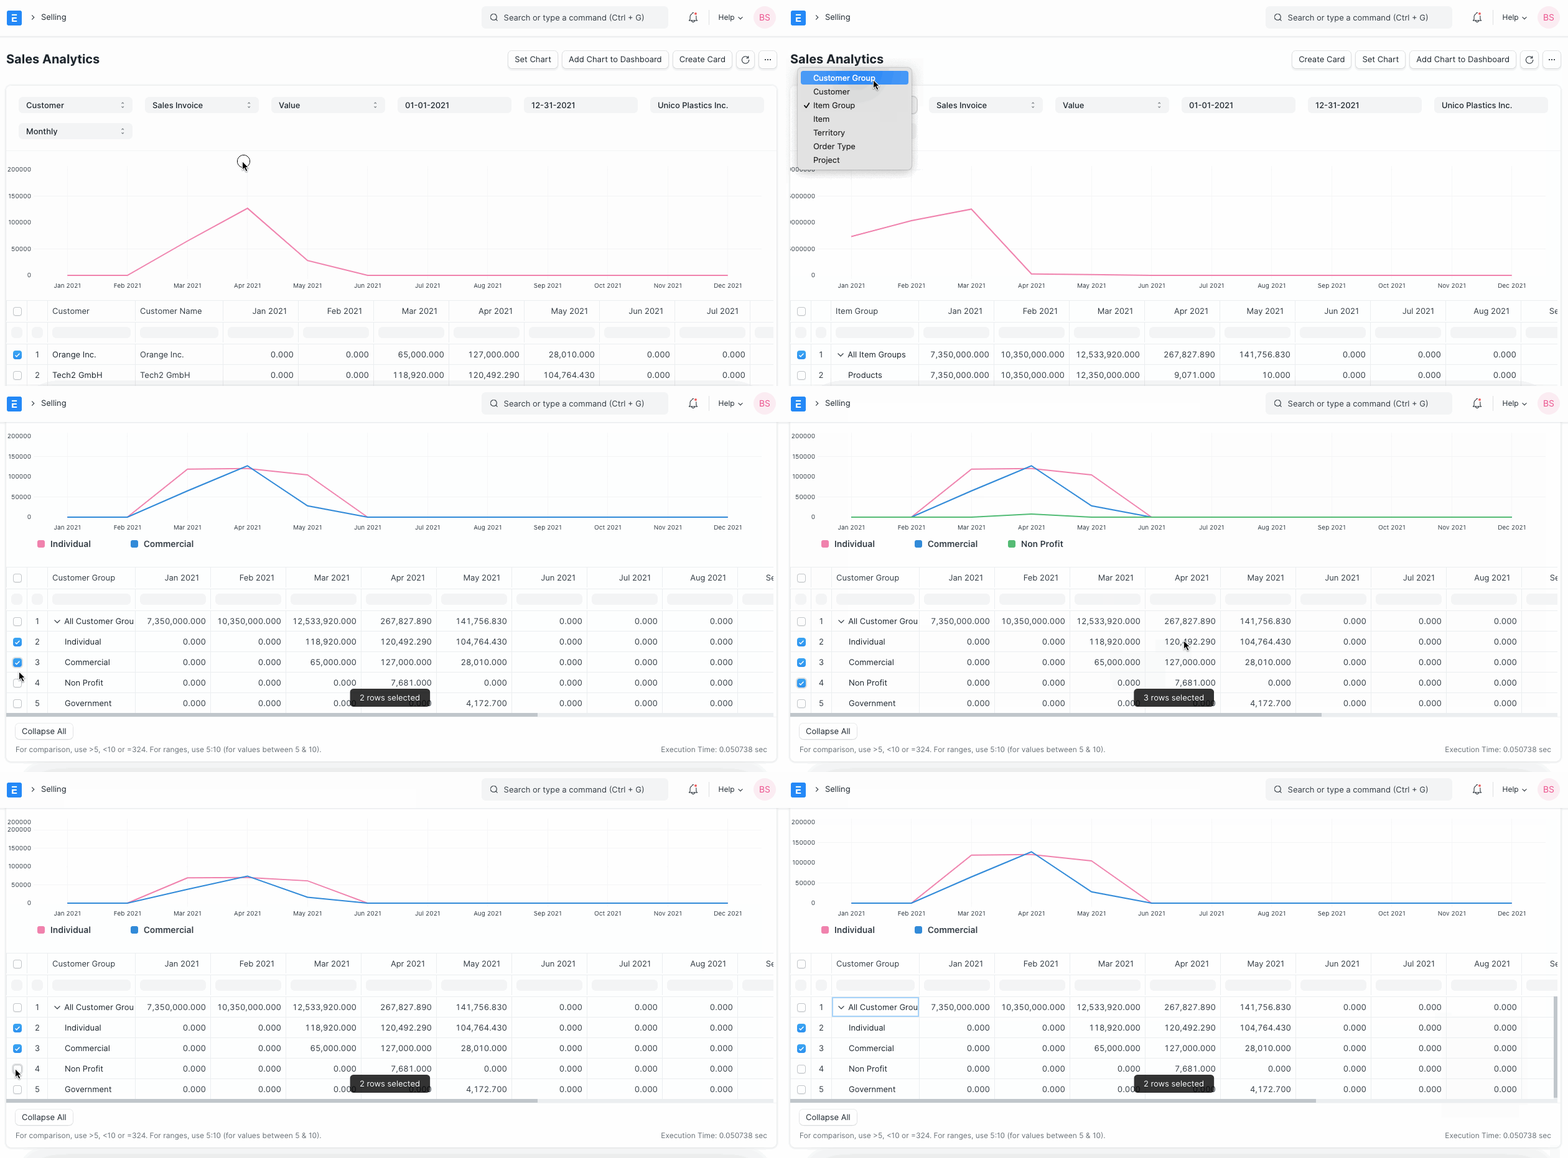
Using the ‘Set Chart’ button, you can set values for the X and Y fields, use different type of charts and select a color.
2. Sales Funnel Report
Go to Selling > Analytics. The report “Sales Funnel” provides a sales generation analysis. It displays the progression of stages in the sales process. There are four stages leading up to a Sales Order: Active Leads, Opportunities, Quotations and Converted (has become a Customer).
- Active Leads shows the number of all your Leads, including all the other stages.
- Opportunities shows the number of Leads for which an Opportunity was created.
- Quotation shows the number of leads for which a Quotation was submitted.
- Converted shows the number of leads for which a Quotation and Sales Order was submitted.
The earlier stages usually include the later stages. However, if an earlier stage was skipped, you might see counterintuitive results like two Quotations resulting from one Opportunity (because it is not mandatory to create an Opportunity first).
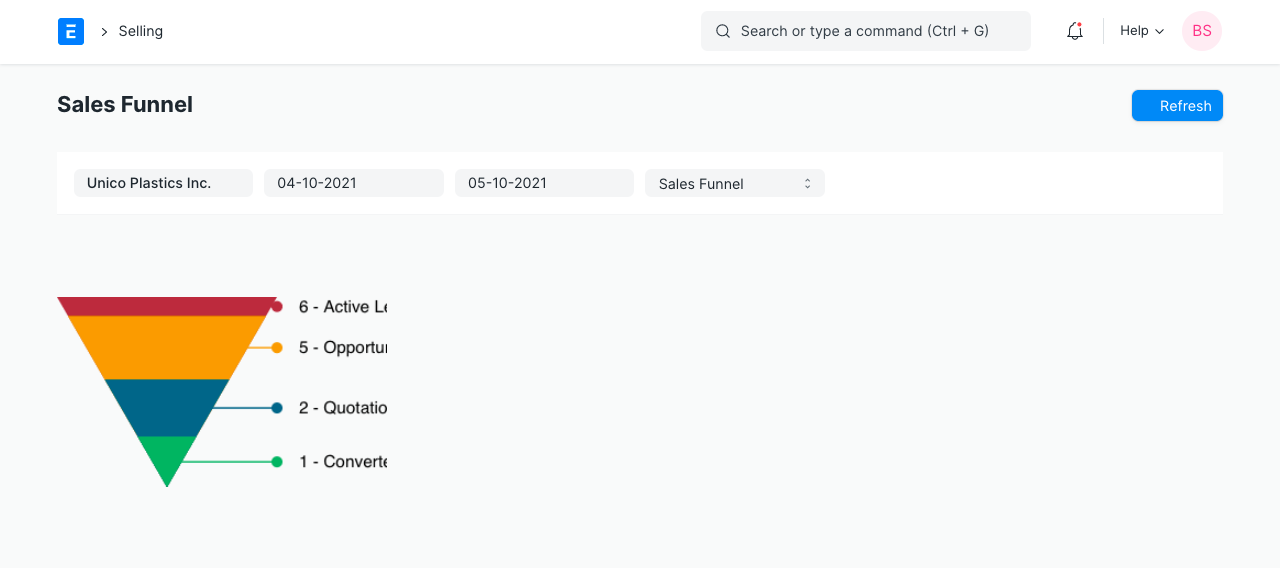
Once a date range has been selected, the graph is updated, the graph reflects the changes and the associated labels.
3. Customer Acquisition and Loyalty Report
Go to Selling > Analytics. To understand revenue, it’s often helpful to look at the data from a new customer and existing customers standpoint. This report helps visualize customer loyalty. There are two windows within this report: The Filter Window and the Data Window.
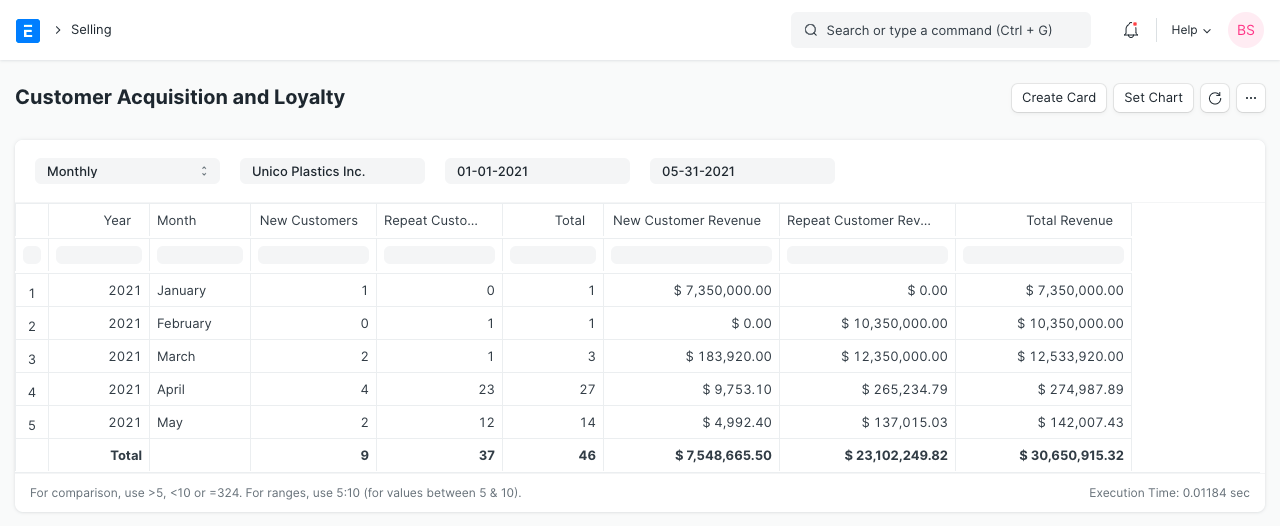
Accessing the Filter Window, the company and date ranges can be applied. Data is updated in the Data Window as changes are applied.
Within the Data Window, columns of information are accessible.
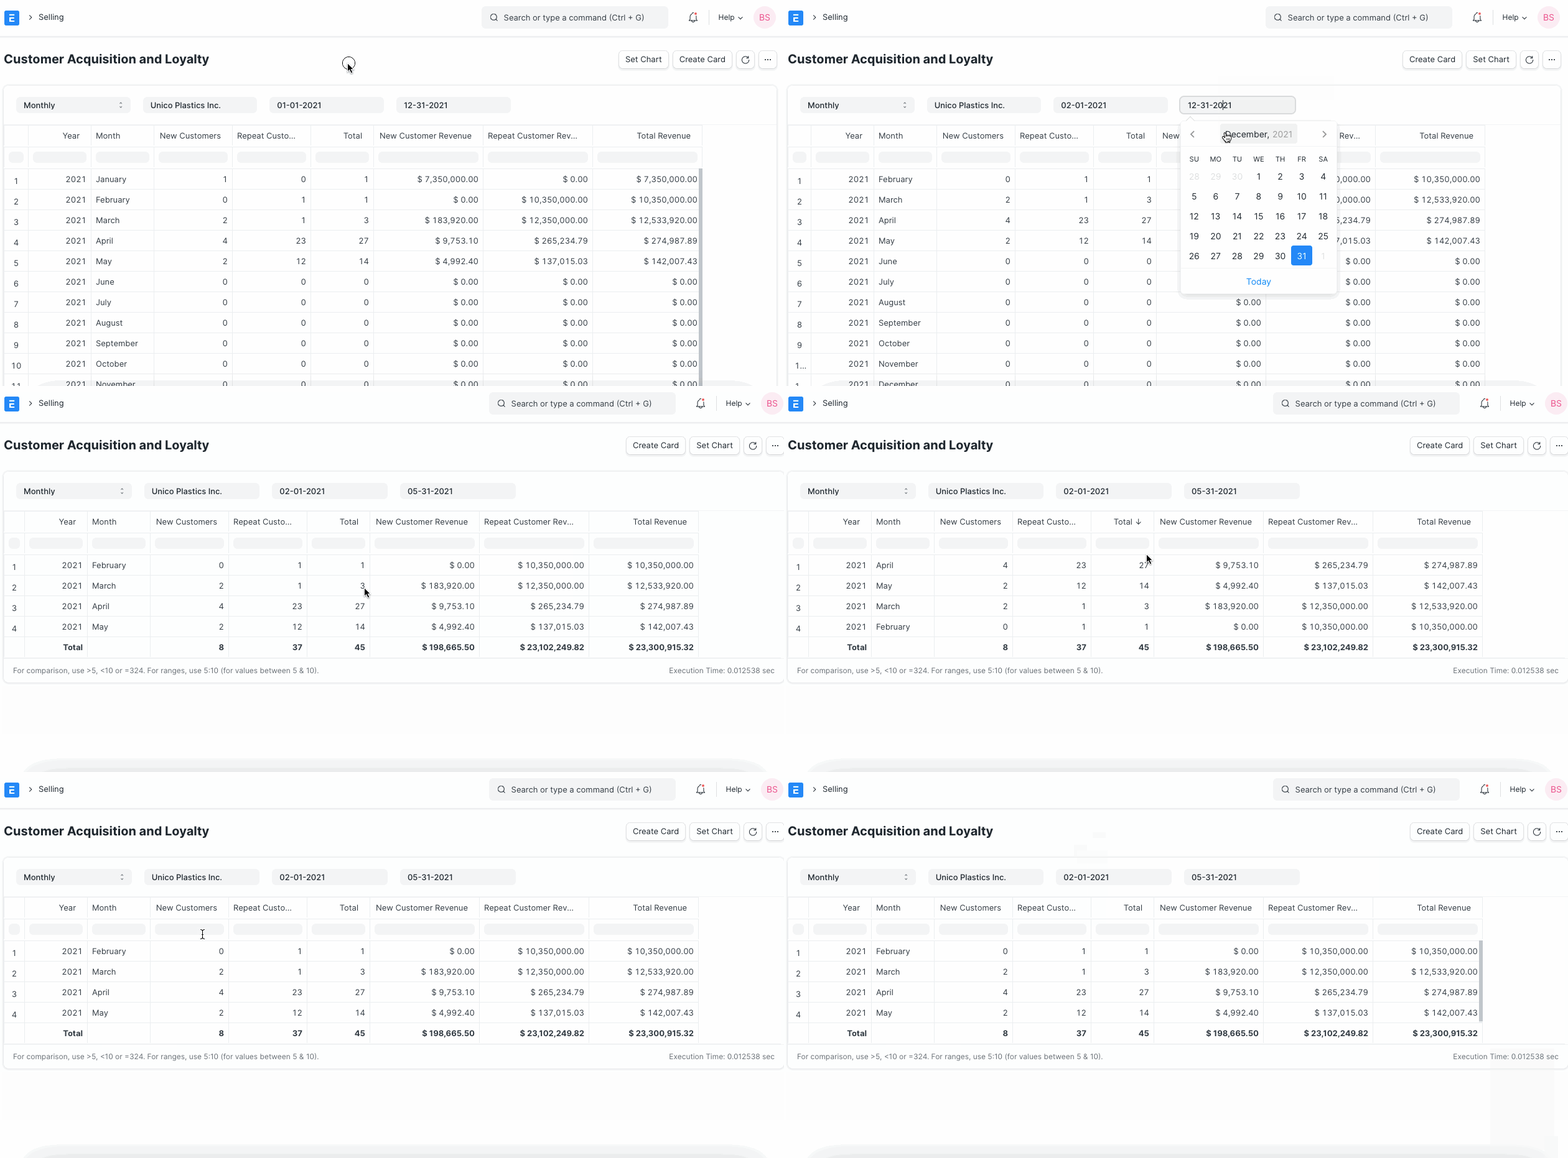
- Moving columns: The columns can be moved, re-arranged by clicking on the column headings and dragging them.
- Sorting: To sort the data in columns, click on the right-hand side of a column heading and you’ll see options to sort as ascending, descending, reset sorting, or remove a column.
- Filtering: The text boxes below the column headings work as instant filters. Enter a number there and all matching records will be shown.
Under Key Reports there are reports for Inactive Customers, Ordered Items To Be Delivered, Sales Person-wise Transaction Summary, Item-wise Sales History, Quotation Trends, Sales Order Trends in the Selling module.
In the Other Reports section there are reports for the following:
- Lead Details
- Customer Addresses And Contacts
- BOM Search
- Available Stock for Packing Items
- Pending SO Items For Purchase Request
- Customer Credit Balance
- Customers Without Any Sales Transactions
- Sales Partners Commission
Warehouse
A warehouse is a commercial building for storage of goods. Warehouses are used by manufacturers, importers, exporters, wholesalers, transport businesses, customs, etc.
They are usually large plain buildings in industrial areas of cities, towns, and villages. They mostly have loading docks to load and unload goods from trucks.
The terminology of ‘Warehouse’ in IONIC ERP is a bit broader though and maybe can be regarded as “storage locations”. You can create a sub-Warehouse which could be a shelf inside your actual location.
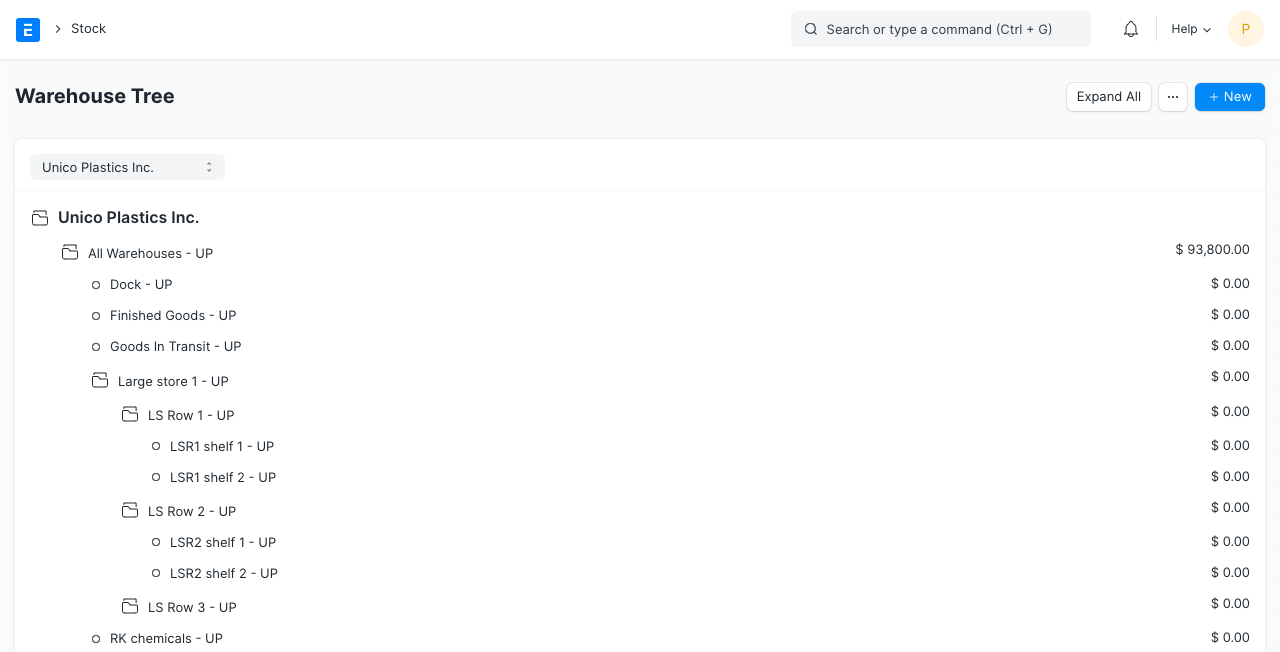
This can become quite a detailed Tree like the following:
Warehouse > Room > Row > Shelf > Bin
To access the Warehouse list, go to:
Home > Stock > Settings > Warehouse
1. How to create a Warehouse
- Go to the Warehouse list, click on New.
- Enter a name for the Warehouse.
- Set/check the Parent Warehouse. If you tick on ‘Is Group’, you can create sub-Warehouses under this group Warehouse.
- Save.
Warehouses are saved with their respective Company’s abbreviations. This facilitates identifying which Warehouse belongs to which company at a glance.
1.1 Additional options when creating a Warehouse
Account: Set a default account here for all transactions with this Warehouse. Setting this account will show transactions from this Warehouse in the Accounting Ledger. Warehouse Type: You can create a Warehouse Type to classify Warehouses. For example, Supplier Warehouses, Stock Warehouses, WIP Warehouses, Rooms, etc. can be tagged. This classification is useful when generating reports or in certain stock transactions.
Address and contact
You can add Billing, Shipping, and other types of addresses for the Warehouse. You can also add a contact, this could be the Warehouse Manager for example.
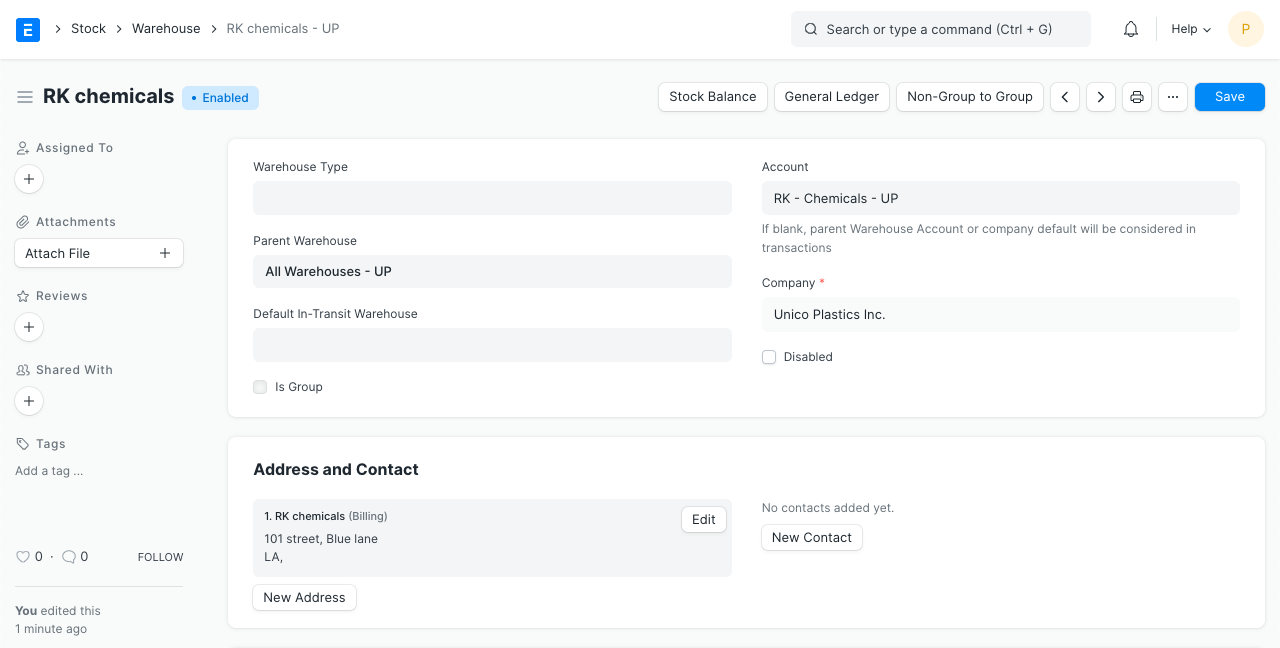
1.2 After Saving
After saving a Warehouse, you’ll see the following options:
- Stock Balance: This will open the Stock Balance report to display the quantity, valuation, balance, etc.
- General Ledger: This will open the General Ledger to display the accounting transactions.
- Non-Group to Group: If the Warehouse is a Non-Group Warehouse, i.e. cannot contain other Warehouses under it, this button will make this a Group Warehouse.
2. Features
2.1 Tree View
You can also switch to ‘Tree’ View which will show all the group and child Warehouses.
2.2 Warehouse Account
In ERPNext, if you enable Perpetual Inventory, every Warehouse must belong to a specific company to maintain company-wise stock balance. To do so, each Warehouse should be linked with an Account in the Chart of Accounts (the same name as the Warehouse itself). This account captures the monetary equivalent of the goods or materials stored in that specific warehouse.
If you have a more detailed Warehouse Tree, most likely it’s a good idea to link the sub-locations (room, row, shelf, etc.) to the account of the actual Warehouse (the root Warehouse of that Tree) as most scenarios do not require to account for value of stock items per Shelf or Bin. For example, if you have Warehouse A, and the room, rows are B, C, etc., then link B and C to the account of A.
Tip: IONIC ERP maintains stock balance for every distinct combination of Item and Warehouse. Thus you can get the stock balance for any specific Item in a particular Warehouse on any particular date.
Item
An Item is a product or a service offered by your company.
The term Item is also applicable to raw materials or components of products yet to be produced (before they can be sold to customers). IONIC ERP allows you to manage all sorts of items like raw-materials, sub-assemblies, finished goods, item variants, and service items.
IONIC ERP is optimized for itemized management of your sales and purchase. If you are in services, you can create an Item for each service that you offer. Completing the Item Master is very essential for the successful implementation of IONIC ERP.
To access the Item list, go to:
Home > Stock > Items and Pricing > Item
1. Prerequisites
Before creating and using an Item, it is advised that you create the following first:
- Item Group
- Warehouse
- A Unit of Measure if required
2. How to create an Item
- Go to the Item list, click on new.
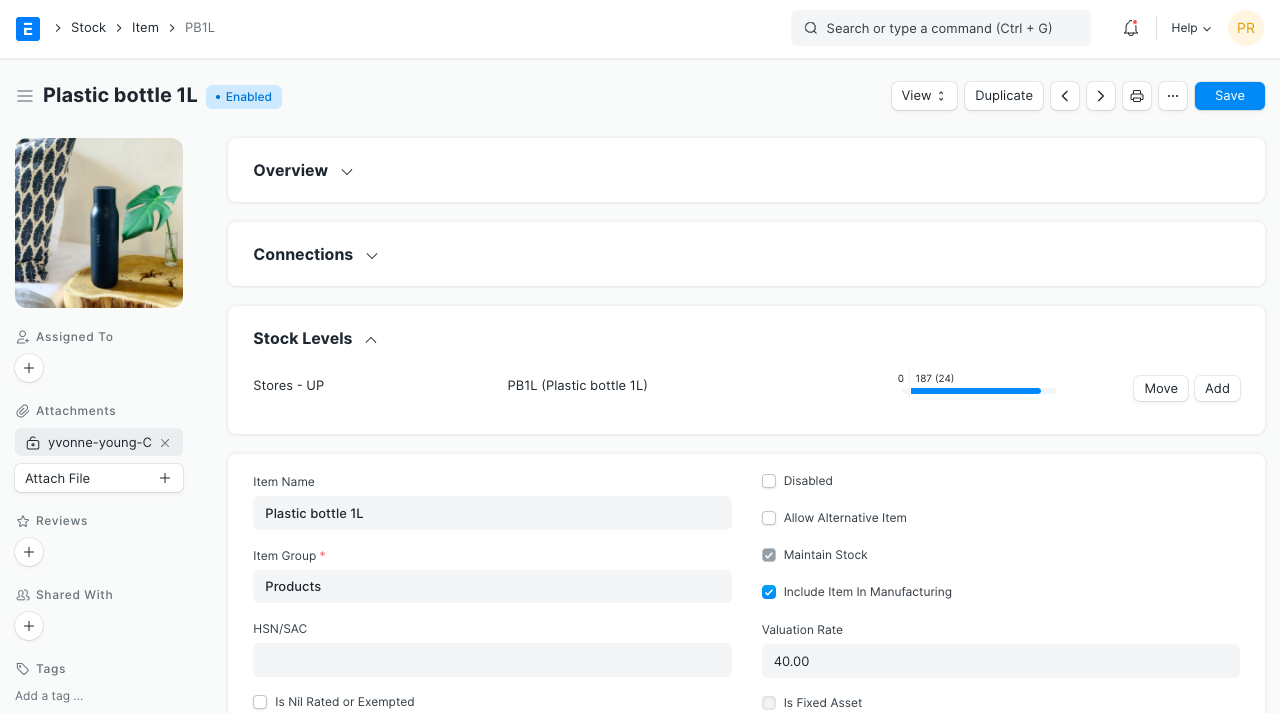
- Enter an Item Code, the name will be auto-filled the same as Item Code on clicking inside the Item Name field.
- Select an Item Group.
- Enter the opening stock units and standard selling rate.
- Save.
2.1 Item Properties
- Item Name: Item name is the actual name of your product or service.
- Item Code: Item Code is a short-form to denote your Item. If you have very few Items, it is advisable to keep the Item Name and the Item Code same. This helps new users to recognize and update Item details in all transactions. In case you have a lot of Items with long names and the list runs in hundreds, it is advisable to code. To understand naming Item codes see Item Codification. You can also generate Item Code based on a Naming Series by enabling this feature in Stock Settings.
- Item Group: Item Group is used to categorize an Item under various criteria like products, raw materials, services, sub-assemblies, consumables or all Item groups. Create your default Item Group list under Setup > Item Group and pre-select the option while filling your New Item details under Item Group. Item groups can be sub-assemblies, raw materials, etc, or based on your business use case.
- Default Unit of Measure: This is the default measuring unit that you will use for your product. It could be Nos, Kgs, Meters, etc. You can store all the UOMs that your product will require under Set Up> Master Data > UOM. These can be preselected while filling New Item by using % sign to get a pop up of the UOM list. Visit the UoM page for more details
2.2 Options when creating an item
- Disabled: If you disable an Item, it cannot be selected in any transaction.
- Allow Alternative Item: Sometimes when manufacturing a finished good, specific material may not be available. If you tick this, you can create and select an alternative item from the Item Alternative list. To know more, visit the Item Alternative page.
- Maintain Stock: If you are maintaining stock of this Item in your Inventory, IONIC ERP will make a stock ledger entry for each transaction of this item. Ensure to keep this option unchecked when creating a non-stock Item (make to order/engineer) or a service.
- Include Item in Manufacturing: This is for raw material Items that’ll be used to create finished goods. If the Item is an additional service like ‘washing’ that’ll be used in the BOM, keep this unchecked.
- Valuation Rate: There are two options to maintain valuation of stock. FIFO (first in – first out) and Moving Average. To understand this topic in detail please visit Item Valuation, FIFO and Moving Average.
- Standard Selling Rate: When creating an Item, entering a value for this field will automatically create an Item Price at the backend. Entering a value after the Item has been saved will not work. In this case, the Item Price is created from any transactions with the Item. The rate at which you’ll sell the item. This will be fetched in Sales Orders and Sales Invoices.
- Is Fixed Asset: Tick this checkbox if this item is a company Asset. Check out the Asset Module to know more.
- Auto Create Assets on Purchase: If Item is a Company Asset, tick this checkbox if you want to auto create assets while purchasing this item through Purchase Cycle. Check out the Asset Page to know more.
- Allowance Percentage: This option will be available only when you create and save the item. This is the percent by which you will be allowed to over-bill or over-deliver this Item. If not set, it will select from Stock Settings.
- Uploading an Image: To upload an image for your icon that will appear in all transactions, save the partially filled form. Only after your file is saved the ‘Change’ button will appear on the Image icon. Click on Change, then click on Upload, and upload the image.
For India:
- HSN/SAC: Harmonized System of Nomenclature (HSN) and Service Accounting Code (SAC) for GST. These numbers are defined by the government and different Items fall under different codes. New HSN codes can be added if not present in the list.
- Is nil rated or exempted: For an Item that is under GST, but no tax is applied to it. Eg: Cereals.
- Is Non GST: For an item that is not covered under GST. Eg: petrol.
3. Features
3.1 Brand and Description
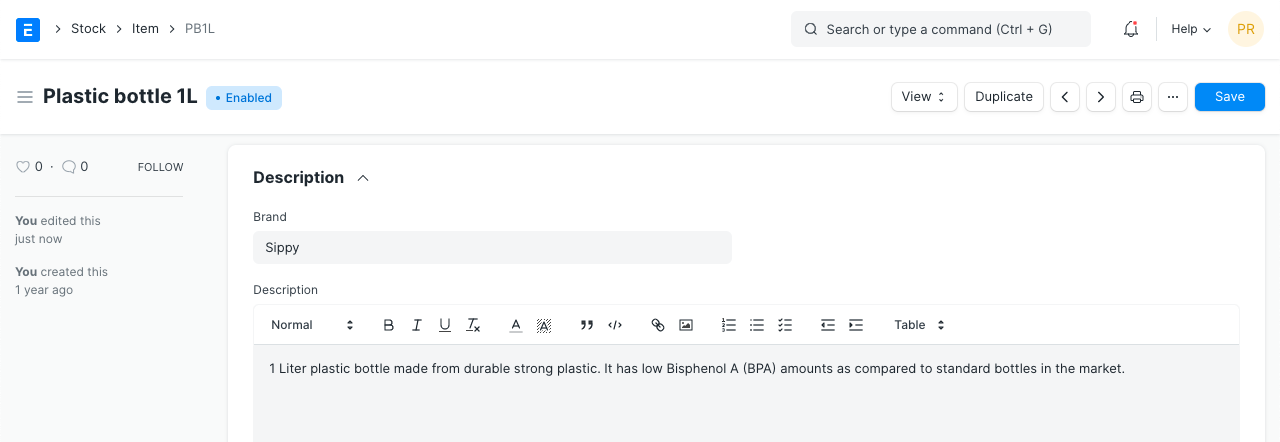
- Brand: If you have more than one brand save them under Selling > Brand and pre-select them while filling a New Item.
- Description: Description of the item. The text from the Item Code will be fetched by default.
3.2 Barcodes
Barcodes can be recorded in Items to quickly scan and add them in transactions. In the Barcodes table you can add an Item’s barcode for scanning. There are two types of barcodes in IONIC ERP:
- EAN: The European Article Number is a 13 digit number. EAN is used internationally and recognized by more POS systems.
- UPC: The Universal Product Code is a 12 digit number. UPC is generally used only in USA and Canada.
3.3 Inventory
- Shelf Life In Days: This is for a product Batch. The number of days after which product batch will be unusable. For example, medicines.
- End of Life: For a single item/product, the date after which it’ll be completely unusable. That is, the item will be unusable in transactions and manufacturing. For example, you’re using plastic crystals for manufacturing Items for the next 5 years after which you want to use plastic beads.
- Warranty: To track a warranty period, it is necessary that the Item is serialized. When this Item is delivered, the delivery date and the expiry period is saved in the Serial Number master. Through the serial number master, you can track the warranty status.A warranty period is a time period in which a purchased product may be returned or exchanged.
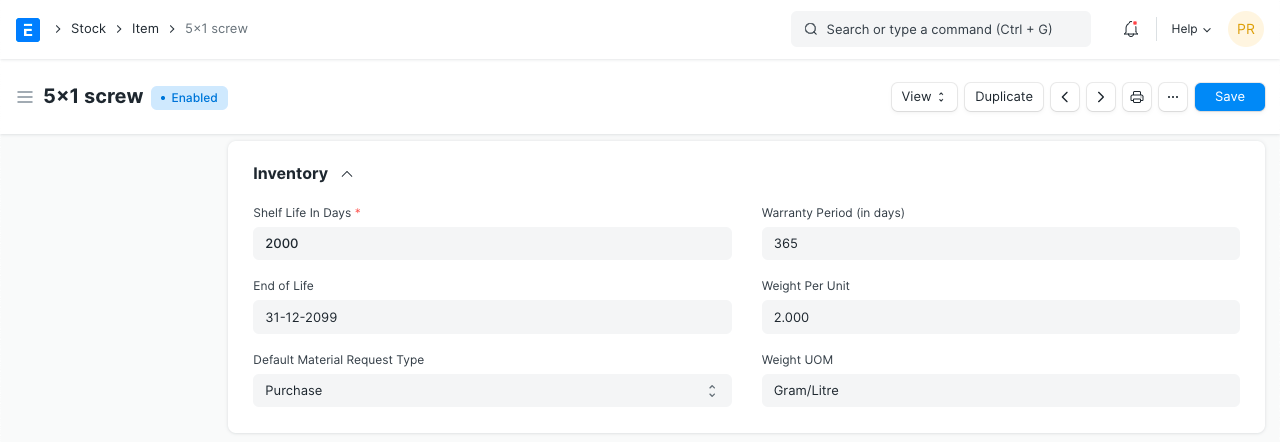
- Weight UOM: The Unit of Measure for the item. This can be Nos, Kilo, etc. The Weight UoM which you use internally can be different from the purchase UoM.
- Weight Per Unit: The actual weight per unit of the item. Eg: 1 kilo biscuits or 10 biscuits per pack.
- Default Material Request Type: When you create a new Material Request for this item, the field set here will be selected by default in the new Material Request. This is also known as an ‘indent’.
- Valuation Method: Select the Valuation Method whether FIFO or Moving Average. Read Item Valuation methods to know more.
- Allow negative stock: When checked the item will be allowed to go negative even if negative stock is disabled from Stock Settings. This is useful if you don’t want to enable negative stock on high value items but few select low value items are allowed to go negative for few days.
3.4 Automatic Reordering
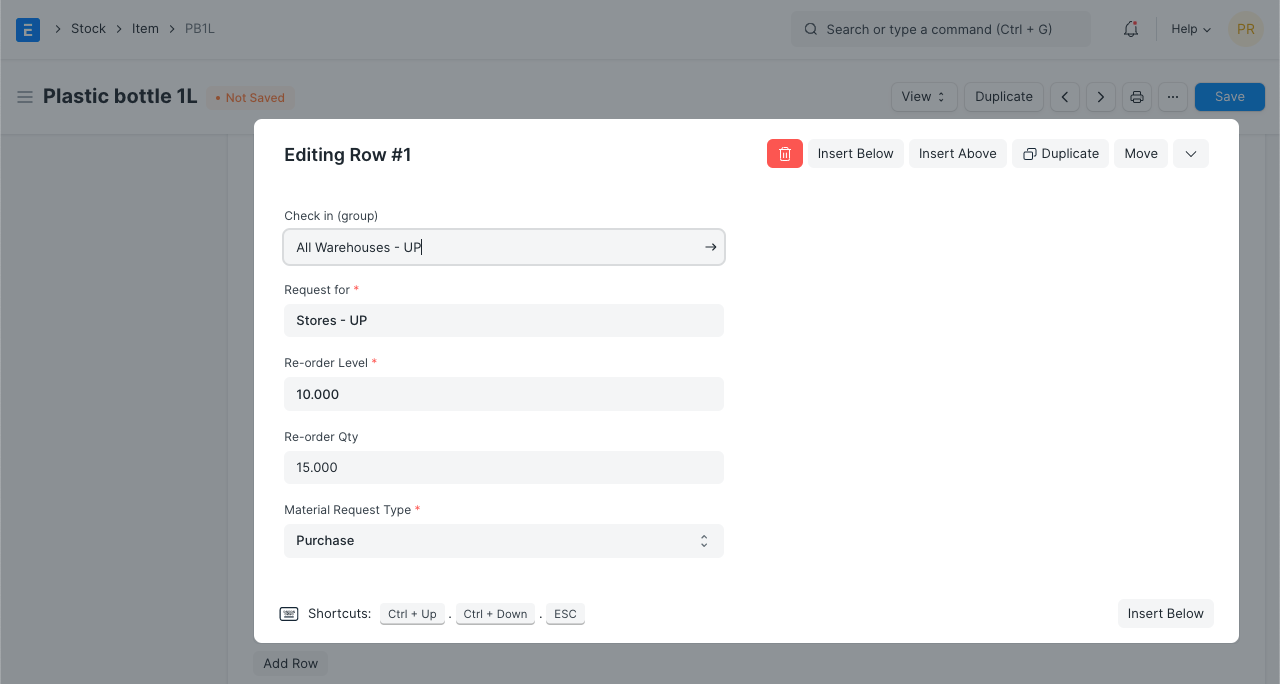
When the stock of an item dips under a certain quantity, you can set an automatic reorder under ‘Auto Reorder’ section. This should be enabled in Stock Settings. This will raise a Material Request for the Item. The user with roles Purchase Manager and Stock Manager will be notified when the Material Request is created.
- Check in (group): In which group warehouses to check the quantity of the item.
- Request for: Which warehouse to stock the item reorder.
- Re-order Level: When this quantity is reached, the reorder will be triggered. Re-order level can be determined based on the lead time and the average daily consumption. For example, you can set the reorder level of Motherboard at 10. When only 10 Motherboards are remaining in stock, the system will either automatically create a Material Request in your IONIC ERP account.
- Re-order Qty: The number of units to be reordered so that the sum of ordering cost and holding cost is at its minimum. The re-order quantity is based on the ‘Minimum Order Qty’ specified by the supplier and many other factors.For example, If reorder level is 100 items, your reorder quantity may not necessarily be 100 items. The Reorder quantity can be greater than or equal to the reorder level. It may depend upon lead time, discount, transportation and average daily consumption.
- Material Request Type: The Material Request type with which the stock will be reordered. This depends whether you buy the Item, manufacture it yourself or transfer it between Warehouses.
Note: The Material Request is created at 12 midnight depending on the set reorder level.
3.5 Multiple Units of Measure
You can add alternate UoMs for an Item. If the default UoM in which you sell is numbers (NoS) but you receive it in Kilos, you can set an additional UoM with an appropriate conversion factor. For example, 500 Nos of screws = 1 Kilogram, so select Kilogram/Litre as UOM and set the conversion factor as 500. To know more about selling in different UoM.
3.6 Serial Numbers
With Serial Numbers, you can track warranty and returns. In case any individual Item is recalled by the supplier the number system helps to track individual Item. The numbering system also manages expiry dates.
Please note that if you sell your items in thousands, and if the items are very small like pens or erasers, you need not serialize them.
In IONIC ERP, you will have to mention the Serial Number in some accounting entries. If your product is not a big consumer durable Item, if it has no warranty and has no chances of being recalled, avoid giving serial numbers.
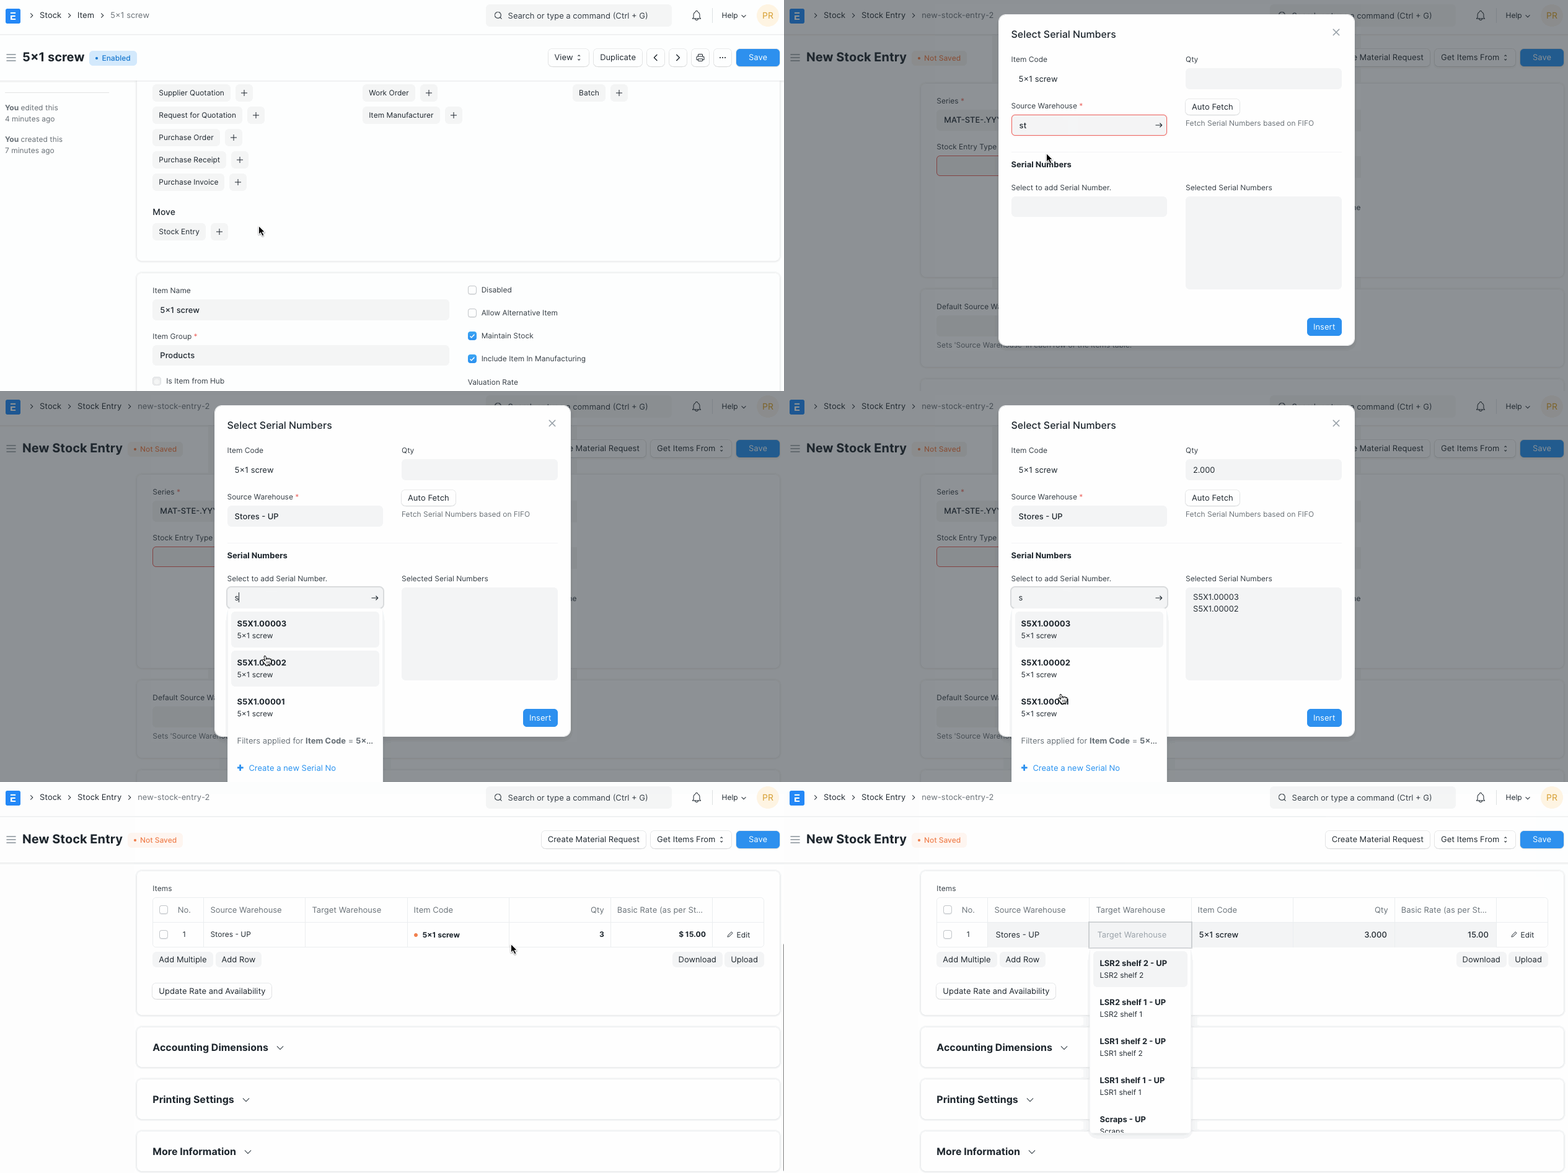
3.7 Batches
A set of Items can be manufactured in batches. This is useful for moving the batch and associate an expiry date with a certain batch.
- Has Batch No: Options for batch number, expiry date, and retaining sample stock will be revealed on ticking this checkbox. You cannot activate this if there is any pre-existing transaction for this item. If this is disabled, you’ll have to enter the serial numbers manually for every transaction.
- Batch Number Series: Prefix that’ll be applied to batch numbers. If you set 5x1SCR, then the first batch will be named like 5x1SCR00001 on first transaction/manufacture.
- Automatically Create New Batch: If the batch number is not mentioned in transactions, then they will be automatically created according to a format like AAAA.00001. If you always want to manually create a batch number for this item, leave this field blank. This setting will override ‘Naming Series Prefix’ in Stock Settings. Batch numbers can be set to be generated automatically if you manufacture the Items or can be entered manually if it comes from an external manufacturer.
- Has Expiry Date: If you tick this, the batch number will be created according to the expiry date. The expiry dates can be set in the ‘Batch’ master.
- Retain Sample: To retain a minimum number of sample stock of the item. You need to set a Sample Retention Warehouse in Stock Settings for this.
- Has Serial No: This is similar to Batch Number Series, it’ll be created when you make transactions/manufacture. If you set Serial Number Series as AA, then on the first transaction a serial number like AA00001 will be created.
Tip: While entering an Item Code in an Items table, if the table requires inventory details, then depending on whether the entered item is batched or serialized, you can enter serial or batch numbers right away in a pop-up dialog.
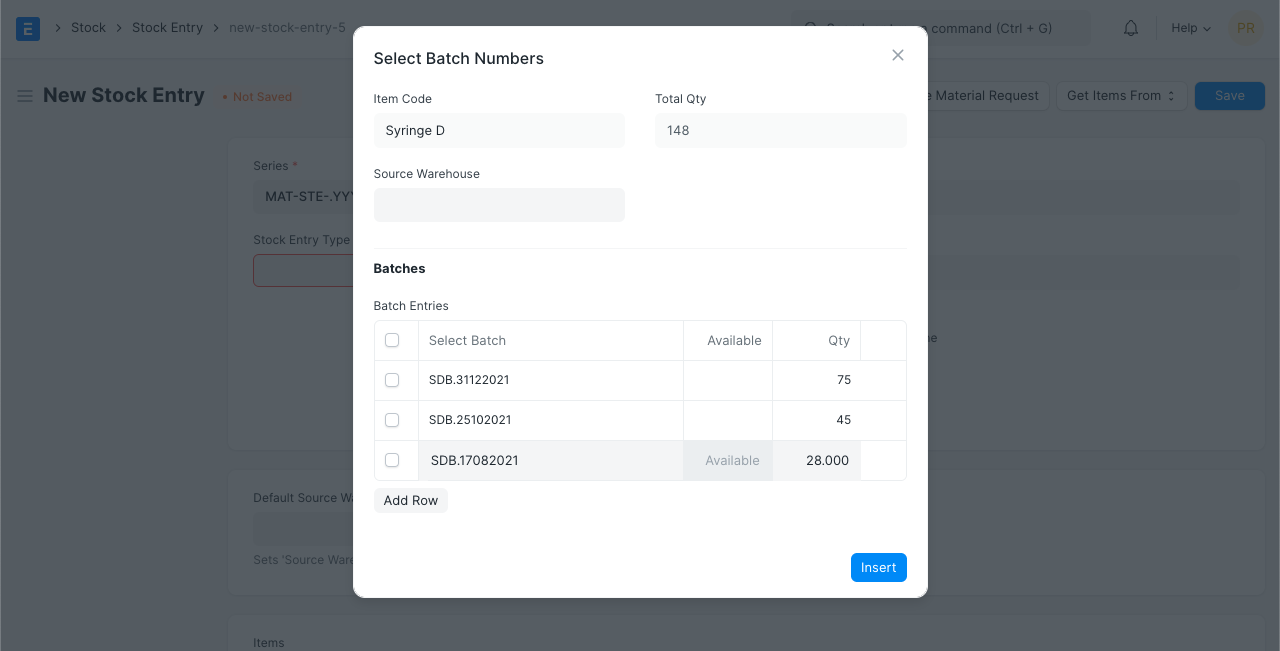
Note: Once you mark an item as serialized or batched or neither, you cannot change it after you have made a Stock Entry.
To know more, visit the Stock Reconciliation page.
3.8 Variants
An Item Variant is a different version of a Item. To learn more about managing variants see Item Variants.
3.9 Item Defaults
In this section, you can define Company-wide transaction-related defaults for this Item.
- Default Warehouse: This is the Warehouse that is automatically selected in your transactions with this item.
- Default Price List: Whether Standard Selling or Standard Buying. Likewise, you can also set the purchasing and selling default accounts
- Supplier: If a default supplier is set, this supplier will be selected for new purchase transactions.
- Default Expense Account: It is the account in which cost of the Item will be debited.
- Default Income Account: It is the account in which income from selling the Item will be credited.
- Default Cost Center: It is used for tracking expense for this Item.
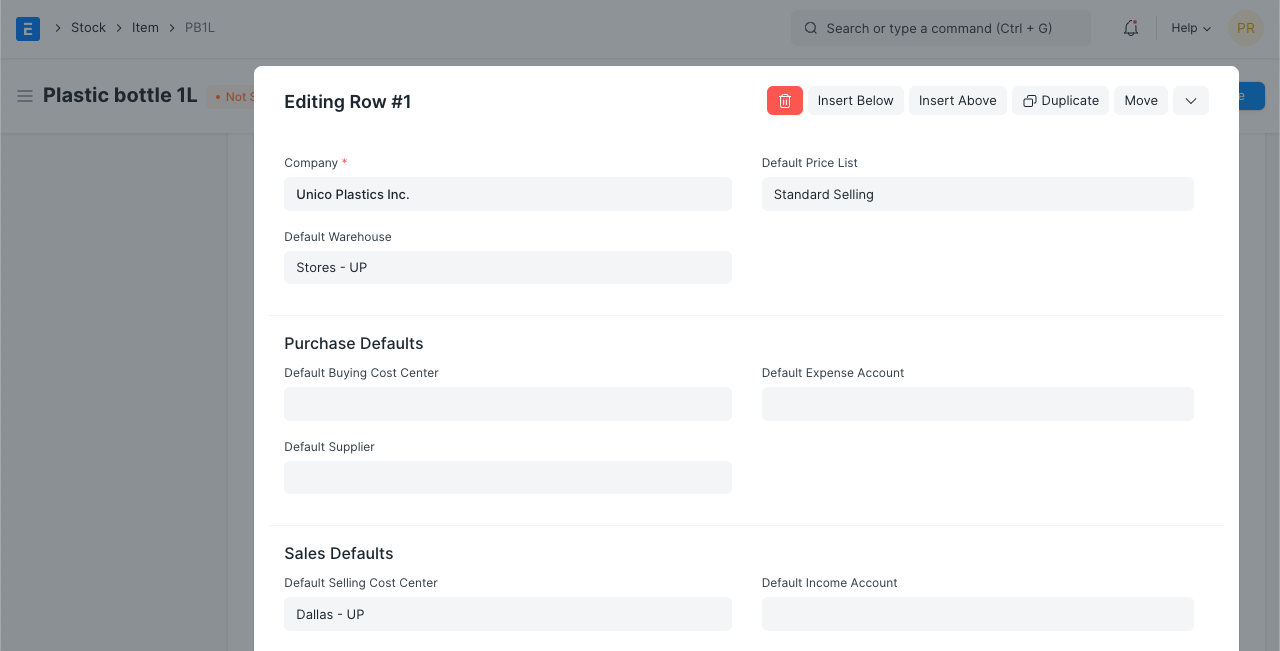
Tip: You can add more rows for multiple companies.
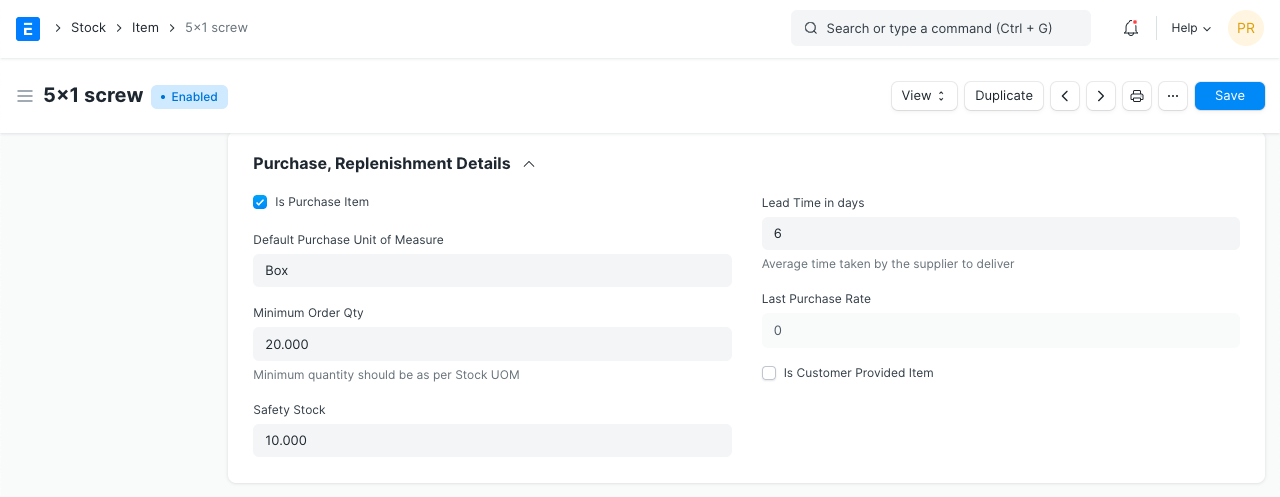
3.10 Purchase, Replenishment Details
- Default Purchase Unit of Measure: The default UoM that will be used in Purchase transactions.
- Minimum Order Qty: The minimum quantity required for purchase transactions like Purchase Orders. If set, the system will not let you proceed with the purchase transaction if the item quantity in the purchase transaction is lesser than the quantity set in this field.
- Safety Stock: “Safety Stock” is used in the report “Itemwise Recommended Reorder Level”. Based on Safety Stock, average daily consumption and the lead time, the system suggests Reorder Level of an item.Reorder Level = Safety Stock + (Average Daily Consumption * Lead Time)
- Last Purchase Rate: The rate at which you last purchased this item using a Purchase Invoice will be displayed here.
- Is Purchase Item: If unticked, you won’t be able to use this item in purchase transactions.
- Is Customer Provided Item: Checked if Item is provided by a customer and received through Stock Entry > Material Receipt. If Checked, Customer field is Mandatory as the default customer for Material Request.
- Lead time days: Lead time days are the number of days between ordering the Item and it to reach the Warehouse.
3.11 Supplier Details
- Delivered by Supplier (Drop Ship): If the item is delivered directly by the supplier to the customer, tick this checkbox. Read more here.
- Supplier Codes: Track Item Code defined by the Suppliers for this Item. In the Purchase transactions, on selecting an Item, a Supplier Part No. will be fetched as well for the Supplier’s reference. You can read more about it here.

3.12 Foreign Trade Details
If you’re sourcing the item from another country, you can set the details here.
- Country of Origin: The country from which you’re sourcing the item.
- Customs Tariff Number: You can create a customs tariff number with a description and use it for reference here to share with custom agencies. Later it can be used to add in Delivery Notes.
3.13 Sales Details
- Grant Commission: Grant a commission to Sales Person and Sales Partner when this item is sold. If disabled, the sales generated by this item will be ignored in the calculation of commission.
- Default Sales Unit of Measure: The default UoM that’ll be fetched for sales transactions.
- Max Discount (%): You can define the maximum discount in % to be applied to an item. Eg: if you set 20%, you cannot sell this item with a discount greater than 20%.
- Is Sales Item: If unticked, you won’t be able to use this item in sales transactions.

3.14 Deferred Revenue and Deferred Expense
You can enable deferred revenue or expense from the item. Once you tick the checkbox, you’ll see options to set the Deferred Expense Account and the number of months through which the revenue/expense is deferred.
For example, consider a yearly gym membership, you pay the money upfront at once but the service is given throughout the year. For the gym owner, this is deferred revenue and for the customer, it is a deferred expense.

Check out the pages on Deferred Revenue for more details.
3.15 Customer Details
The Customer may identify an Item with a different Item Code. this is Similar to Supplier Code.
- Customer Name: Select a customer here.
- Customer Group: This will be fetched based on the Customer you selected in the previous field.
- Ref Code: A customer can identify this item with a different number. You can track Item Code assigned by the Customer for this Item. When you create a Sales Order, the Customer’s Reference Code for this Item will be shown.
3.16 Item Tax
These settings are required only if a particular Item has a different tax rate than the rate defined in the standard tax Account.
You need to create a new ‘Item Tax Template’ or choose an existing one. For example, if you have a tax Account, “VAT 14%” and this particular Item is exempted from tax, then you select “VAT 14%” in the first column, and set “0” as the tax rate in the second column. Visit the Item Tax Template page for more details.
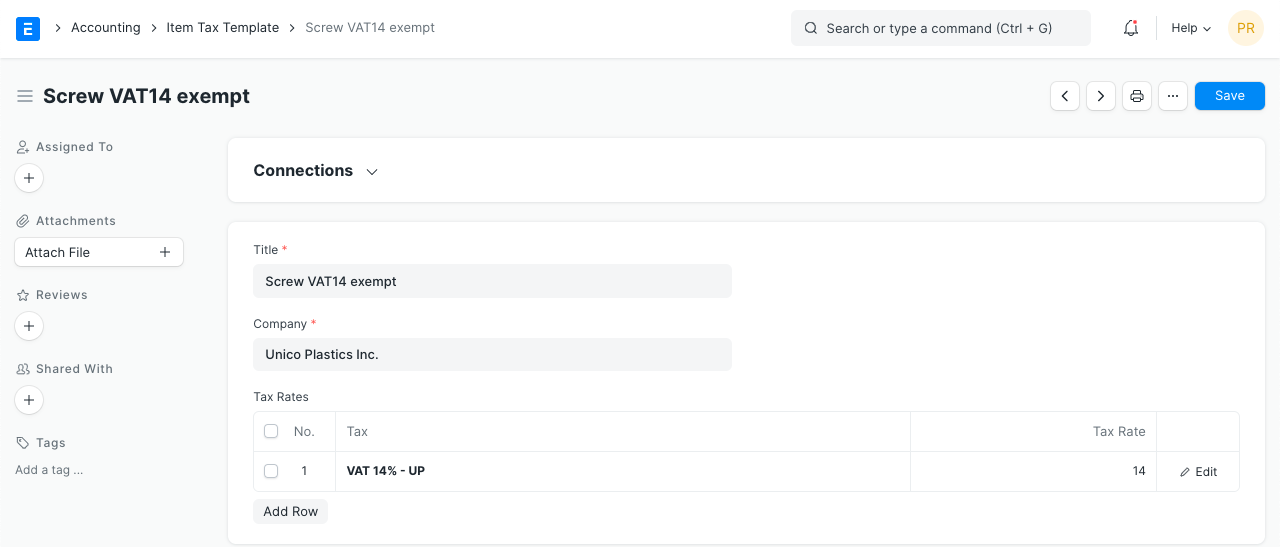
You can also set a Tax Category for this Item.
3.17 Inspection Criteria
- Inspection Required before Purchase: If an inspection is mandatory before the item is purchased, i.e., before you generate Purchase Receipt, tick this checkbox.
- Inspection Required before Delivery: If an inspection is required at the time of delivery from your Supplier is mandatory for this Item, tick this checkbox. That is, before you generate a Delivery Note.
- Quality Inspection Template: If a Quality Inspection is prepared for this Item, then this template of criteria will automatically be updated in the Quality Inspection table of the Quality Inspection. Examples of Criteria are: Weight, Length, Finish, etc.
Quality Inspection can be done with Quick View and you need not go to a different page to update the details inspection in IONIC ERP.
Read Quality Inspection to know more.
3.18 Manufacturing
- Default BOM: The default Bill of Materials used to manufacture this Item.
- Supply Raw Materials for Purchase: If you’re subcontracting to a vendor, you can choose to provide them with the raw materials to manufacture the item using the default BOM.
- Manufacturer: Select the Manufacturer who manufactured this item.
- Manufacturer Part Number: Enter the manufacturer part number that the manufacturer has assigned to this item.

- The manufacturer details appear after you’ve created an ‘Item Manufacturer’ from the dashboard and selected that record as default. Here, add details for:
- Item Code
- Enter the manufacturer name
- Enter the part number the manufacturer uses to identify this item
- Select ‘Is Default’ to show the manufacturer and part number in the Item record

3.19 Website
- Show in Website: Choose if you want to show this Item on your website. Once you tick this, additional options will be visible to configure the item on your website. To view the item on the website click on the ‘See on Website’ link on the top left just above the item image. Visit the Website module to know more.
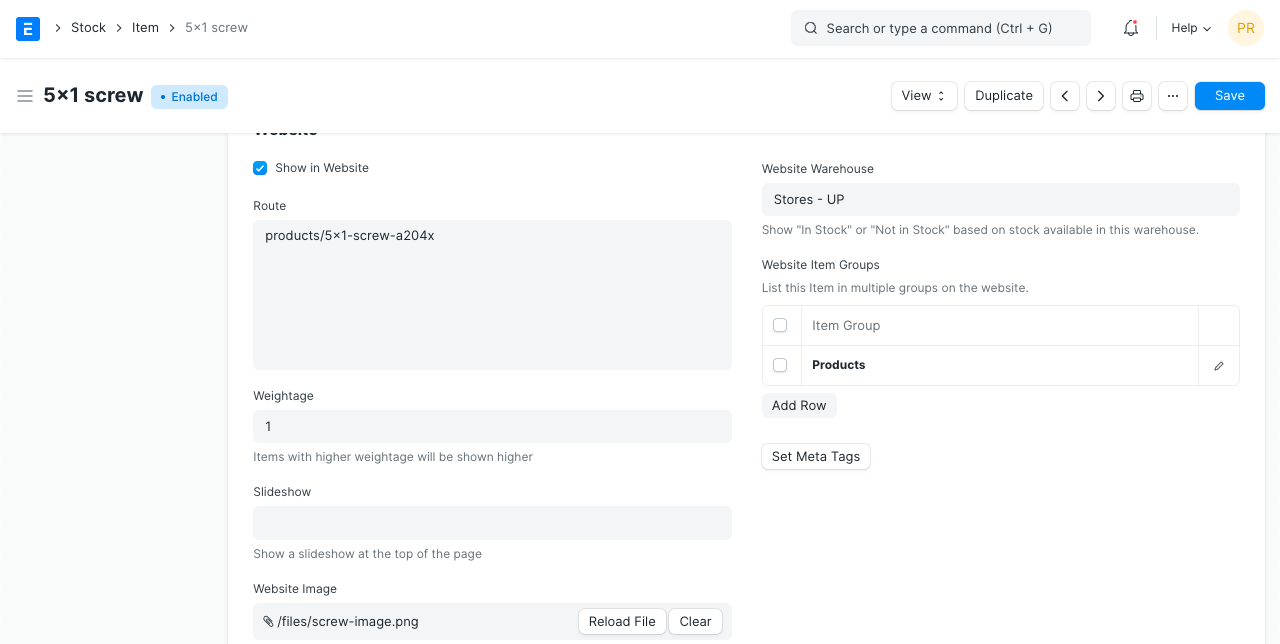
- Weightage: Items with higher weight will be displayed first on the website. The limit for the number you can enter here is very high.
- Slideshow: A slideshow can be displayed at the top of the page. Visit the Homepage page in Website module to know more.
- Image: You can attach an image instead of a Slideshow.
- Website Warehouse: Select an existing or create a new warehouse for transactions via your website. This Warehouse will be different from your offline Warehouses. Stock for any online transactions will be deducted from the Warehouses set under Website Warehouse.
- Website Item Groups: In this table you can select existing or create new Item Groups to classify items on your website.
- Set Meta Tags: Meta tags help with SEO. See Web Page to know how to add them.
Visit Manufacturing and Website to understand these topics in detail.
3.20 Website Specifications
This section is for configuring other details about the item.
- Copy from Item Group: The ‘Website Specifications’ details will be fetched as set in a specific Item Group chosen on the previous section (2.17).
- Website Specifications: Label and its description for the item. For example, ‘Warranty: 1 year’.
- Website Description: This will appear on the item page.
- Website Content: (Introduced in v12) You can create additional styling, etc., use Bootstrap 4 markup to display on the item page.
3.21 Hub Publishing Details
The hub is a free online marketplace where Suppliers and Customers can transact. If both parties are on IONIC ERP, the transactions happen seamlessly. You can visit the hub at: https://hubmarket.org.
- Publish in Hub: Choose if you want to publish your item on https://hubmarket.org/. It is a free marketplace. If your supplier/customer is also on ERPNext, the transactions will be seamless. For example, on creating a Purchase Order from your end, a Sales Order will be created on the Supplier’s end.
- Hub Warehouse: This is a separate Warehouse to maintain the stock for your hub transactions.
- Synced With Hub: Sync item and other details with the hub when transactions take place.
Opening Stock
Opening Stock is the amount and value of materials that a company has available for sale or use at the beginning of an accounting period.
The closing Stock of the previous accounting period becomes the opening Stock of the current accounting period.
1. Prerequisites
- Create Warehouses.
- Link Warehouse to appropriate accounting ledgers.
2. Opening Stock for Non-serialized Items
To post opening stock visit the Stock Reconciliation page.
3. Opening Stock for Serialized and Batched Items
Create the Batch and Serial No records beforehand. To post opening stock for serialized and batched items:
- Go to Stock > Stock Transactions > Stock Entry > New.
- Select ‘Material Receipt’ in ‘Stock Entry Type’.
- Select the Warehouse in ‘Default Target Warehouse’.
- In Items table select Item Code, Qty and Basic rate.
- For batched items select Batch No.
- For serialized items select Serial No.
- Save and Submit.
Accounting Of Inventory Stock
The value of available inventory is treated as a Current Asset in the company’s Chart of Accounts. To prepare a Balance Sheet, you should make the accounting entries for those assets. There are generally two different methods of accounting for inventory.
1. Auto/Perpetual Inventory
In this process, for each stock transaction, the system posts relevant accounting entries to sync stock balance and accounting balance. This is the default setting in IONIC ERP for new accounts. By default, Perpetual Inventory is enabled in the Company.
When you buy and receive items, those items are booked as the company’s assets (stock-in-hand). When you sell and deliver those items, an expense (Cost of Goods Sold) equal to the landed cost of the items is booked. General Ledger entries are created after every stock transaction. As a result, the value as per Stock Ledger always remains the same with the relevant account balance. This improves the accuracy of the Balance Sheet and the Profit and Loss statement.
Read Perpetual Inventory documentation to check accounting entries for a particular stock transaction.
1.2 Advantages of Perpetual Inventory
Perpetual Inventory system will make it easier for you to maintain the accuracy of the company’s asset and expense values. Stock balances will always be synced with relevant account balances, so no more periodic manual entry needs to be done to balance them.
In case of new back-dated stock transactions or cancellation/amendment of an existing transaction, all the future Stock Ledger entries and GL Entries will be recalculated for all items of that transaction. The same is applicable if any cost is added to the submitted Purchase Receipt later through the Landed Cost Voucher.
Note: Perpetual Inventory completely depends upon the item valuation rate. Hence, you have to be more careful entering the valuation rate while making any incoming stock transactions like Purchase Receipt, Material Receipt, or Manufacturing/Repack.
2. Periodic Inventory
In this method, accounting entries need to be created manually in order to sync stock balance and relevant account balance. The system does not create accounting entries automatically for assets at the time of material purchases or sales.
In an accounting period, when you buy and receive items, an expense is booked in your accounting system. You sell and deliver some of these items.
At the end of an accounting period, the total value of items to be sold, need to be booked as the company’s assets, often known as stock-in-hand.
The difference between the value of the items remaining to be sold and the previous period’s stock-in-hand value can be positive or negative. If positive, this value is removed from expenses (Cost of Goods Sold) and is added to assets (stock-in-hand). If negative, a reverse entry is passed.
This complete process is called Periodic Inventory.
If you are an existing user using Periodic Inventory and want to use Perpetual Inventory, you need to follow a few steps to migrate.
Price Lists
A Price List is a collection of Item Prices either Selling, Buying, or both.
IONIC ERP lets you maintain multiple Selling and Buying Item Prices using Price Lists.
Price Lists can be used in scenarios where you have different prices for different zones (based on the shipping costs), for different currencies, etc. An Item can have multiple prices based on customer, currency, region, shipping cost, etc, which can be stored as different rate plans.
In IONIC ERP, all the Item Prices are stored separately. Buying Price for an item is different from Selling Price and thus they’re stored separately.
To access a Price List go to:
Home > Selling/Buying/Stock > Items and Pricing > Price List
1. How to use a Price List
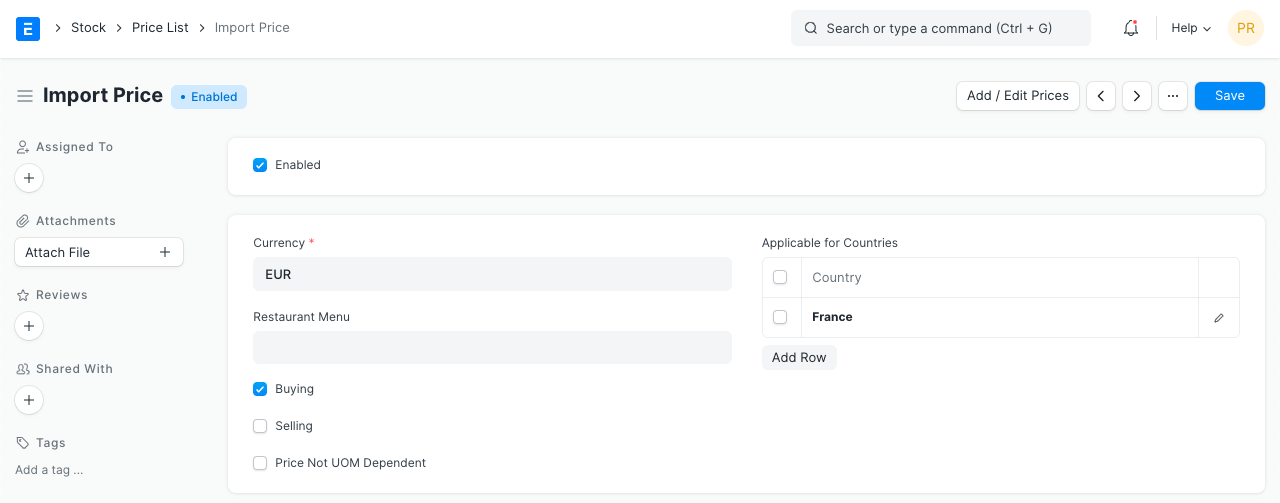
- Price Lists will be used when creating an Item Prices to track selling or buying price of an item.
- Specific countries can be assigned in the Price List.
- To disable specific Price List, untick the ‘Enabled’ checkbox. Disabled Price List will not be available for selection in the Sales and Purchase transactions.
- Price Not UOM Dependent: Consider an item, Tomatoes which you buy in Boxes and sell in Kilos. 1 Box = 10 Kilos and 1 Kilo buying price is 10rs. If this Box is unchecked and you select 1 Box in your transaction, the price will show up only for a Kilo since that’s the only Item Price saved.Now, if you tick this checkbox and make a transaction with a Box of Tomatoes, then the price will be automatically set as 100 since the price of 1 Box (10 Kilos) is 100.
- Standard Buying and Selling Price Lists are created by default.
Note: If you have multiple Price Lists, you can select a Price List or tag it to a Customer (so that it is auto-selected). Your Item Prices will automatically be updated from the Price List.
Stock Settings
You can set default settings for your stock related transactions from the Stock Settings page.
1. Item Naming By
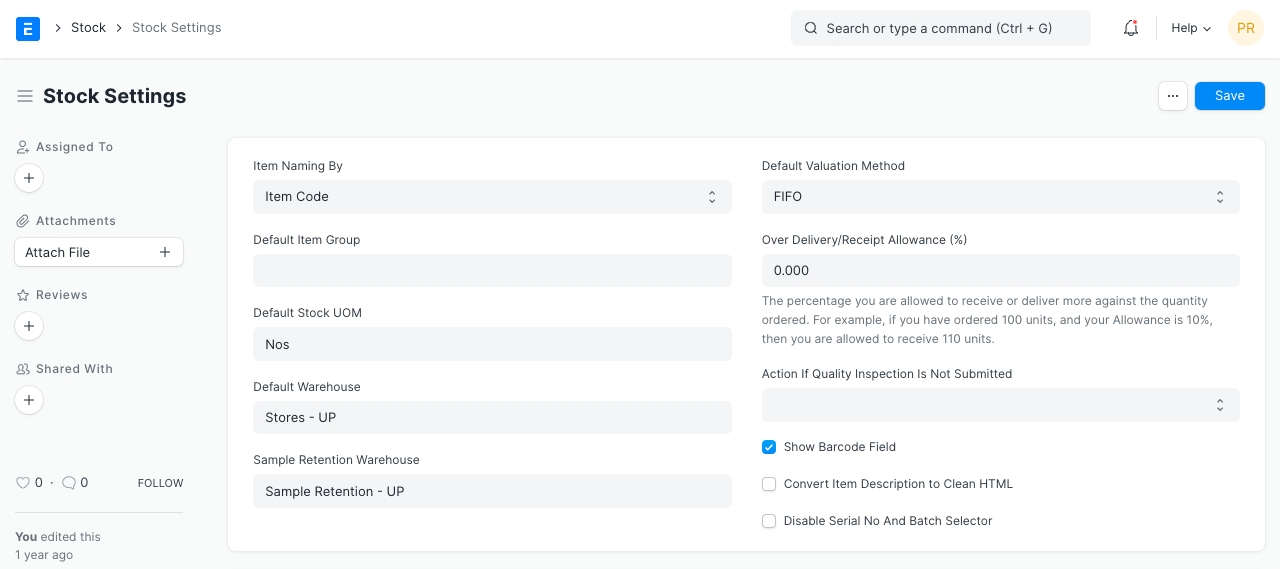
By default, the Item Name is set as per the Item Code entered. If you want Items to be named by a set Naming Series choose the ‘Naming Series’ option .
2. Defaults
2.1 Default Item Group
This will be the default item group allocated to a newly created item. Item groups are useful for classification and setting properties for the whole group. To know more visit the Item Group page.
2.2 Default Stock UOM
The default unit of measure for stock is set as numbers (Nos), it can be changed from here.
2.3 Default Warehouse
Set the default Warehouse from which the stock transactions are done. This will be fetched into the Default Warehouse in the Item master: 
2.4 Sample Retention Warehouse
This is the Warehouse where sample retentions are stored.
2.5 Default Valuation method
FIFO – first in first out or moving average valuation for your items. The default method is FIFO. If you select Moving Average, new Items will be valuated on Moving Average. You can change this when creating new Items in the Item form. Once the Item is saved, the Valuation Method cannot be changed. Read more here.
3. Limit Percent
This is the percentage you are allowed to receive or deliver more against the quantity ordered. For example: If you have ordered 100 units, Supplier sends 120 units and the percentage is set to 10% then you are allowed to receive 110 units. By default, this is set to 0.
4. Role Allowed to Over Deliver/Receive
Users with this role are allowed to over deliver/receive against orders above the allowance percentage
5. Show Barcode Field
A field to enter Barcode details for an item. If unticked, the field won’t be visible in the Item form.
6. Convert Item Description to Clean HTML
Usually, descriptions are copy-pasted from a website or Word/PDF file and they contain a lot of embedded styles. This messes up the Print view of your invoices or quotes.
To fix this, you can check “Convert Item Description to Clean HTML” in Stock Settings. This will ensure that when you save the Items, their descriptions will be cleaned up.
If you want to control your description, views, and allow any HTML to be embedded, you can uncheck this property.
7. Auto insert

7.1 Auto insert Price List rate if missing
Enabling this will insert an Item Price to the Price List of an Item automatically when using the Item in its first transaction. This price is fetched from the ‘Rate’ set in the first transaction with the Item. The Price List depends on whether you’re using a Purchase or Sales transaction.
Note that, the Item Price will be automatically inserted only in the first transaction if not already present.
If this is unticked, the ‘Standard Selling Rate’ set in the Item when creating the Item will be added as Item Price.
7.2 Automatically Set Serial Nos based on FIFO
Serial numbers for stock will be set automatically based on the Items entered based on first in first out. The Serial Numbers will be set automatically in transactions like Purchase/Sales Invoices, Delivery Notes, etc.
8. Allow Negative Stock
This will allow stock items to be displayed in negative values. Using this option depends on your use case. For example, the stock transaction entries are entered at the weekend or month-end. In this case, negative stock needs to be enabled so that you can continue with your purchase/sales transaction entries.
Instead of enabling negative stock globally you can also enable it for specific items.
9. Set Qty in Transactions based on Serial No Input
The quantity of items will be set according to the serial numbers. For example, if the user has added serial nos like A001, A002, and A003 then the system will set the quantity as 3 in the transaction.
10. Automatic Material Request

10.1 Raise Material Request when the stock reaches re-order level
This option is useful if you want to ensure a constant supply of raw materials/products and avoid shortage. A Material Request will be raised automatically when stock reached the re-order level defined in the Item form.
10.2 Notify by Email on the creation of automatic Material Request
An email will be sent to notify the User with the role ‘Purchase Manager’ when an automatic Material Request is created.
11. Inter Warehouse Transfer Settings

11.1 Enable customer warehouse for material transfer from Delivery Note and Sales Invoice
This option is useful when material transfer needs to be presented as a Delivery Note. For example, if there are statutory requirements where taxes are to be applied on each transfer of Material. It is easier to manage in a transaction like Delivery Note, than in the Stock Entry
11.2 Enable supplier warehouse for material transfer from Purchase Receipt and Purchase Invoice
Similar to above option this option is useful when material transfer needs to be presented as Purchase Receipt.
To know more about inter warehouse material transfer via Delivery Note and Purchase Invoice please refer this article Material Transfer From Delivery Note
12. Freeze Stock Entries
The User will not be allowed to make stock postings beyond this date.

- Stock Frozen Upto: A threshold date till which stocks will be frozen.
- Freeze Stocks Older Than [Days]: Stocks older than x days will be frozen. This is calculated based on the creation date of the item.
- Role Allowed to edit frozen stock: The role you choose here will be allowed to edit frozen stock.
13. Batch identification
Global setting for batches of stocks to be identified by a Naming Series. You can override this in the Item DocType.
Sales Billing
Sales Invoice
A Sales Invoice is a bill that you send to your Customers against which the Customer makes the payment.
Sales Invoice is an accounting transaction. On submission of Sales Invoice, the system updates the receivable and books income against a Customer Account.
To access the Sales Invoice list, go to:
Home > Accounting > Accounts Receivable > Sales Invoice
1. Prerequisites
Before creating and using a Sales Invoice, it is advised to create the following first:
- Item
- Customer
- Optional:
- Sales Order
- Delivery Note
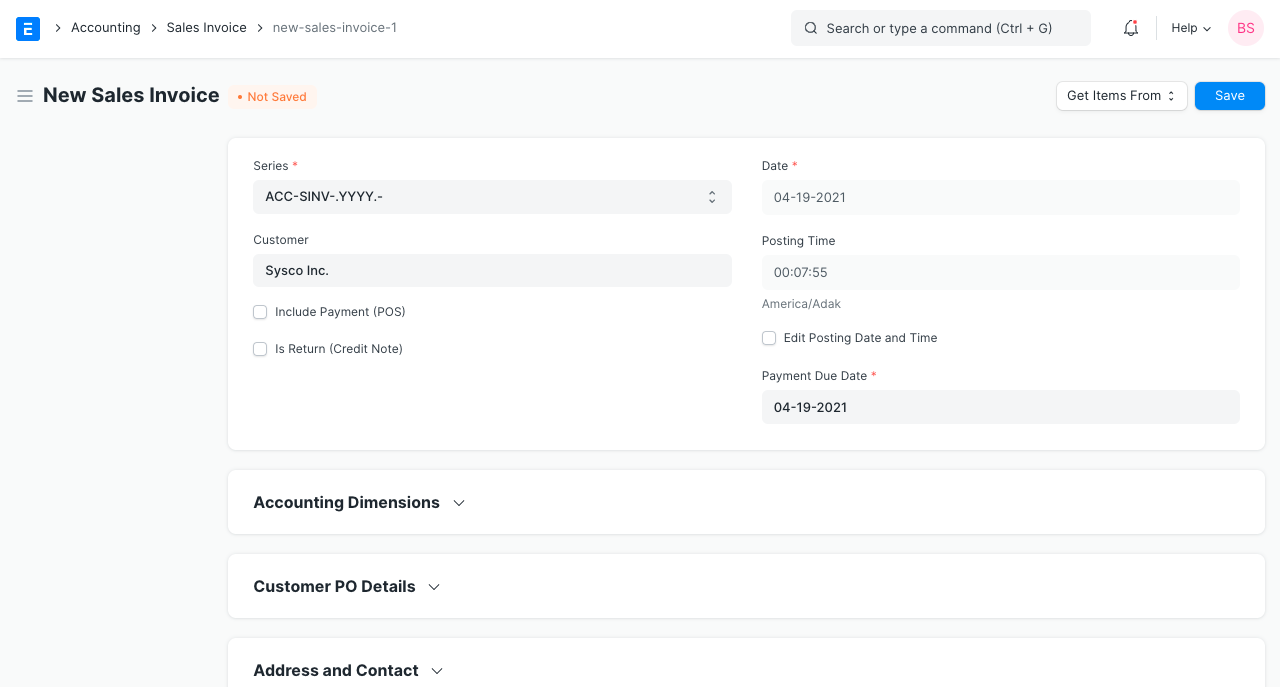
2. How to create a Sales Invoice
A Sales Invoice is usually created from a Sales Order or a Delivery Note. The Customer’s Item details will be fetched into the Sales Invoice. However, you can also create a Sales Invoice directly, for example, a POS invoice.
To fetch the details automatically in a Sales Invoice, click on the Get Items from. The details can be fetched from a Sales Order, Delivery Note, or a Quotation.
For manual creation, follow these steps:
- Go to the Sales Invoice list and click on New.
- Select the Customer.
- Set the Payment Due Date.
- In the Items table, select the Items and set the quantities.
- The prices will be fetched automatically if Item Price is added, else add a price in the table.
- The posting date and time will be set to current, you can edit after you tick the checkbox below Posting Time to make a backdated entry.
- Save and Submit.
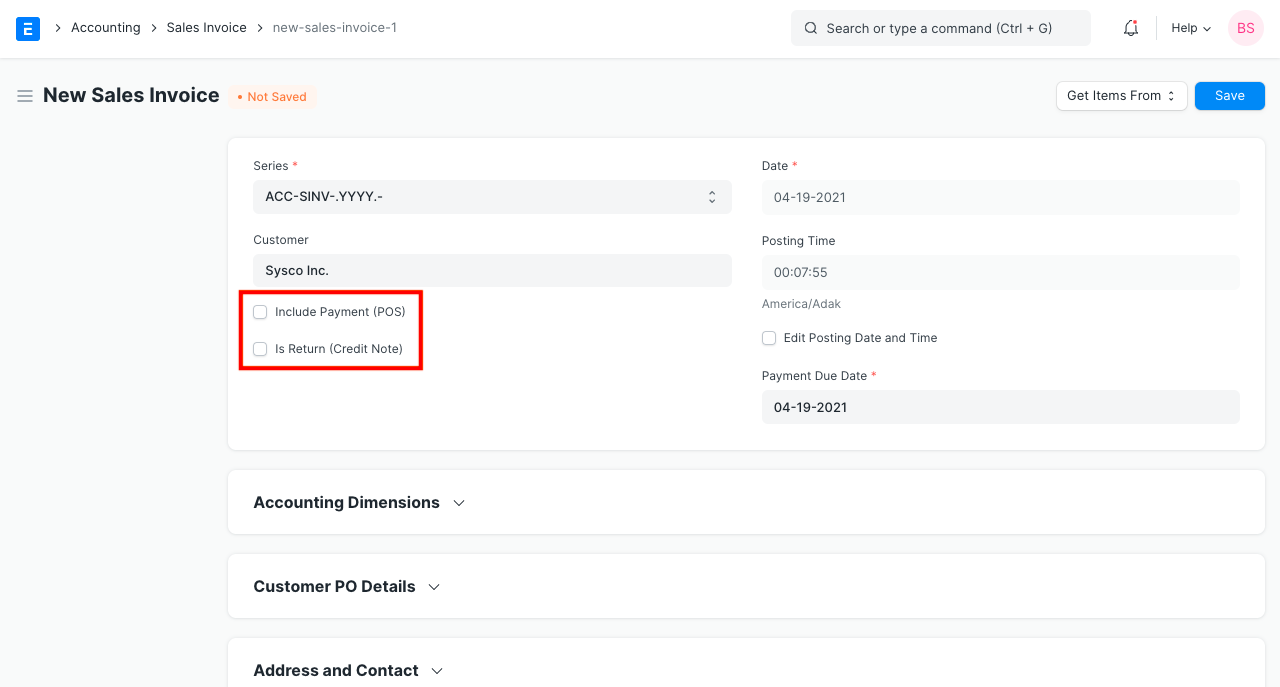
2.1 Additional options when creating a Sales Invoice
- Include Payment (POS): If this invoice is for retail sales / Point of Sale. Know more here.
- Is Return Credit Note: Tick this if the customer has returned the Items. To know more details, visit the Credit Note page.
For India: e-Way Bill No: According to GST rules, transporters need to carry an e-Way Bill. To know how to generate an e-Way Bill, visit this page.
2.2 Statuses
These are the statuses that are auto-assigned to Sales Invoice.
- Draft: A draft is saved but yet to be submitted.
- Submitted: The invoice is submitted to the system and the general ledger has been updated.
- Paid: Customer has made the payment and a Payment Entry has been submitted.
- Unpaid: Invoice is generated but payment is pending but within the payment due date.
- Overdue: Payment is pending beyond the payment due date.
- Canceled: The Sales Invoice is canceled due to any reason. Once an invoice is canceled, it’s impact on Account and Stock is undone.
- Credit Note Issued: The Item is returned by the Customer and a Credit Note is created against this invoice.
- Return: It is assigned to Credit Note created against the original Sales Invoice. Though you can also create a standalone Credit Note.
- Unpaid and Discounted: Payment is pending and any ongoing subscription has been discounted using Invoice Discounting.
- Overdue and Discounted: Payment is pending beyond the payment due date and any ongoing subscription has been discounted using Invoice Discounting.
3. Features
3.1 Dates
- Posting Date: The date on which the Sales Invoice will affect your books of accounts i.e. your General Ledger. This will affect all your balances in that accounting period.
- Due Date: The date on which the payment is due (if you have sold on credit). The credit limit can be set from the Customer master.
3.2 Accounting Dimensions
Accounting Dimensions lets you tag transactions based on a specific Territory, Branch, Customer, etc. This helps in viewing accounting statements separately based on the selected dimension(s). To know more, check help on Accounting Dimensions feature.
Note: Project and Cost Center are treated as dimensions by default.
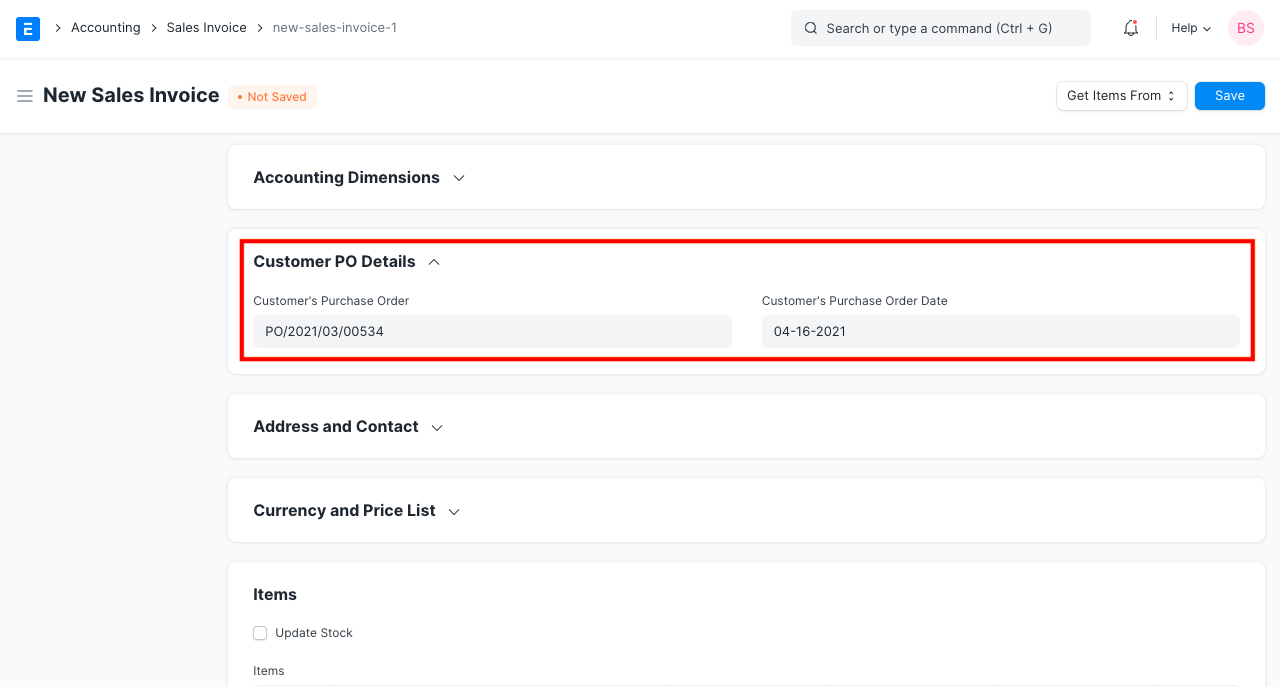
3.3 Customer PO Details
- Customer’s Purchase Order: Track customer’s PO No. received, primarily to prevent the creation of duplicate Sales Order or Invoice for the same PO received from the Customer. You can do more configuration related to customer’s PO No. validation in Selling Settings
- Customer’s Purchase Order Date: The date on which the Customer placed the Purchase Order.
3.4 Address and Contact
- Customer Address: This is the Billing Address of the Customer.
- Contact Person: If the Customer is a company, the person to be contacted is fetched in this field if set in the Customer form.
- Territory: A Territory is the region where the Customer belongs to, fetched from the Customer form. The default value is All Territories.
- Shipping Address: Address where the items will be shipped to.
For India, the following details can be recorded for GST purposes. You can capture these details in the Address and Customer master, which would be fetched in the Sales Invoice.
- Billing Address GSTIN
- Customer GSTIN
- Place of Supply
- Company GSTIN
3.5 Currency
You can set the currency in which the Sales Invoice order is to be sent. This can be fetched from the Customer master or preceding transactions like Sales Order.
- Wish to select Customer’s currency just for the reference of the Customer, whereas accounts posting will be done in the Company’s base currency only. Learn more here.
- Maintain separate receivable account in the Customer’s currency. The Receivable for this invoice should be posted in that currency itself. Read Multi Currency Accounting to learn more.
3.6 Price list
If you select a Price List, then the item prices will be fetched from that list. Ticking on ‘Ignore Pricing Rule’ will ignore the Pricing Rules set in Accounts > Pricing Rule.
Read Price List documentation to know more.
3.7 The Items table
Note: From version-13 onwards we have introduced immutable ledger which changes the rules for cancellation of stock entries and posting backdated stock transactions in ERPNext. Learn more here.
- Update Stock Ticking this checkbox will update the Stock Ledger on submitting the Sales Invoice. If you’ve created a Delivery Note, the Stock Ledger will be changed. If you’re skipping the creation of Delivery Note, tick this checkbox.
- Scan Barcode: You can add Items in the Items table by scanning their barcodes if you have a barcode scanner. Read documentation for tracking items using barcode to know more.
- Grant Commission: Grant a commission to Sales Person and Sales Partner on the net amount of this line item. If disabled, this line item will be ignored in the calculation of commission.
- The Item Code, name, description, Image, and Manufacturer will be fetched from the Item master.
- Discount and Margin: You can apply a discount on individual Items percentage-wise or on the total amount of the Item. Read Applying Discount for more details.
- Rate: The Rate is fetched if set in the Price List and the total Amount is calculated.
- Drop Ship: Drop Shipping is when you make the sales transaction, but the Item is delivered by the Supplier. To know more, visit the Drop Shipping page.
- Accounting Details: The Income and Expense accounts can be changed here you you wish to. If this Item is an Asset, it can be linked here. This is useful when you’re selling an Asset.
- Deferred Revenue: If the income for this Item will be billed over the coming months in parts, then tick on ‘Enable Deferred Revenue’. To know more, visit the Deferred Revenue page.
- Item Weight: The Item Weight details per unit and Weight UOM are fetched if set in the Item master.
- Stock Details: The following details will be fetched from the Item master:
- Warehouse: The Warehouse from where the stock will be sent.
- Available Qty at Warehouse: The quantity available in the selected Warehouse.
- Batch No and Serial No: If your Item is serialized or batched, you will have to enter Serial Number and Batch in the Items table. You are allowed to enter multiple Serial Numbers in one row (each on a separate line) and you must enter the same number of Serial Numbers as the quantity.
- Item Tax Template: You can set an Item Tax Template to apply a specific Tax amount to this particular Item. To know more, visit this page.
- References: If this Sales Invoice was created from a Sales Order/Delivery Note, it’ll be referred here. Also, the Delivered Quantity will be shown.
- Page Break will create a page break just before this Item when printing.
3.8 Timesheet
If you want to bill Employees working on Projects on an hourly basis (contract based), they can fill out Timesheets which consists of their billing rate. When you make a new Sales Invoice, select the Project for which the billing is to be made, and the corresponding Timesheet entries for that Project will be fetched.
If your Company’s Employees are working at a location and it needs to be billed, you can create an Invoice based on the Timesheet.
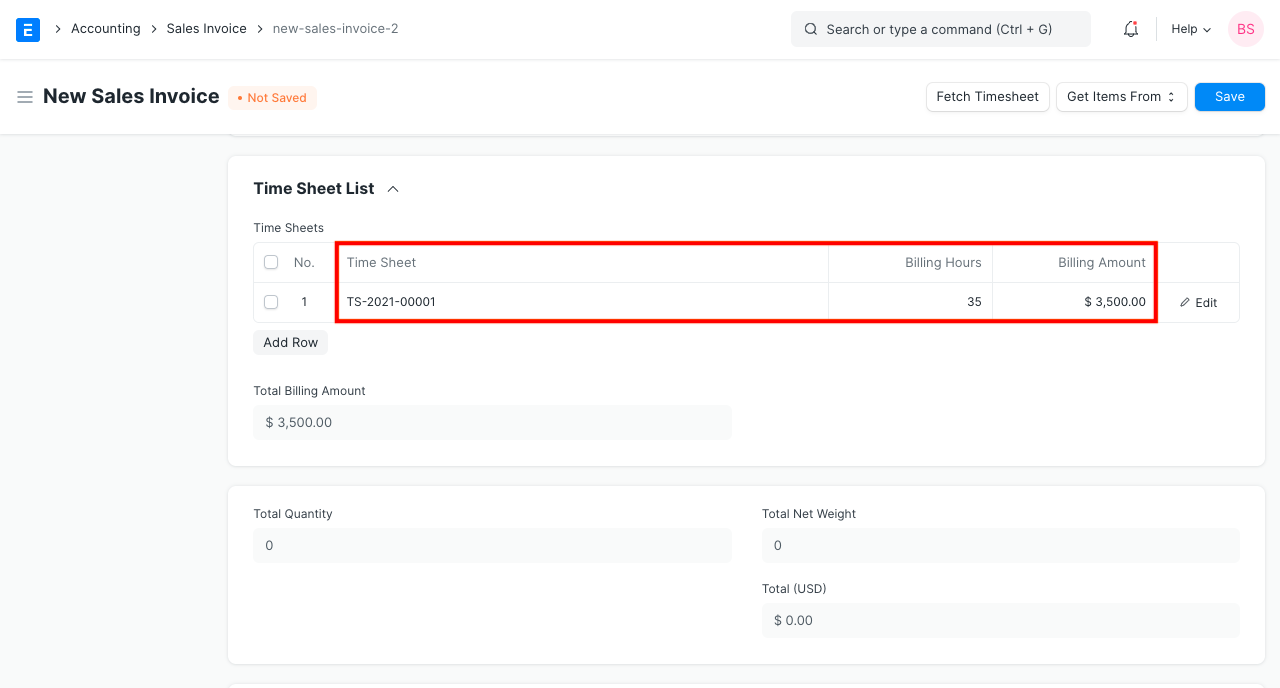
To know more, visit this page.
3.9 Taxes and Charges
The Taxes and Charges will be fetched from the Sales Order or Delivery Note.
Visit the Sales Taxes and Charges Template page to know more about taxes.
The total taxes and charges will be displayed below the table.
To add taxes automatically via a Tax Category, visit this page.
Make sure to mark all your taxes in the Taxes and Charges table correctly for an accurate valuation.
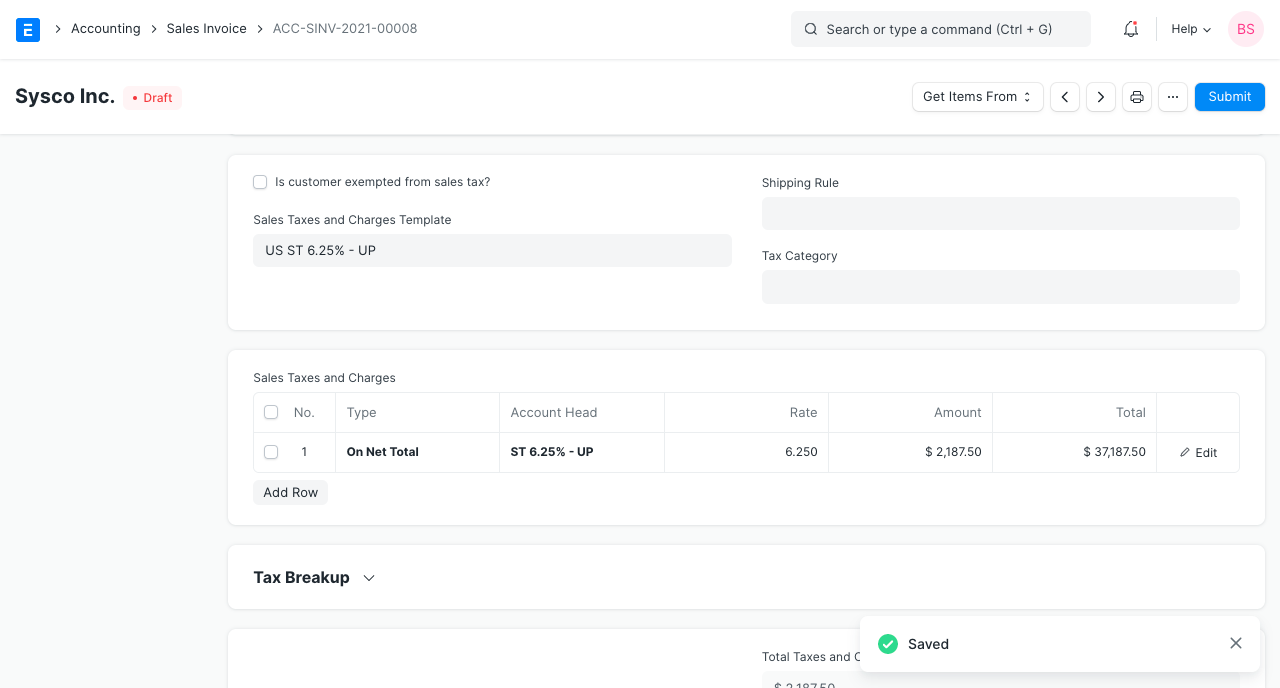
Shipping Rule
A Shipping Rule helps set the cost of shipping an Item. The cost will usually increase with the distance of shipping. To know more, visit the Shipping Rule page.
3.10 Loyalty Points Redemption
If the Customer is enrolled in a Loyalty Program, they can choose to redeem it. To know more, visit the Loyalty Program page.
3.11 Additional Discount
Any additional discounts to the whole Invoice can be set in this section. This discount could be based on the Grand Total i.e., post tax/charges or Net total i.e., pre tax/charges. The additional discount can be applied as a percentage or an amount. Visit the Applying Discount page for more details.

3.12 Advance Payment
For high-value Items, the seller can request an advance payment before processing the order. The Get Advances Received button opens a popup from where you can fetch the orders where the advance payment was made. To know more, visit the Advance Payment Entry page.
3.13 Payment Terms
The payment for an invoice may be made in parts depending on your understanding with the Supplier. This is fetched if set in the Sales Order. To know more, visit the Payment Terms page.
3.14 Write Off
Write off happens when the Customer pays an amount less than the invoice amount. This may be a small difference like 0.50. Over several orders, this might add up to a big number. For accounting accuracy, this difference amount is ‘written off’. To know more, visit the Payment Terms page.
3.15 Terms and Conditions
There may be certain terms and conditions on the Item you’re selling, these can be applied here. Read Terms and Condition documentation to know how to add them.
3.16 Transporter Information
If you outsource transporting Items to their delivery location, the transporter details can be added. This is not the same as drop shipping.
- Transporter: The Supplier who will transport the Item to your Customer. The transporter feature should be enabled in the Supplier master to select the Supplier here.
- Driver: You can add a Driver here who will drive the mode of transport.
The details are usually fetched from the Delivery Note.
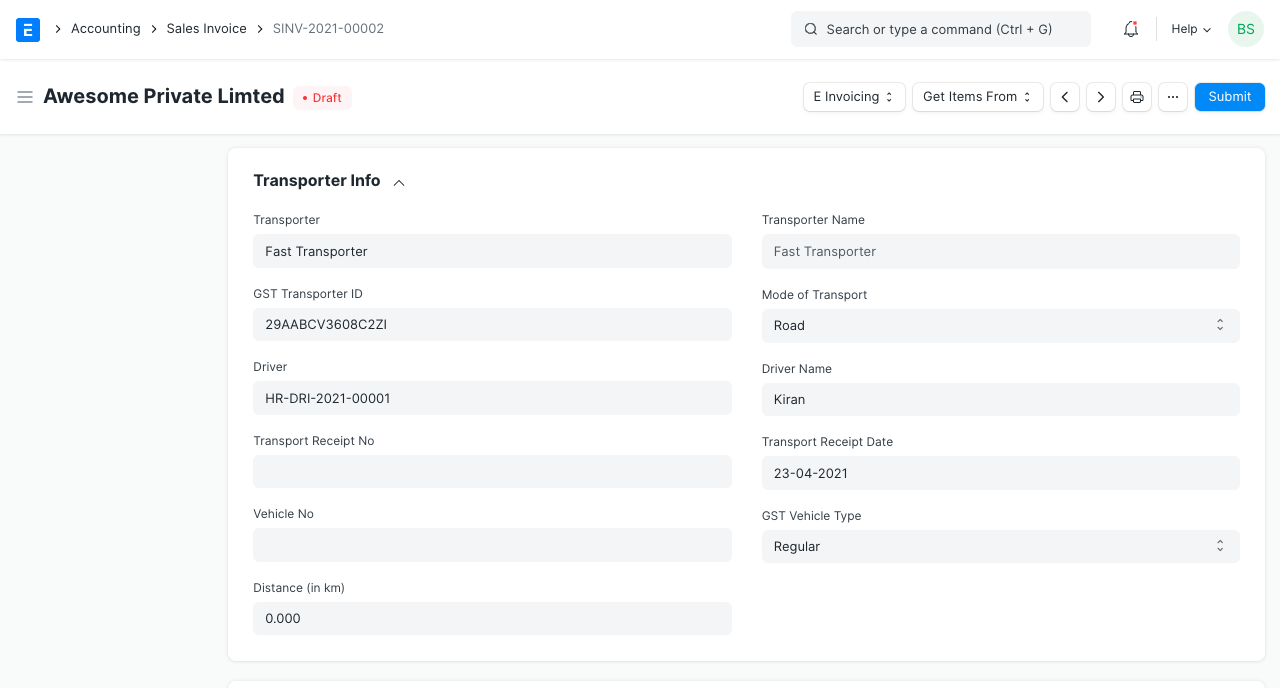
The following details can be recorded:
- Distance in km
- Mode of Transport whether road, air, rail, or ship.
For India, GST:
- GST Transporter ID
- Transport Receipt No
- Vehicle No The GST Vehicle Type can be changed
The Transport Receipt Date and Driver Name will be fetched.
3.17 Printing Settings
Letterhead
You can print your Sales Invoice on your Company’s letterhead. Know more here.
‘Group same items’ will group the same items added multiple times in the Items table. This can be seen when your print.
Print Headings
Sales Invoice headings can also be changed when printing the document. You can do this by selecting a Print Heading. To create new Print Headings go to: Home > Settings > Printing > Print Heading. Know more here.
There are additional checkboxes for printing the Sales Invoice without the amount, this might be useful when the Item is of high value. You can also group the same Items in one row when printing.
3.18 GST Details (for India)
The following details can be set for GST:
- GST Category
- Invoice Copy
- Reverse Charge
- E-commerce GSTIN
- Print Heading
3.19 More Information
The following Sales details can be recorded:
- Campaign: If this invoice is a part of on ongoing sales Campaign, it can be linked. To know more, visit the Campaign page.
- Source: A Lead Source can be tagged here to know the source of sales. To know more, visit the Lead Source page.
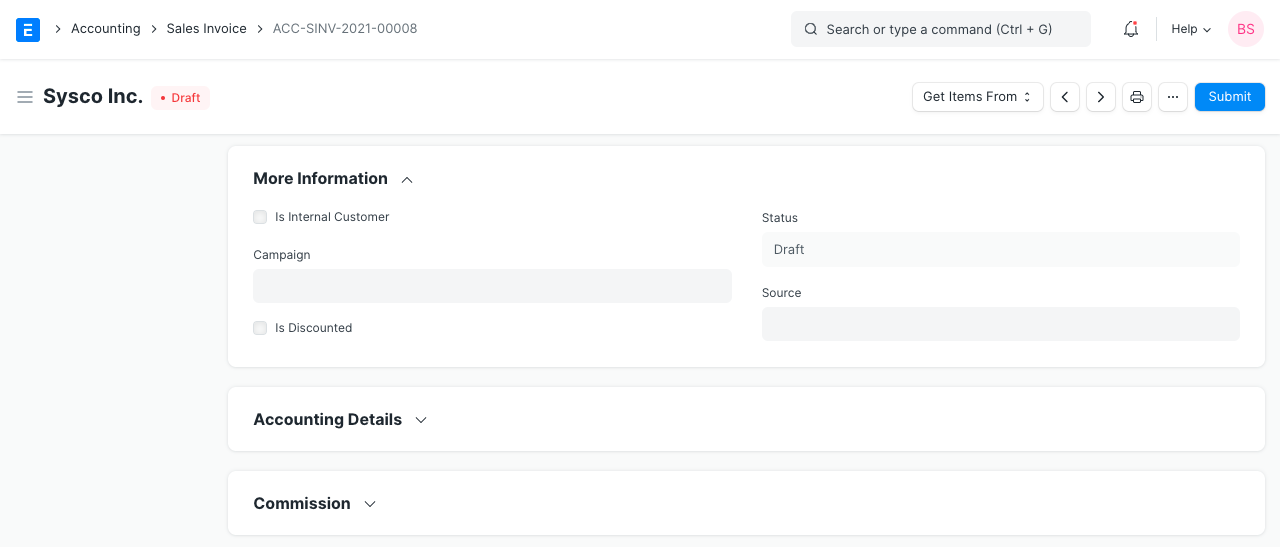
3.20 Accounting Details
- Debit To: The account against which receivable will be booked for this Customer.
- Is Opening Entry: If this is an opening entry to affect your accounts select ‘Yes’. i.e. if you’re migrating from another ERP to ERPNext mid year, you might want to use an Opening Entry to update account balances in ERPNext.
- Remarks: Any additional remarks about the Sales Invoice can be added here.
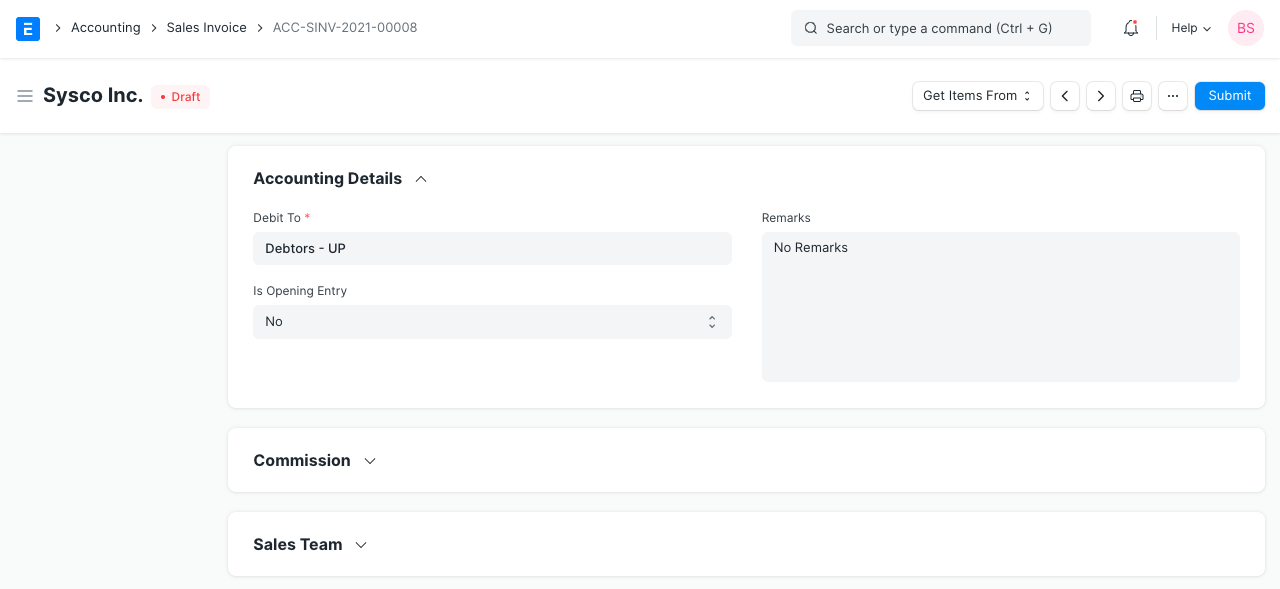
3.21 Commission
If the sale took place via one of your Sales Partners, you can add their commission details here. This is usually fetched from the Sales Order/Delivery Note.
3.22 Sales Team
Sales Persons: ERPNext allows you to add multiple Sales Persons who may have worked on this deal. This is also fetched from the Sales Order/Delivery Note.
3.23 Automatically Fetching Item Batch Numbers
If you are selling an Item from a Batch, ERPNext will automatically fetch a batch number for you if “Update Stock” is checked. The batch number will be fetched on a First Expiring First Out (FEFO) basis. This is a variant of First In First Out (FIFO) that gives the highest priority to the soonest to expire Items.
Note that if the first batch in the queue cannot satisfy the order on the invoice, the next batch in the queue that can satisfy the order will be selected. If no batch can satisfy the order, ERPNext will cancel its attempt to automatically fetch a suitable batch number.
3.24 POS Invoices
Consider a scenario where the retail transaction is carried out. For e.g: A retail shop. If you check the Is POS checkbox, then all your POS Profile data is fetched into the Sales Invoice and you can easily make payments.
Also, if you check the Update Stock the stock will also update automatically, without the need for a Delivery Note.
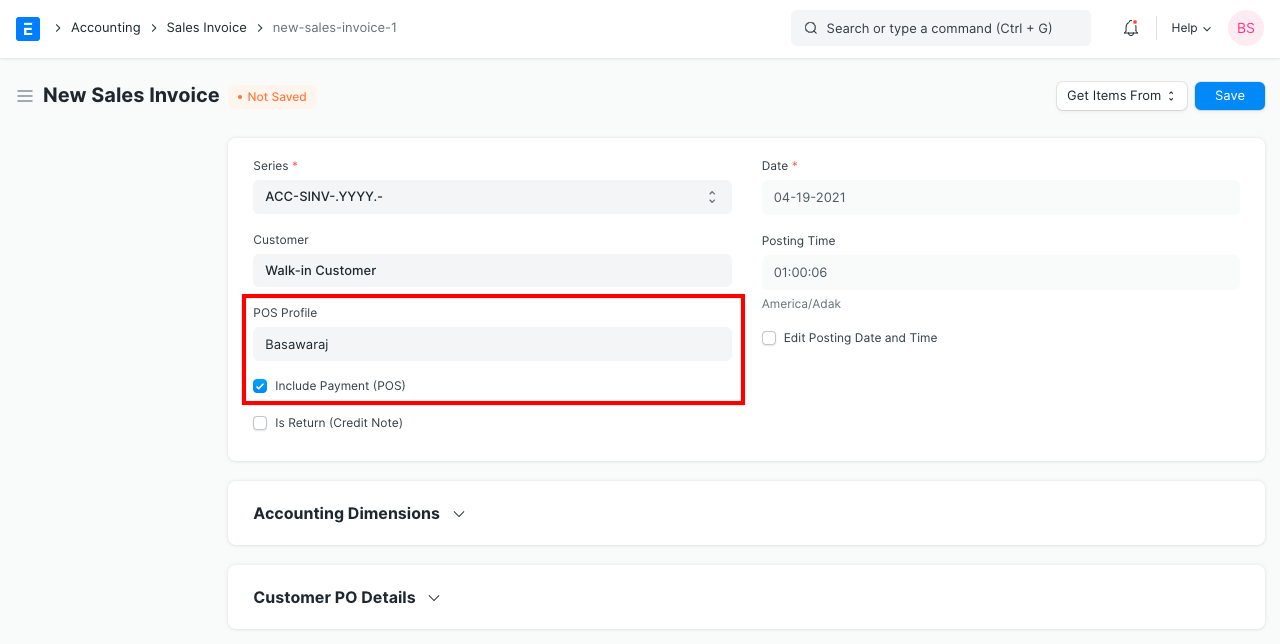
3.25 After Submitting
On submitting a Sales Invoice, the following documents can be created against it:
- Journal Entry
- Payment Entry
- Payment Request
- Invoice Discounting
- Delivery Note
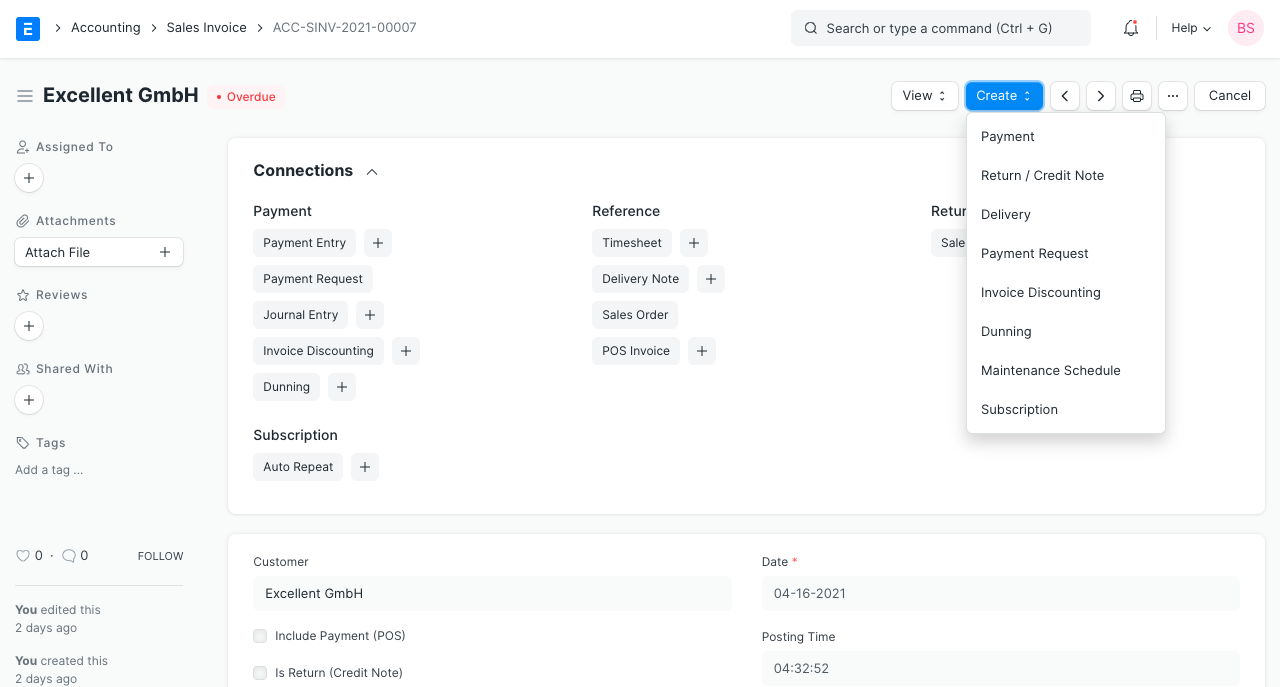
4. More
Accounting Impact
All Sales must be booked against an “Income Account”. This refers to an Account in the “Income” section of your Chart of Accounts. It is a good practice to classify your income by type (like product income, service income, etc). The Income Account must be set for each row of the Items table.
Tip: To set default Income Accounts for Items, you can set it in the Item or Item Group.
The other account that is affected is the Account of the Customer. That is automatically set from “Debit To” in the heading section.
You can also mention the Cost Centers in which your Income must be booked. Remember that your Cost Centers tell you the profitability of the different lines of business or product. You can also set a default Cost Center in the Item master. See also: Accounting Dimensions.
Accounting entries (GL Entry) for a typical double entry “Sale”:
When booking a sale (accrual):
- Debit: Customer (grand total)
- Credit: Income (net total, minus taxes for each Item)
- Credit: Taxes (liabilities to be paid to the government)
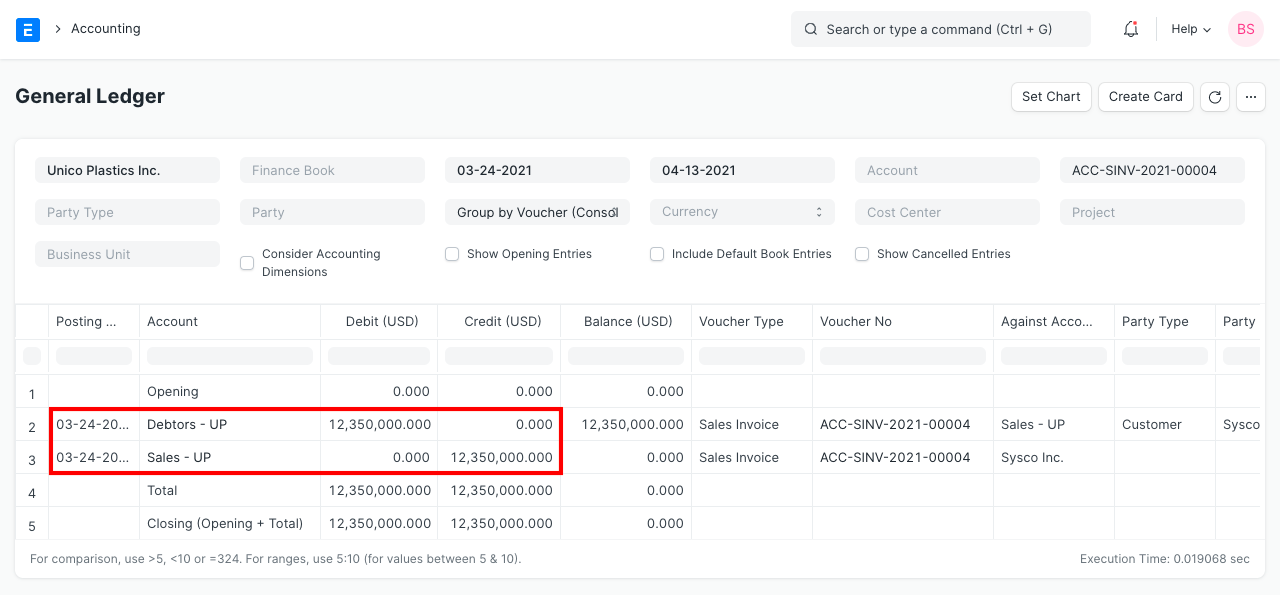
To see entries in your Sales Invoice after you “Submit”, click on “View Ledger”.
Inter Company Invoices
An Inter Company Journal Invoice is done between organizations that belong to the same group.
Along with creating Purchase Invoices or Sales Invoices for a single company, you can create inter-linked invoices for multiple companies.
For example, you can create a Purchase Invoice for a company say ‘Company ABC’, and create a Sales Invoice against this Purchase Invoice for another company say ‘Company XYZ’ and link them together.
1. How to create Inter Company Invoices
1.1 Setting up
- Go to: Accounts > Masters > Customer.
- Select the Customer who you would want to choose for the inter-linked invoice.
- Enable the checkbox, Is Internal Customer shown as follows:
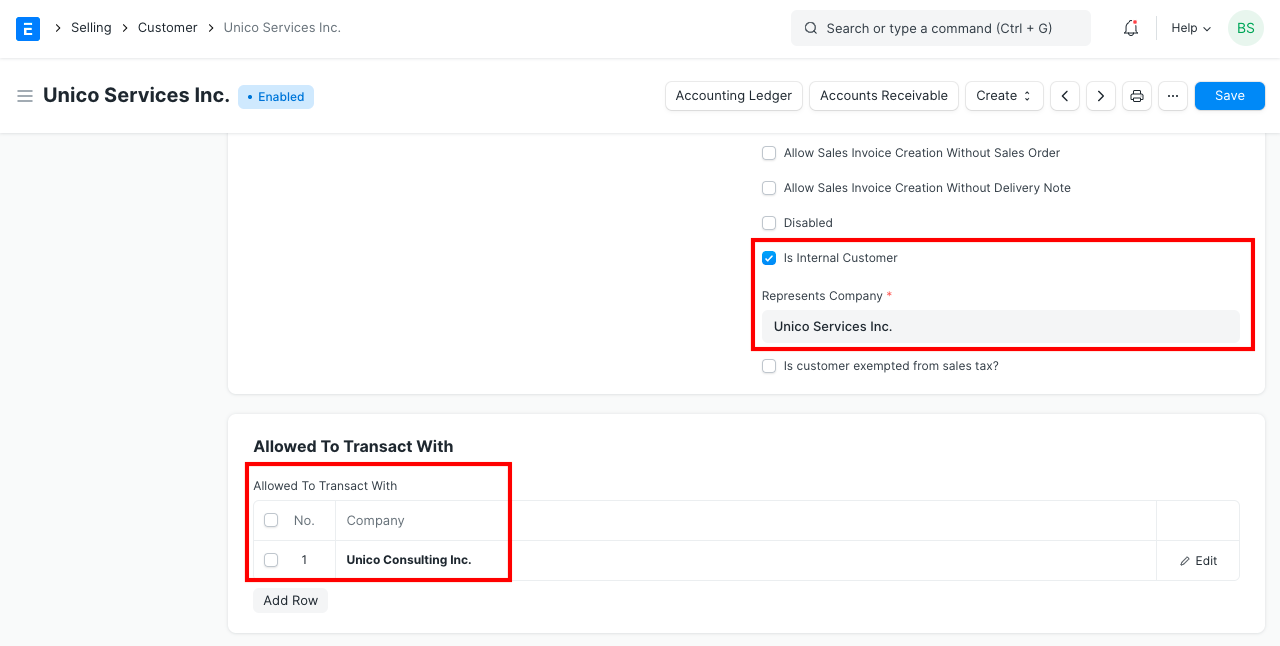
- Add the company which the Customer represents in the Represents Company field. This the company for which the Sales Invoice will be created.
- In the Allowed To Transact With table, add the company against which you will be creating a Purchase Invoice.
- Now, when you create a Purchase Invoice against company A (customer is from company B, the seller is company A), it’ll be linked to the Sales Invoice for company A created using this Internal Customer from company B.
- Now, you need to follow a similar procedure for setting up a Supplier for inter-linked invoices.
- Go to: Accounts > Masters > Select the Supplier
- Tick on Is Internal Supplier.
- In the Represents Company field, add the company which you added in the table Allowed To Transact With for the Customer.
- In the table Allowed To Transact With for the Supplier, add the company which the Customer represents. This is the company against which you are going to make an inter-linked Purchase Invoice.
- Here is a screenshot of the Supplier company to avoid any confusion:
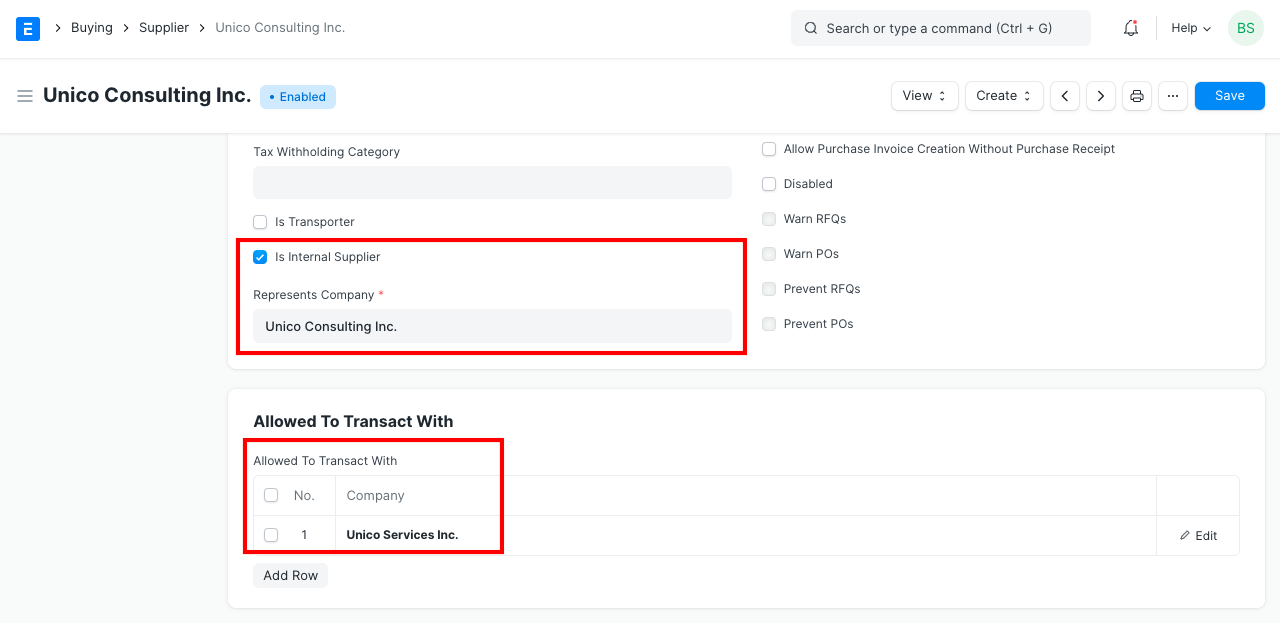
1.2 Creating the Invoice
- Now, create a new Sales Invoice, fill up the fields.
- Remember to select the Customer who is an internal customer and company from which he’s buying.
- Save and Submit the Invoice.
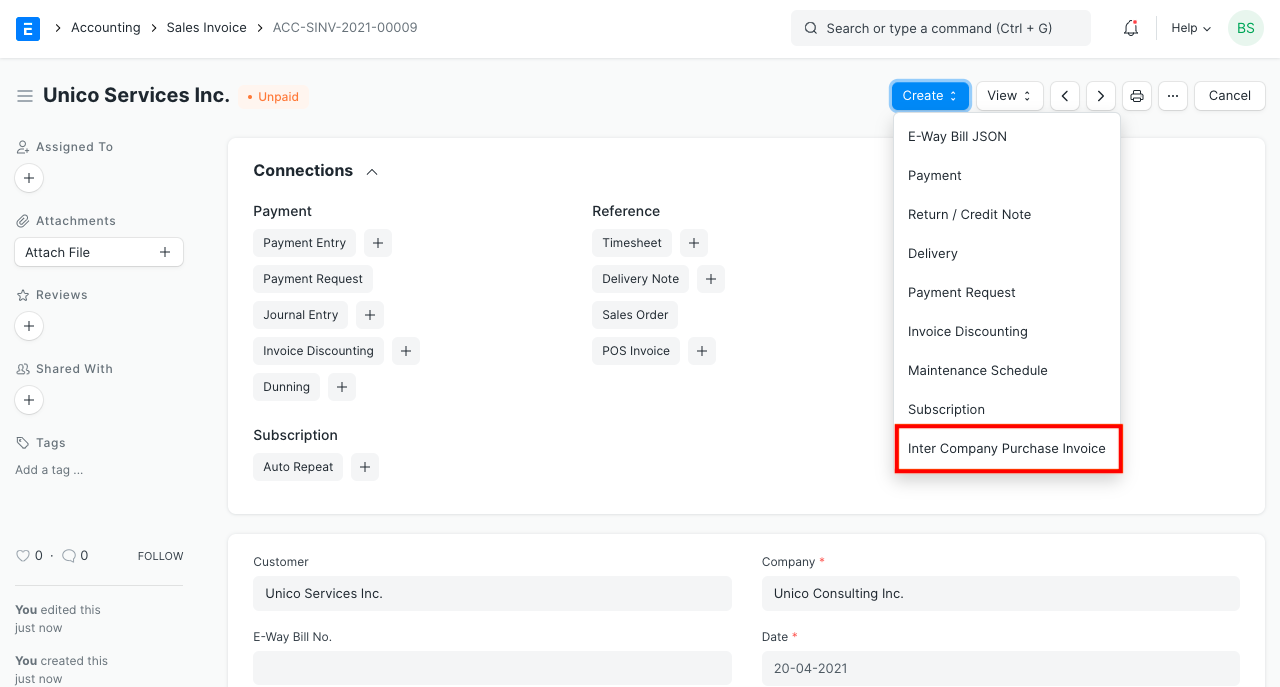
- Before you make an Inter Company Invoice you need to do the following:
- The selling and buying price between the companies should be in sync.
- Go to Stock > Price List, create a new Price List for inter company transactions.
- Tick both Selling and Buying in this new Price List.
- Go to Buying > Supplier > internal supplier, in the currency and price list section, set the price list to the new one just created.
- Do the same for the internal customer, i.e., set the price list to the new one.
- Now, you can make an inter company Purchase or Sales Invoice.
- Under the Make button dropdown, you will find a link Inter Company Invoice, on clicking the link, you will be routed to a new Purchase Invoice form page.
- Here, the supplier and company will be auto-fetched depending on the company you selected in the Sales Invoice. > Remember: There can only be a single Internal Supplier or Customer per company.
- Submit the invoice, done! Now, both the invoices are inter-linked. Also, on canceling any of the invoices, the link will break as well.
Note: An Inter Company invoice will only affect the accounting ledger and not the stock ledger. This is because the companies belong to the same group of companies.
You can follow the same process to create a Purchase Invoice and then an inter-linked Sales Invoice from the submitted Purchase Invoice.
Credit Note
A Credit Note is a document sent by a seller to the Customer, notifying that a credit has been made to their account against the goods returned by the buyer.
A Credit Note is issued for the value of goods returned by the Customer, it may be less than or equal to the total amount of the order.
1. How to make a Credit Note
The user can make a Credit Note against the Sales Invoice or they can directly make Credit Note from the Sales Invoice without reference. Note that to create a Credit Note, the invoice must be paid using a Payment Entry.
- Go to the respective Sales Invoice and click on Create > Return / Credit Note.
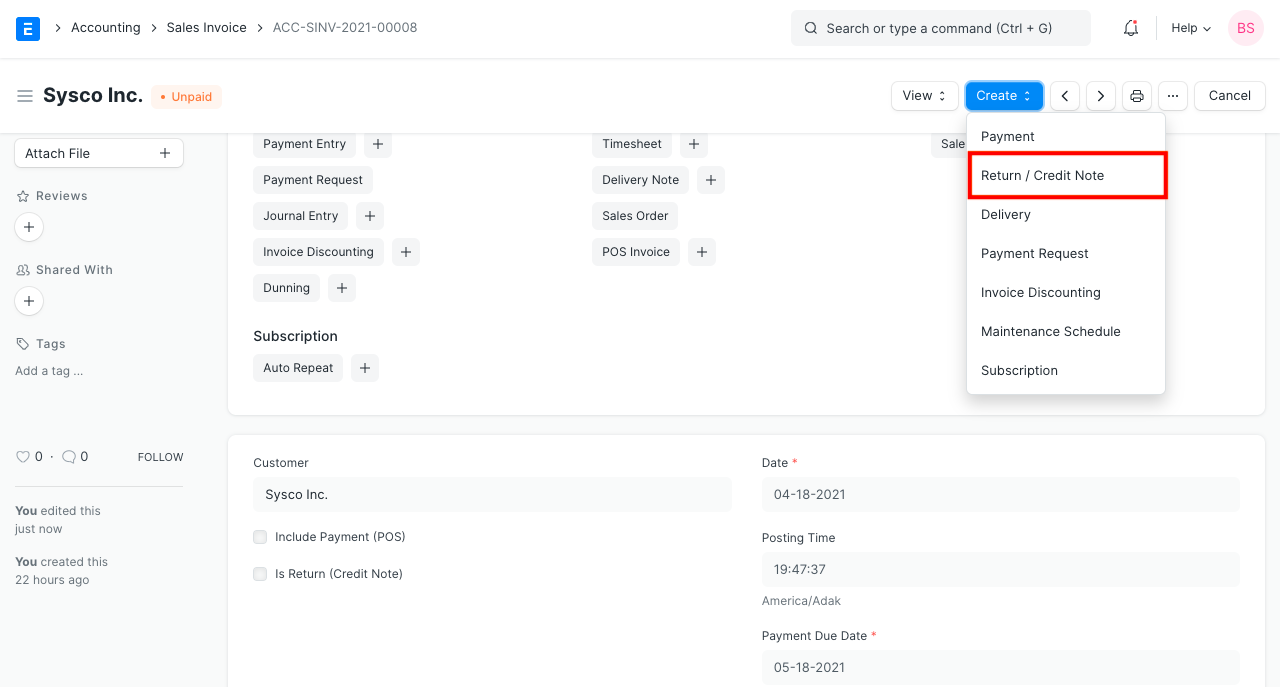
- The Customer and Item details will be fetched as set in the Sales Invoice.
- If the Customer had paid partially or fully, make a Payment Entry against the original Sales Invoice.
- Save and Submit.
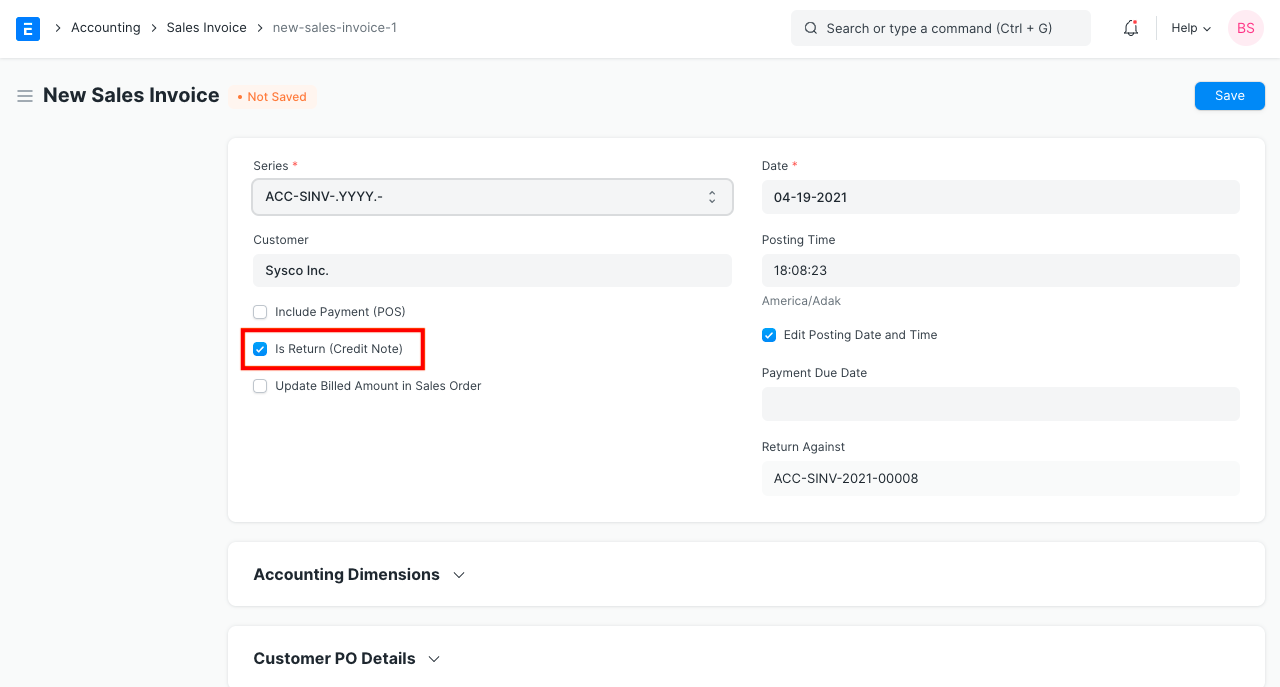
The Item quantity and Payment amount will be negative since it’s a return.
1.1 How does Credit Note affect ledger
Once a Payment Entry is created against the original Sales Invoice, the amount will be added to the Customer’s account in negative so that the next time they make a purchase, this amount will be adjusted.
This is how the ledger is affected after a payment entry against a returned invoice: 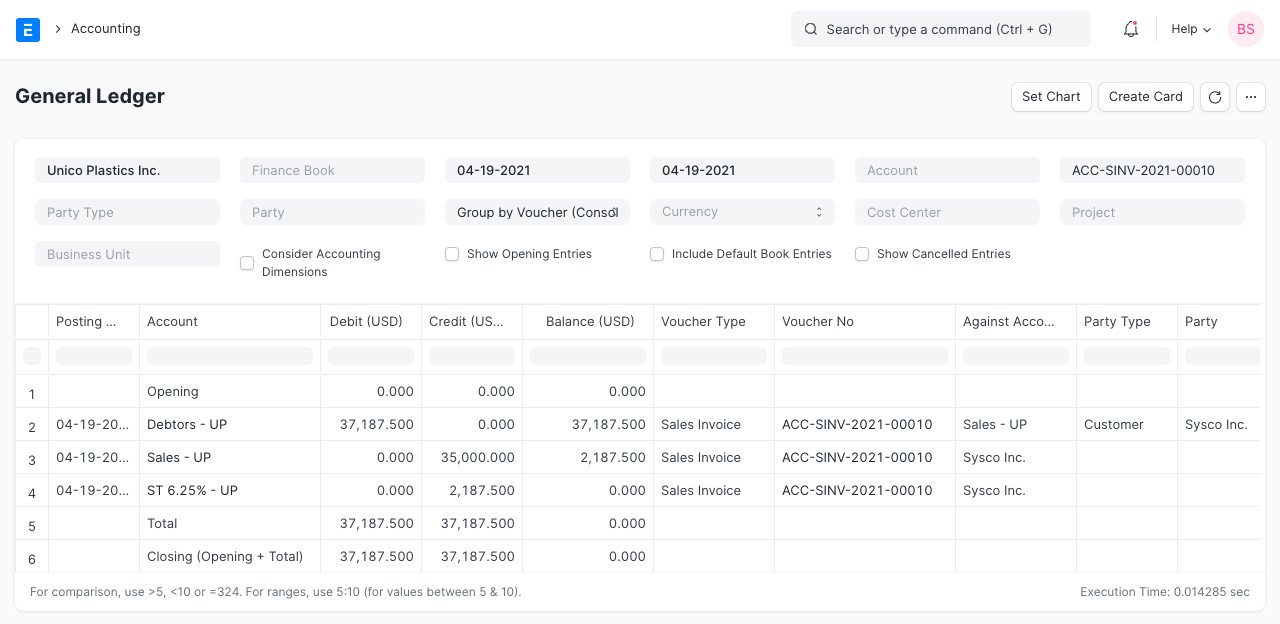
Refer the Sales Invoice page for any other details.
1.2 No payment was made against Sales Invoice
In case no payment was made against the original invoice, you could just cancel the Sales Invoice. But, if only 5 out of 10 Items are being returned from an invoice, creating a Credit Note is useful for updating the ledger.
2. Example
Customer Rohan had purchased PVC pipes worth Rs 300 + taxes and at the time of delivery, Customer found that the products were damaged. Now Rohan has returned the product a Credit Note will be issued.
Credit Note with payment entry in ERPNext for above example is as below:
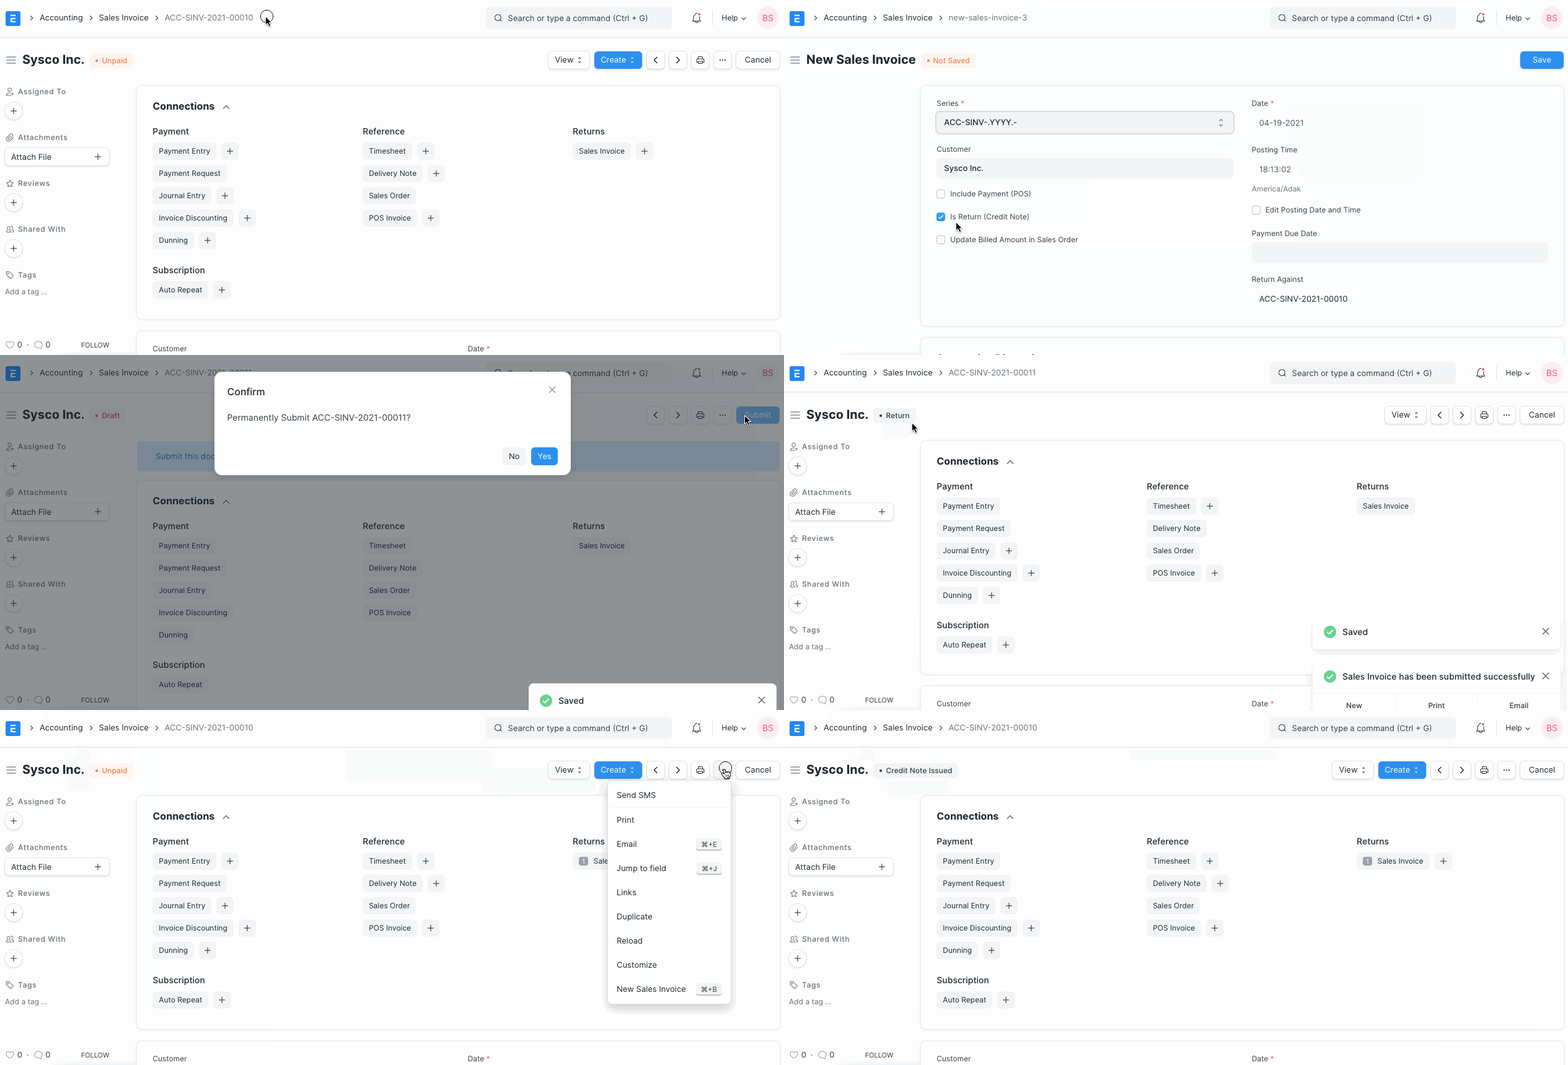
Credit Limit
Credit Limit is the maximum amount of credit you are willing to offer to a Customer.
A Credit Limit is the maximum amount of credit that a financial institution or other lender will extend to a debtor for a particular line of credit. From a Customer’s perspective, it is the maximum amount of goods or services they can get without paying money upfront.
You can set the Credit Limit in Customer, Customer Group, and in the Company. When a Sales Order or a Sales Invoice is submitted, the Credit Limit will be checked.
The order of precedence for checking Credit Limit is as follows:
- Credit Limit set in Customer
- Credit Limit set in Customer Group
- Credit Limit set in Company
1. How to Set Credit Limit
- Go to: Selling > Sales > Customer > Customer.
- Under Credit Limit and Payment Terms section, set the Credit Limit.
- If you leave the Credit Limit as the default, i.e., 0, it has no effect.
- Save.
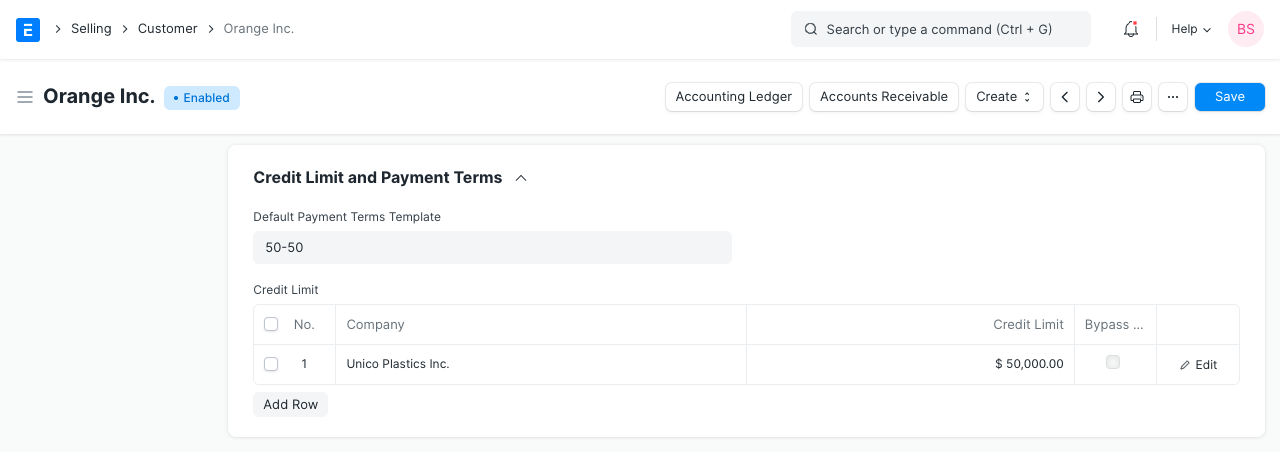
2. Features
2.1 Credit Controller
You can allow users with a specific role to override the Credit Limit validation and submit a Sales Order or Sales Invoice even when a Customer’s Credit Limit is fully utilized.
To set the Credit Controller role:
- Go to: Accounting > Settings > Accounts Settings
- Set the role in Credit Controller field.
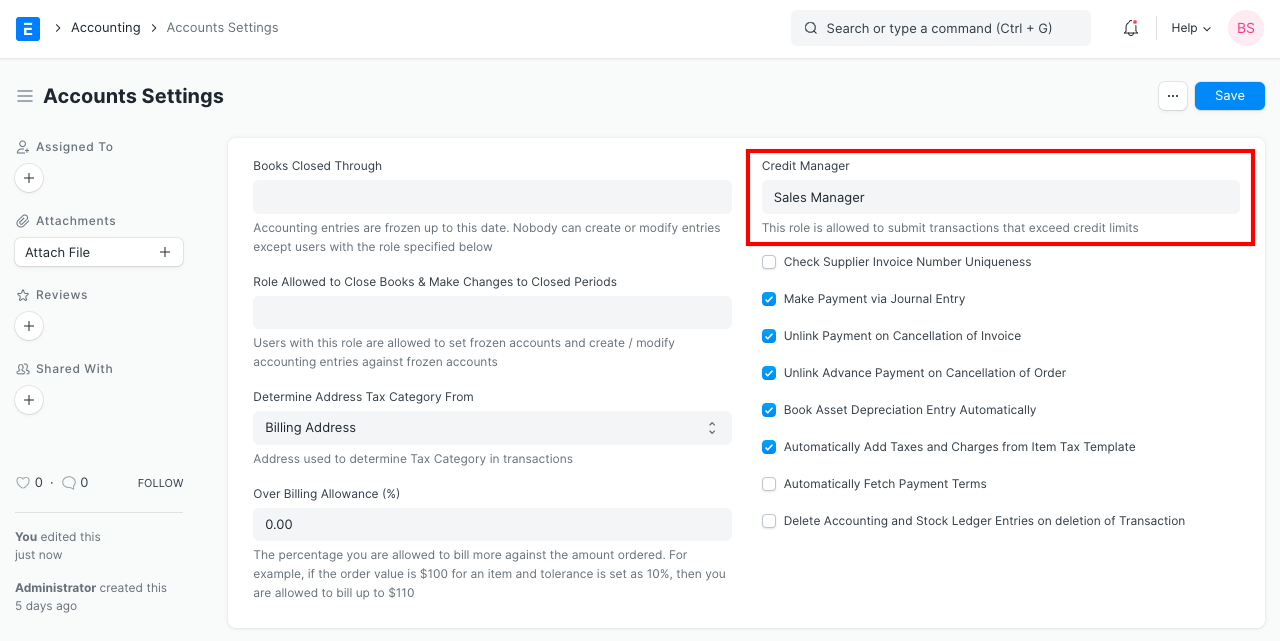
2.2 Bypass Credit Limit Check for Sales Order
For specific customers, you can set the credit limit to be checked against the cumulative amount of the outstanding sales invoices and not the sales orders. You can do so by ticking ‘Bypass credit limit check at Sales Order’ checkbox in ‘Credit Limit and Payment Terms’ section of the customer.

2.3 Credit Limit for Customer Groups
To set Credit Limit at Customer Group Level:
- Go to Selling > Customers > Customer Group.
- Open the Customer Group and set the Credit Limit.
2.4 Credit Limit for Company
On setting Credit Limit at the Company level, all the Customers will have this Credit Limit applied globally.
To set Credit Limit at Company level:
- Go to Accounting > Masters and Accounts > Company.
- Open the Company and set the Credit Limit.
Sales Return
A sold Item being returned is known as a Sales Return.
Businesses often return goods that are already sold. They could be returned by the customer due to quality issues, non-delivery on the agreed date, or any other reason.
1. Prerequisites
Before creating and using a Sales Return, it is advised that you create the following first:
- Item
- Sales Invoice or Delivery Note
2. How to create a Sales Return
- First open the original Delivery Note / Sales Invoice, against which Customer returned the Items.
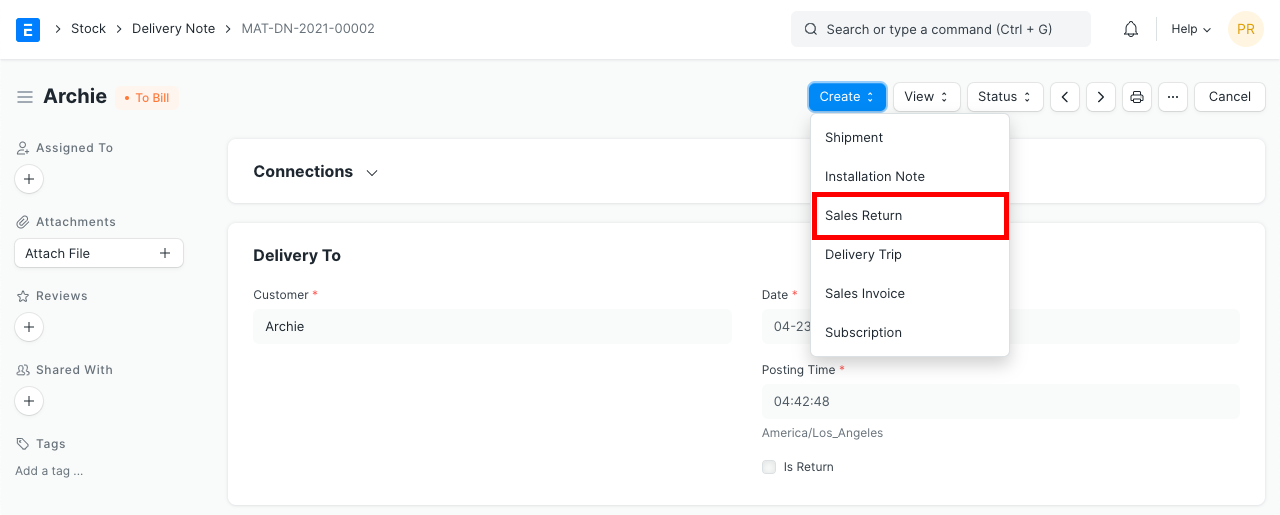
- Then click on ‘Create > Sales Return’, it will open a new Delivery Note with ‘Is Return’ checked, Items, Rate, and taxes will negative numbers.
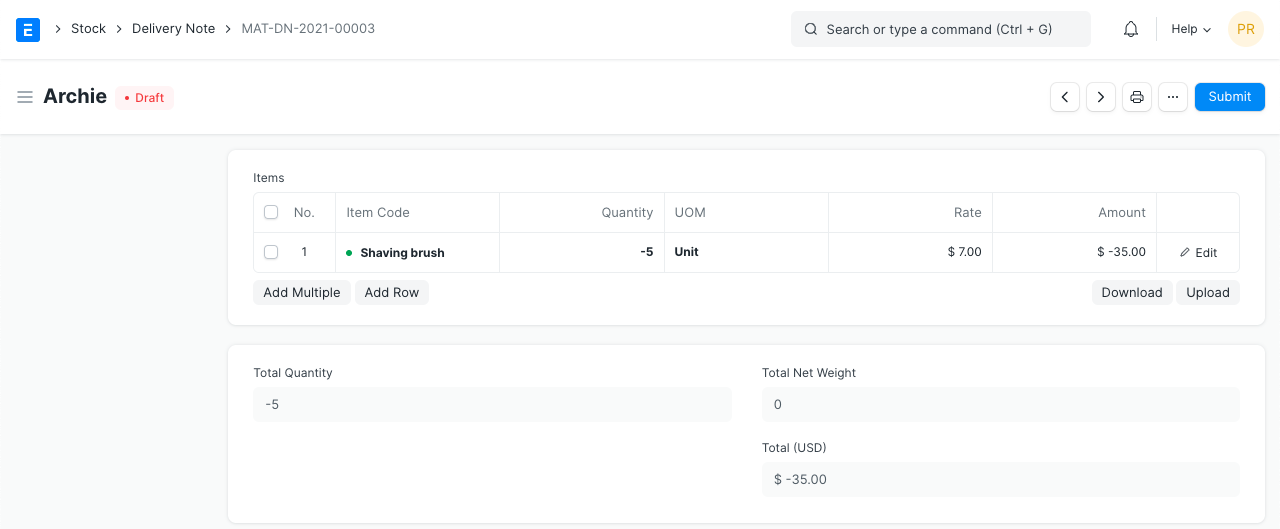
- You can also create the return entry against the original Sales Invoice, to return stock along with credit note, check “Update Stock” option in Return Sales Invoice.

- On submission of Return Delivery Note / Sales Invoice, the system will increase stock balance in the mentioned Warehouse. To maintain correct stock valuation, stock balance will go up according to the original purchase rate of the returned items.
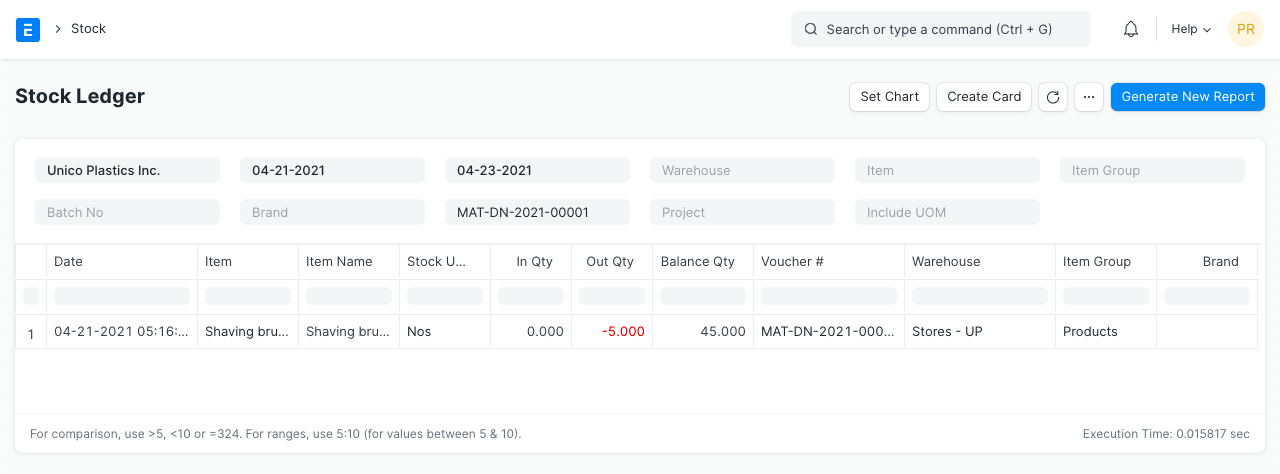
- In case of Return Sales Invoice, Customer account will be credited and associated income and tax account will be debited as shown in the Accounting Ledger.
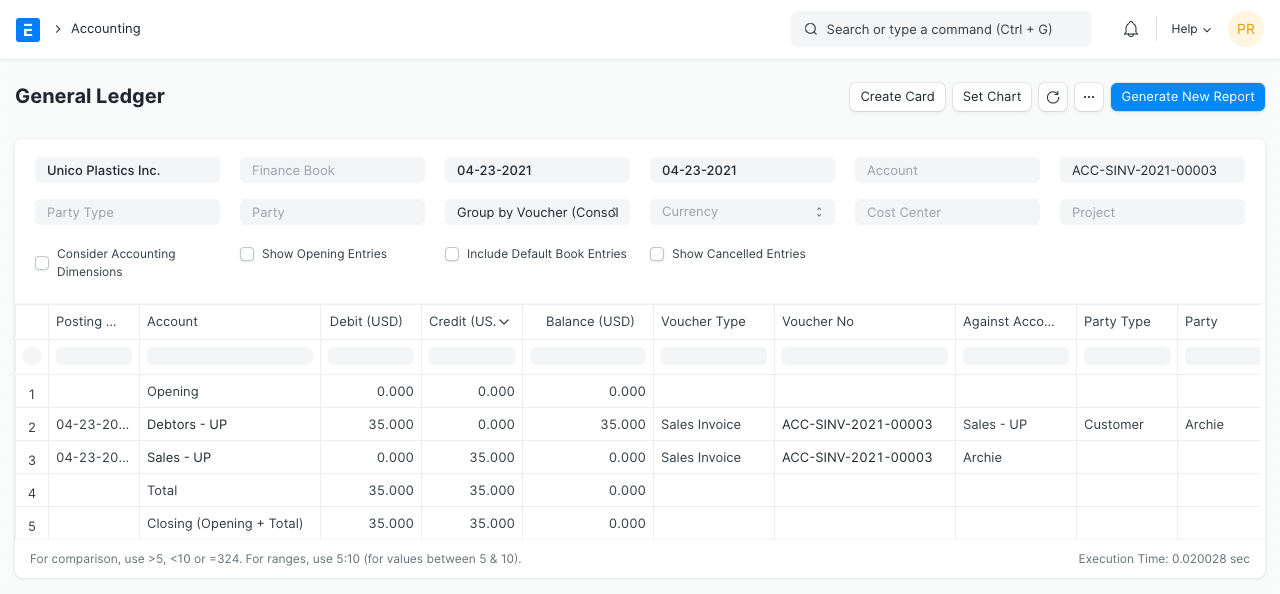
If Perpetual Inventory is enabled, the system will also post accounting entry against warehouse account to sync warehouse account balance with stock balance as per Stock Ledger.
3. Impact on Stock Return via Delivery Note
On Creating a Sales Return against a Delivery Note:
- The Returned Quantity in the original Delivery Note along with any Sales Order linked to it, is updated.
- The original Delivery Note’s status is changed to Return Issued if 100% returned:

Retail Operations
Point of Sale Profile
In IONIC ERP, a POS profile allows using the Point of Sale feature.
POS includes advanced features to cater to different functionality, such as inventory management, CRM, financials, warehousing, etc., all built into the POS software. Before modern POS, all of these functions were done independently and required the manual re-keying of information, which could lead to entry errors.
If you are in retail operations, you want your Point of Sale to be as quick and efficient as possible. To do this, you can create a POS Profile for a user.
To access the POS Profile list, go to:
Home > Retail > Retail Operations > Point-of-Sale Profile
1. How to create a POS Profile
- Go to the Point-of-Sale Profile and click on New.
- Enter a name for the profile.
- Select a Naming Series.
- Set a Write Off Account and Write Off Cost Center to which the transactions will be recorded.
- Set up payment modes in the table, the default will be cash if nothing is set here. Only the modes set here will be available when using POS. After adding payment modes, set one of them as the default payment method by ticking the checkbox.
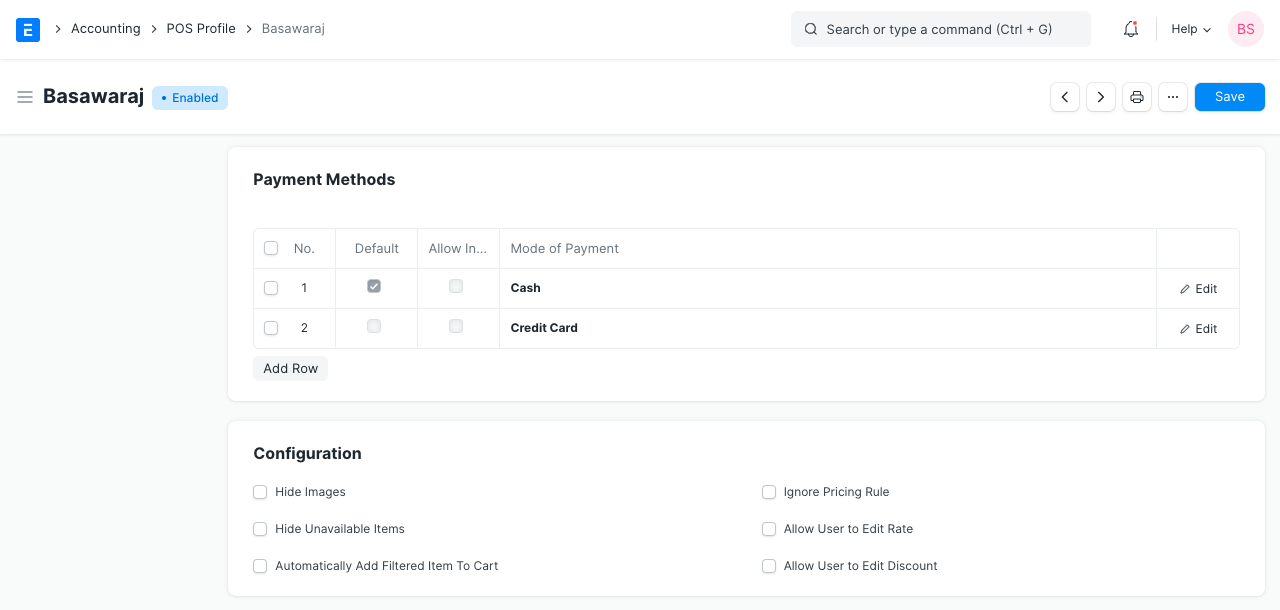
- Set the default amounts for the payment methods (recommended: 0).
- Save.
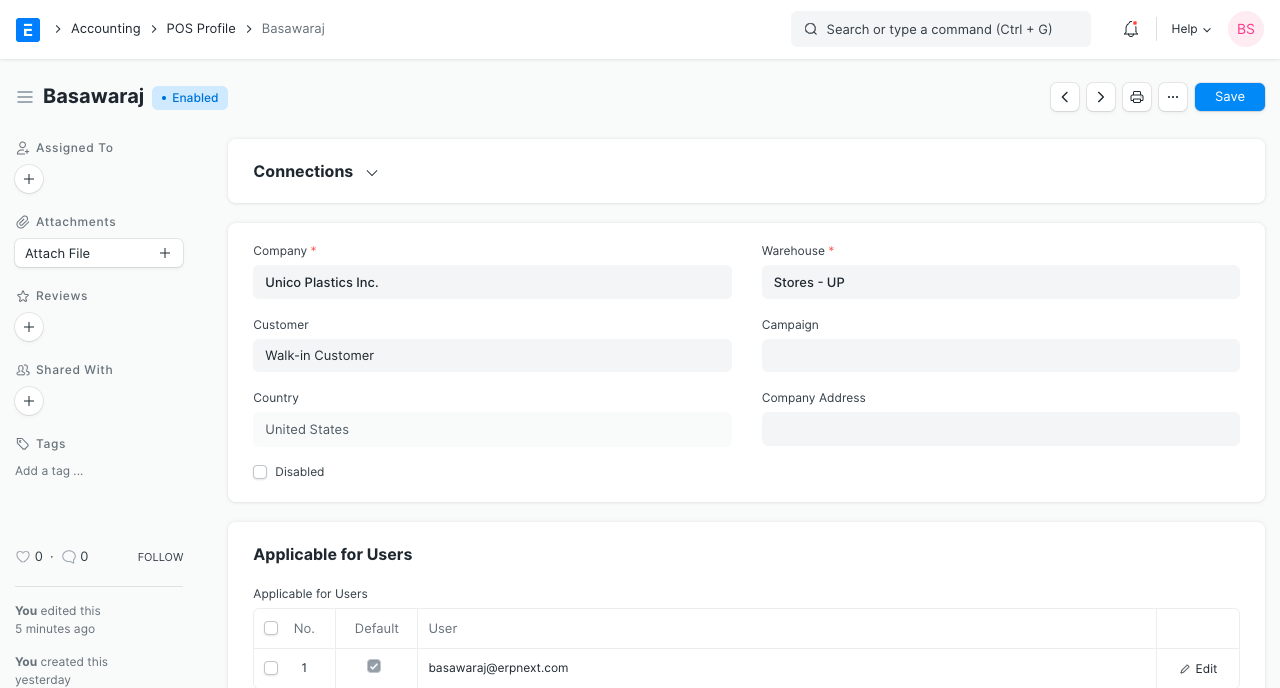
1.1 Additional options when creating a POS Profile
- Customer: Users can sell particular products to the particular Customers from the POS by adding item groups, customer groups in the POS Profile.
- Warehouse: The stock quantities in the selected Warehouse will be affected for POS transactions with this POS Profile.
- Campaign: A sales Campaign can be linked here to track total sales against it.
- Company Address: If the POS counter is set up at a Company branch, the address can be selected here.
- Update Stock: If enabled, the stock quantities will be affected when transactions are performed with the POS Profile. That is, Stock Ledger Entries will be made when you “Submit” this Sales Invoice thereby eliminating the need for a separate Delivery Note.
- Ignore Pricing Rule: Any active Pricing Rule will be ignored for this POS Profile.
- Allow Delete: In Offline POS, the data is cached. Ticking this checkbox will allow User to delete the Sales Invoice cached in the Draft stage.
- Allow user to edit Rate: The POS Profile user will be allowed to edit the ‘Rate’ of Items added in transactions.
- Allow user to edit Discount: The POS Profile user will be allowed to edit the ‘Discount’ of Items added in transactions.
- Allow Print Before Pay: This will allow the POS User to print an invoice before the payment is made.
- Display Items In Stock: The remaining quantity of Items from the selected Warehouse will be shown to the POS User.
2. Features
2.1 Applicable for Users
By default, all Sales Users can access the POS Profiles created in ERPNext. However, if you want only certain Users to access certain POS Profiles, you can add them to the table. Once even one User is set in the POS Profile, other Users cannot use this POS Profile for retail transactions.
Setting POS Profile as default: On ticking the Default checkbox in the table, the current POS Profile becomes the default POS Profile for that User. So, the next time the User logs into the system, the POS Profile will be set by default.

Note: If you specify a particular User, the POS setting will be applied only to that User. If the User option is left blank, the setting will be set for all users. To understand how POS works, visit the Point of Sale page.
2.2 Setting Item Group and Customer Group
On setting an Item Group/Customer Group in a POS Profile, the group will be automatically selected when making transactions with the POS Profile.

2.3 Print Settings

Print Format for Online
You can set a Print Format which will decide what the layout of the printed document will look like. To know more, visit the Print Format page.
Letterhead
You can print your POS Sales Invoice on your Company’s letterhead. Know more here.
Print Headings
POS Sales Invoice headings can also be changed when printing the document. For example, the heading can be ‘Invoice’, or ‘Bill’. You can do this by selecting a Print Heading. To create new Print Headings go to: Home > Settings > Printing > Print Heading. Know more here.
Terms and Conditions
There may be certain terms and conditions on the Item you’re selling, these can be applied here. To know about adding Terms and Conditions, click here.
2.4 Accounting
- Price List: A Price List stores the Item Prices. Setting a Price List here will fetch the Item Prices for the current POS Profile from that Price List.
- Currency: By default, this will be set according to the Company’s default currency. However, you can change it. In case you change the currency, remember to change the accounts too.
- Taxes and Charges: Selecting a Sales Taxes and Charges Template or Purchase Taxes and Charges Template here will automatically apply the taxes and charges to the POS transaction.
- Apply Discount On: Here you can set whether the discount is to be applied on the Grand Total (pre tax amount) or the Net Total (post tax amount).
- Tax Category: On selecting a Tax Category here, the Tax Rules associated with the Tax Category will be applied to each transaction performed from this POS Profile.
The following accounts can be set so that the general ledger is updated accordingly:
- Account for Change Amount
- Write Off Account
- Write Off Cost Center
- Income Account
- Expense Account
2.5 Accounting Dimensions
Accounting Dimensions lets you tag transactions based on a specific Territory, Branch, Customer, etc. This helps in viewing accounting statements separately based on the criteria selected. To know more, visit the Accounting Dimensions page.
Note: Cost Center is treated as a dimension by default.
Point of Sale
A Point of Sale refers to the time and place where a retail transaction takes place.
For retail operations, the delivery of goods, accrual of sale and payment all happens in one event, that is usually called the ‘Point of Sale’ (POS).
In IONIC ERP Sales Invoices can be generated from the POS. There are two steps to set up POS:
To access POS, go to:
Home > Retail > Retail Operations > POS
1. Prerequisites
Before creating and using Point of Sale, it is advisable to create the following first:
- POS Profile
2. How to create a POS Invoice
Once you set up a POS profile, you can start billing on POS.
- Go to POS and select a Customer.
- Add Items from the list displayed on the right by clicking on them.
- Ensure that the Item has a Selling Price set in the Item Price list.
- Edit the quantities as needed.
- In order to edit Rate and Discount, you need to enable them in the POS Profile.
- A default Warehouse needs to be set to complete the transaction. If Warehouse is set in both Item and POS profile, the one in POS Profile will be given preference.
- Do note that you need to have Items in your Warehouse before you can sell. If Items are not available, a red dot will be shown next to the Item when selected.
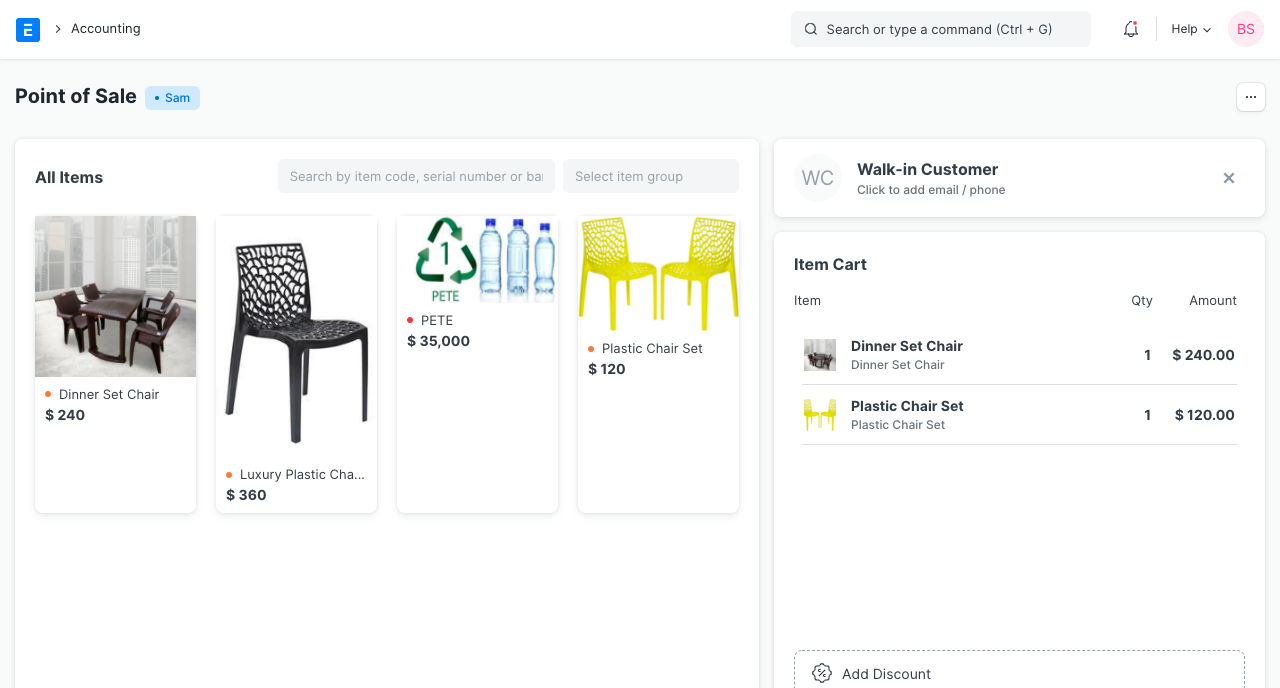
- When all Items are added, cross check the net and grand totals and also the total quantity in the summary at the bottom.
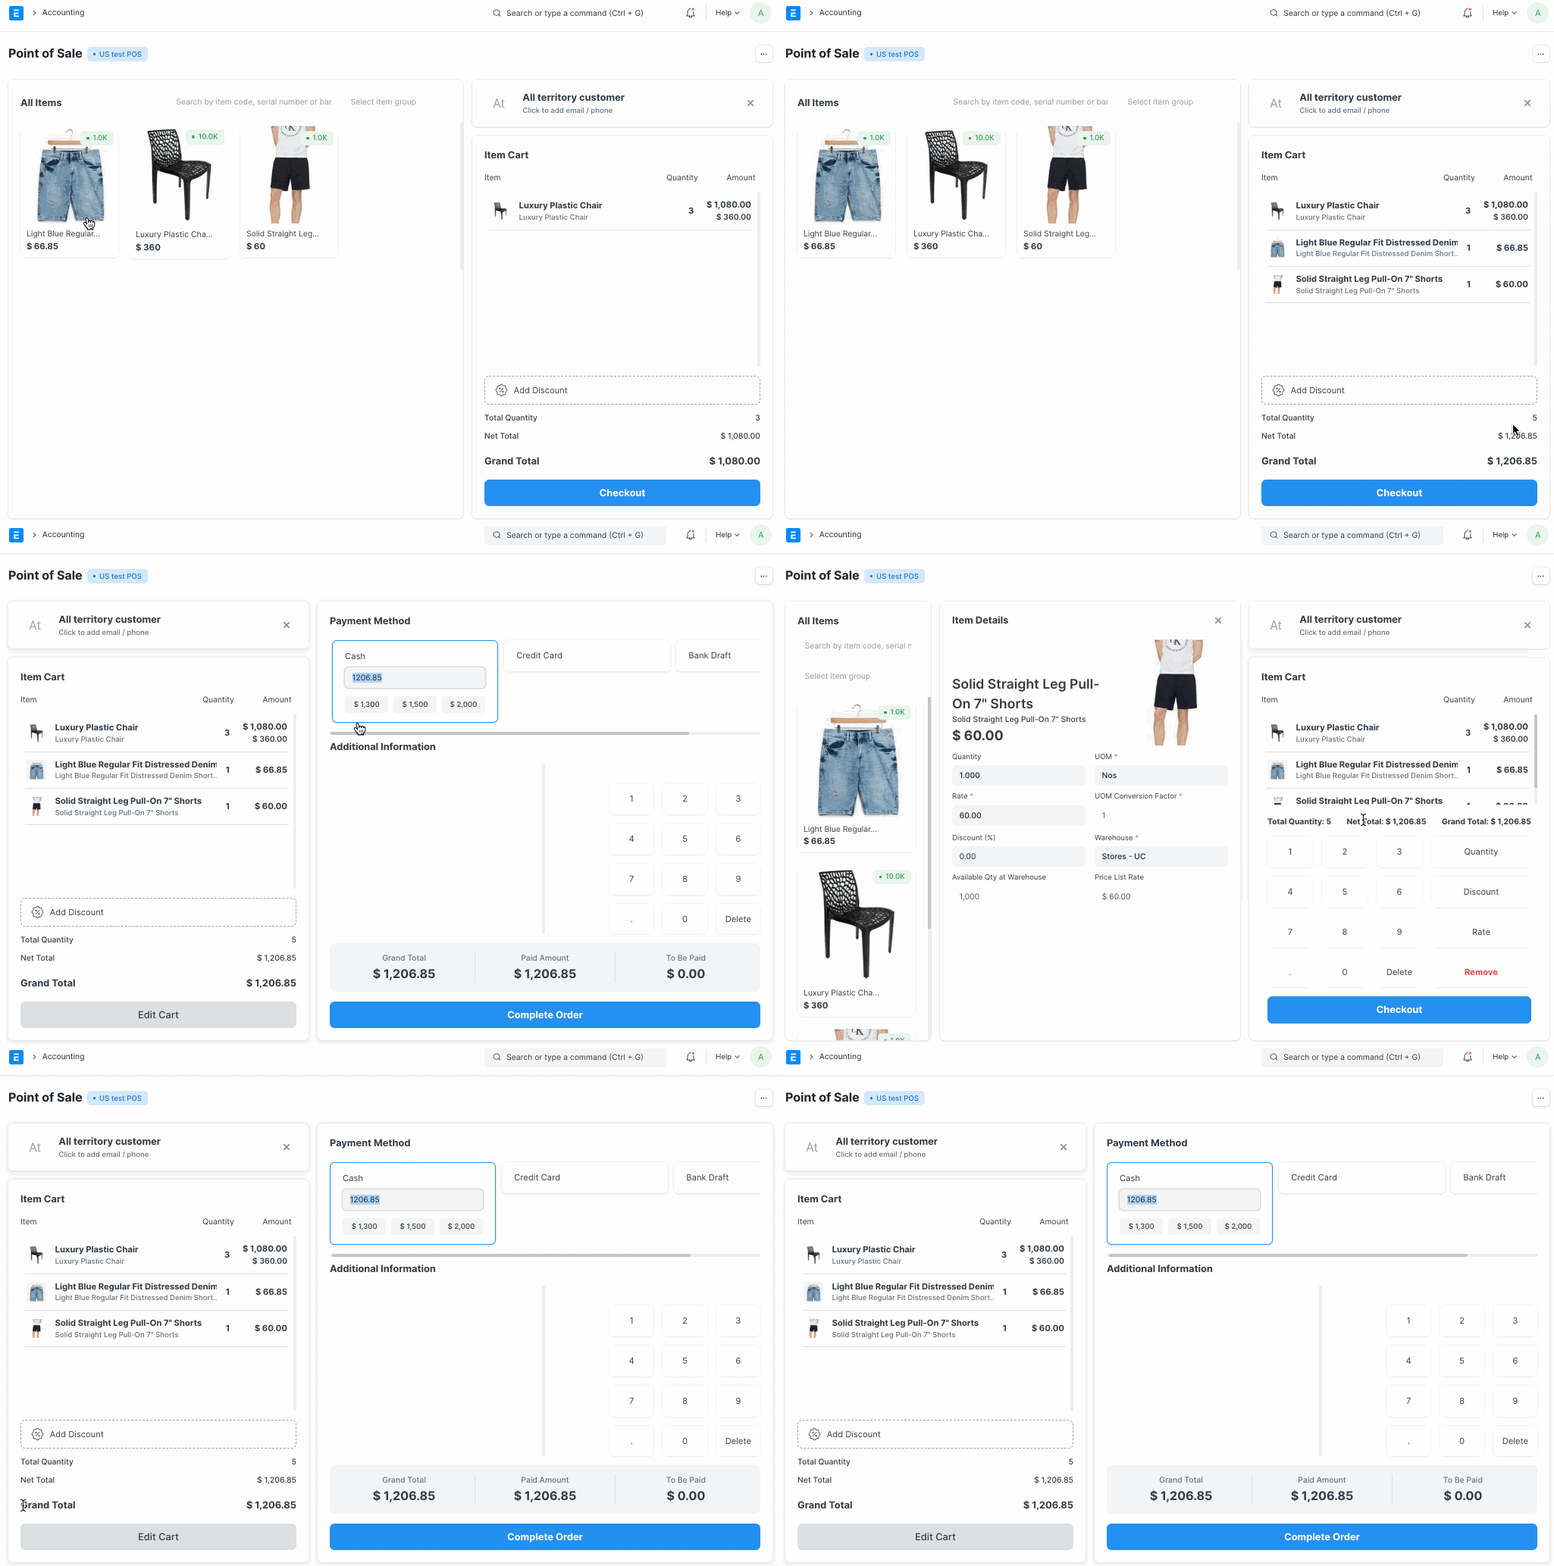
- Select the payment mode and click on Complete Order. You’ll be asked to submit the Sales Invoice.
- You can then print the POS invoice.
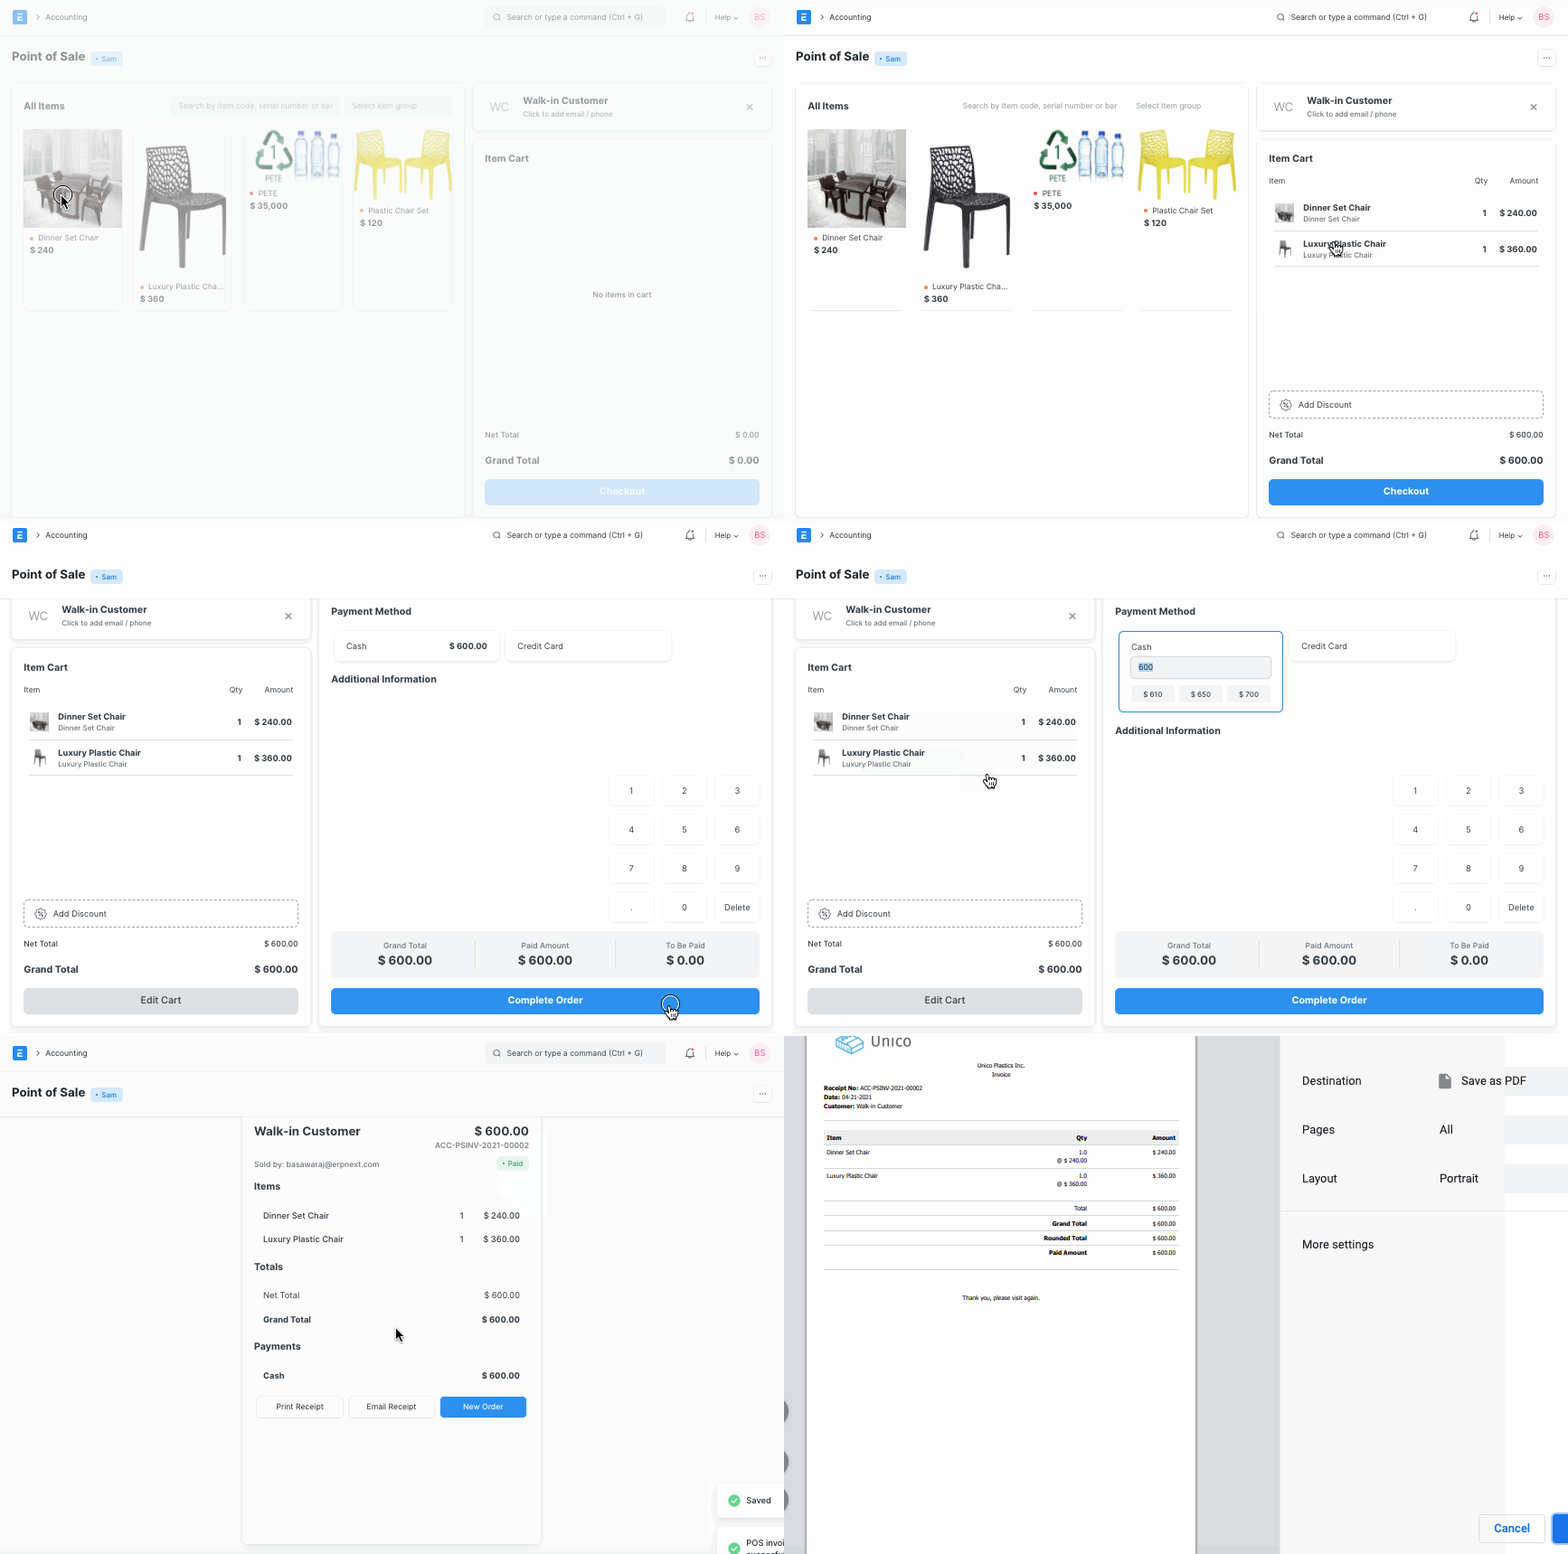
After the Sales Invoice is submitted, you can either print or email it directly to the customer.
2.2 Adding an Item
At the billing counter, the retailer needs to select Items which the Customer buys. In the POS interface you can select an Item by two methods. One, is by clicking on the Item image and the other, is through the Barcode / Serial No.
- Select Item: To select a product click on the Item image and add it into the cart. A cart is an area that prepares a customer for checkout by allowing to edit product information, adjust taxes and add discounts.
- Barcode / Serial No: A Barcode / Serial No is an optical machine-readable representation of data relating to the object to which it is attached.

- Enter Barcode / Serial No in the box as shown in the image below and pause for a second, the item will be automatically added to the cart.
Tip: To change the quantity of an Item, enter your desired quantity in the quantity box. These are mostly used if the same Item is purchased in bulk.
If your product list is very long use the Search field, type the product name in Search box.
2.3 Removing an Item from the Cart
- Select row in the cart and click on ‘Remove’ button in the numeric keypad
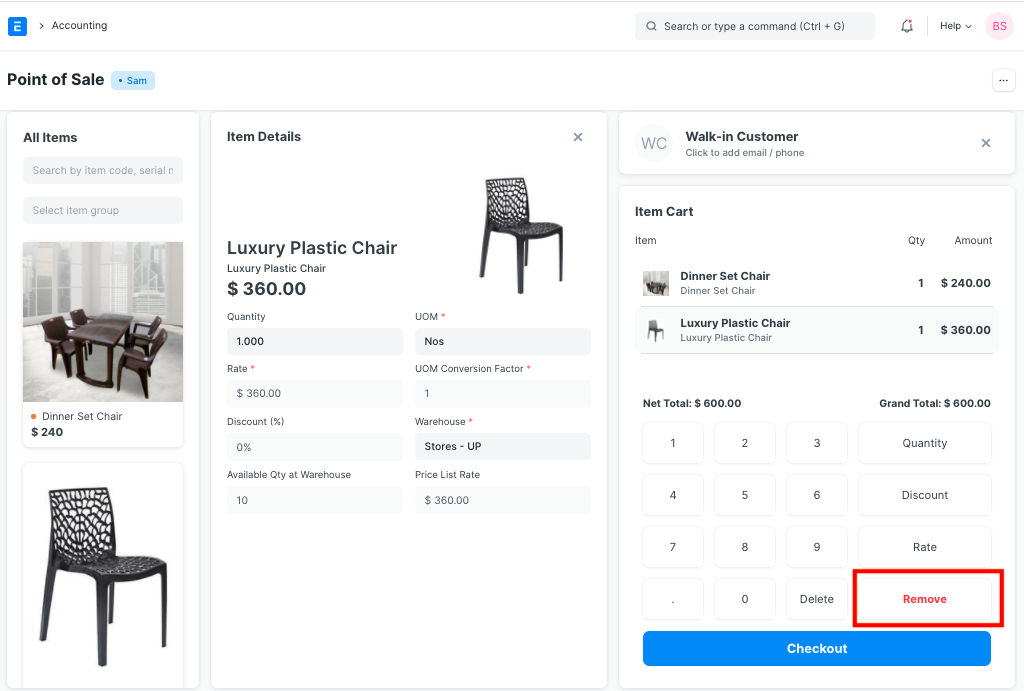
- Set Qty as zero to remove Item from the POS invoice. There are two ways to remove an Item.
- If Item’s Qty is 1, click on a minus sign to make it zero.
- Manually enter 0 (zero) quantity.
2.4 Change Amount
POS calculates the extra amount paid by the customer, which user can return from the cash account. User has to set the account for the change amount on the POS profile.
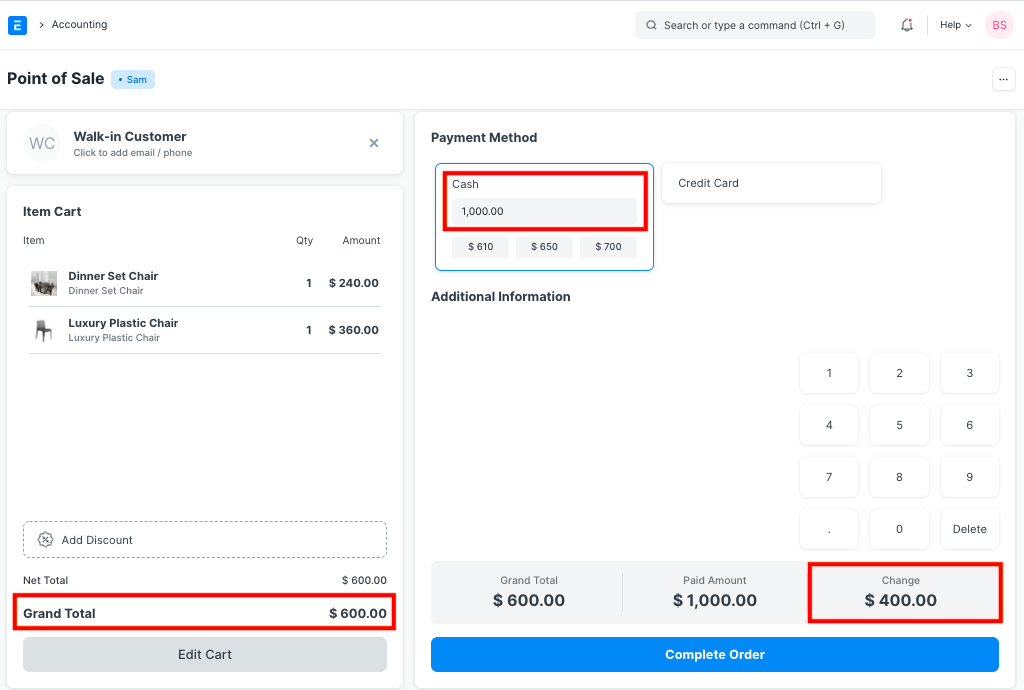
3. Features
3.1 Adding a new Customer
In POS, user can select the existing Customer during making an order or create a new customer. This feature works in the offline mode also. User can also add the customer details like contact number, address details, etc on the form. The Customer which has been created from the POS will be synced when the internet connection is active.
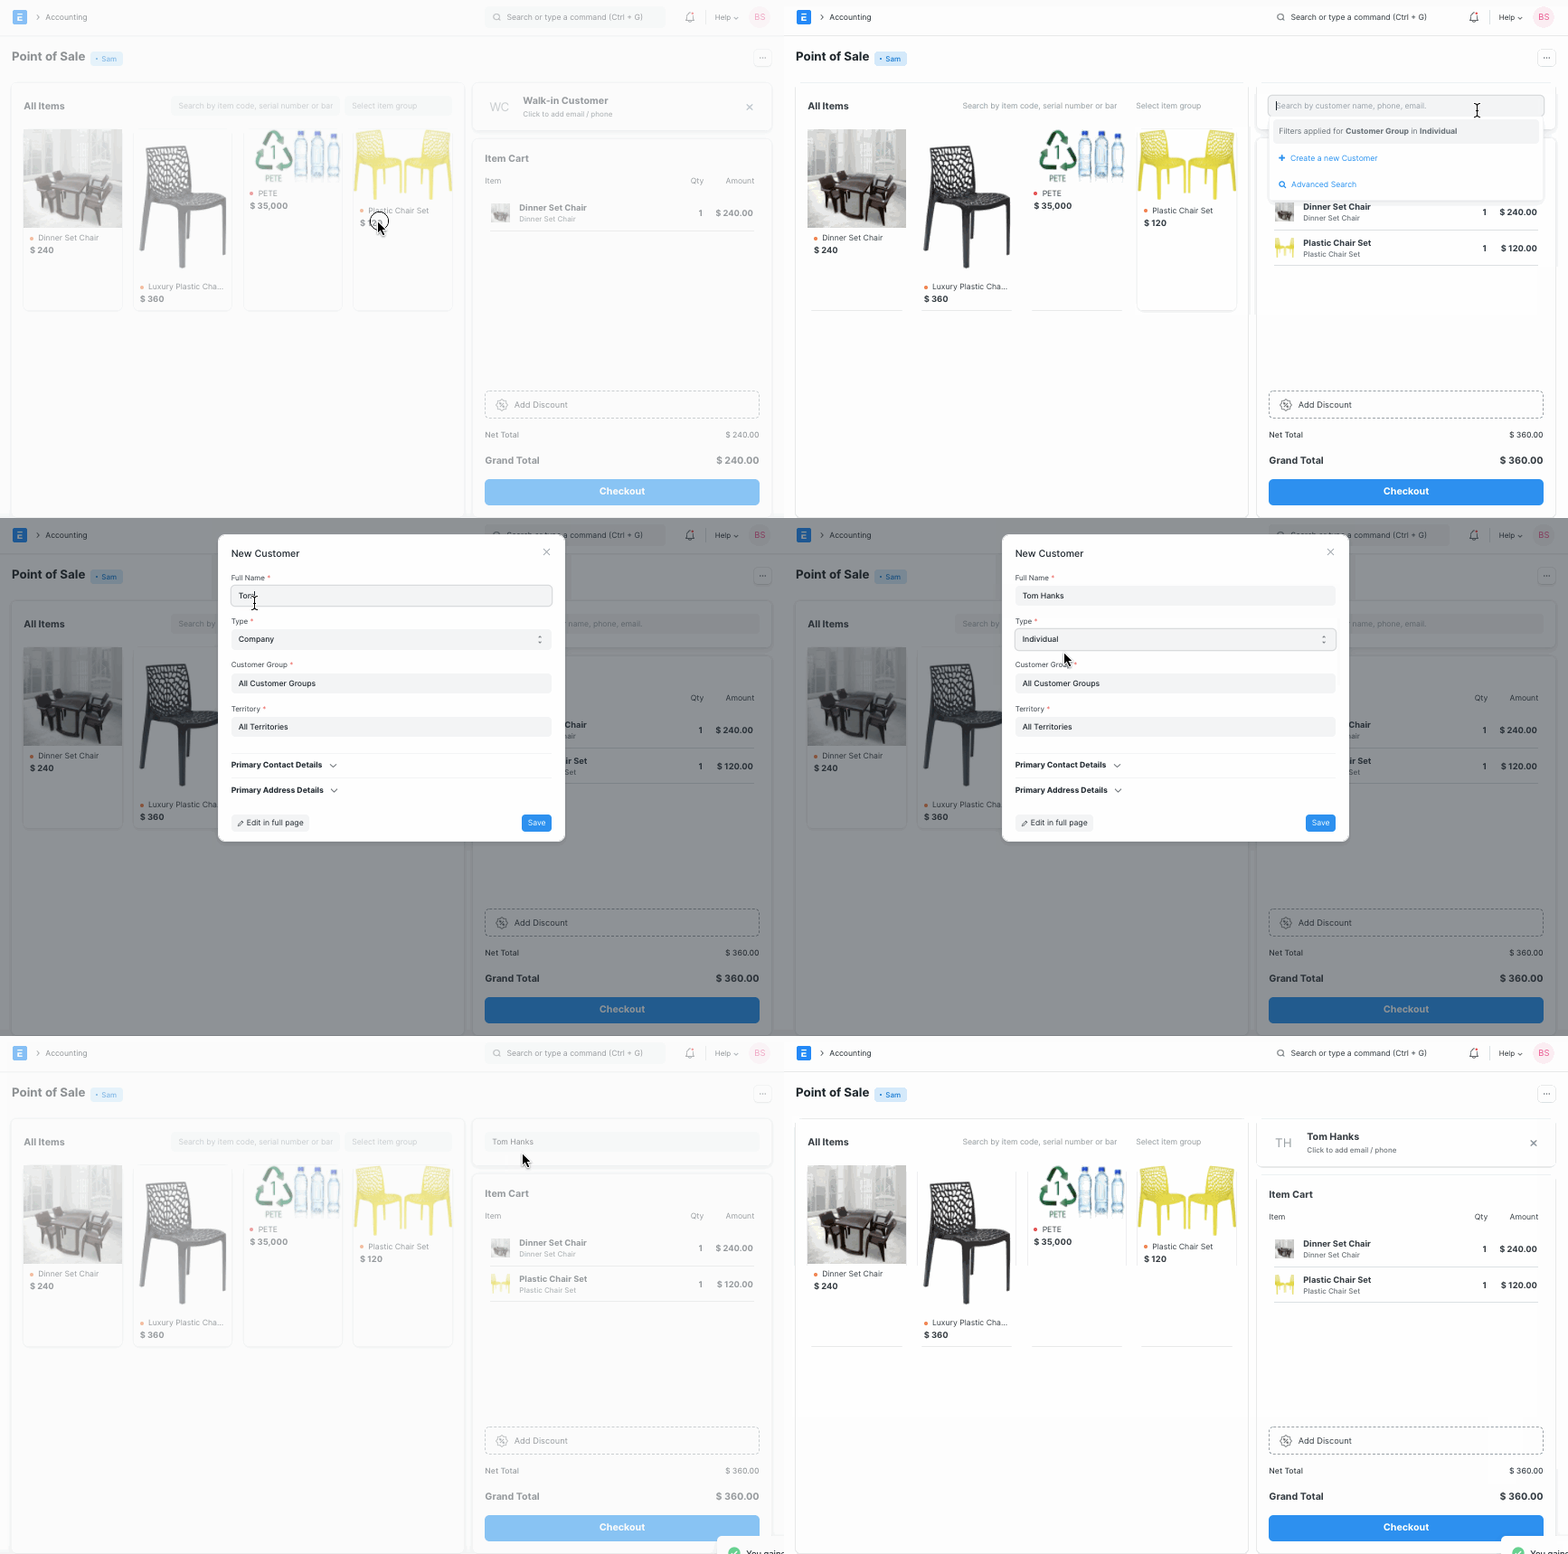
3.2 Accounting entries (GL Entry) for a Point of Sale:
Debits:
- Customer (grand total)
- Bank/Cash (payment)
Credits:
- Income (net total, minus taxes for each Item)
- Taxes (liabilities to be paid to the government)
- Customer (payment)
- Write Off (optional)
- Account for Change Amount (optional)
To see entries after submitting the Sales Invoice, click on View Ledger.
3.3 Email
You can also send the receipt via email.
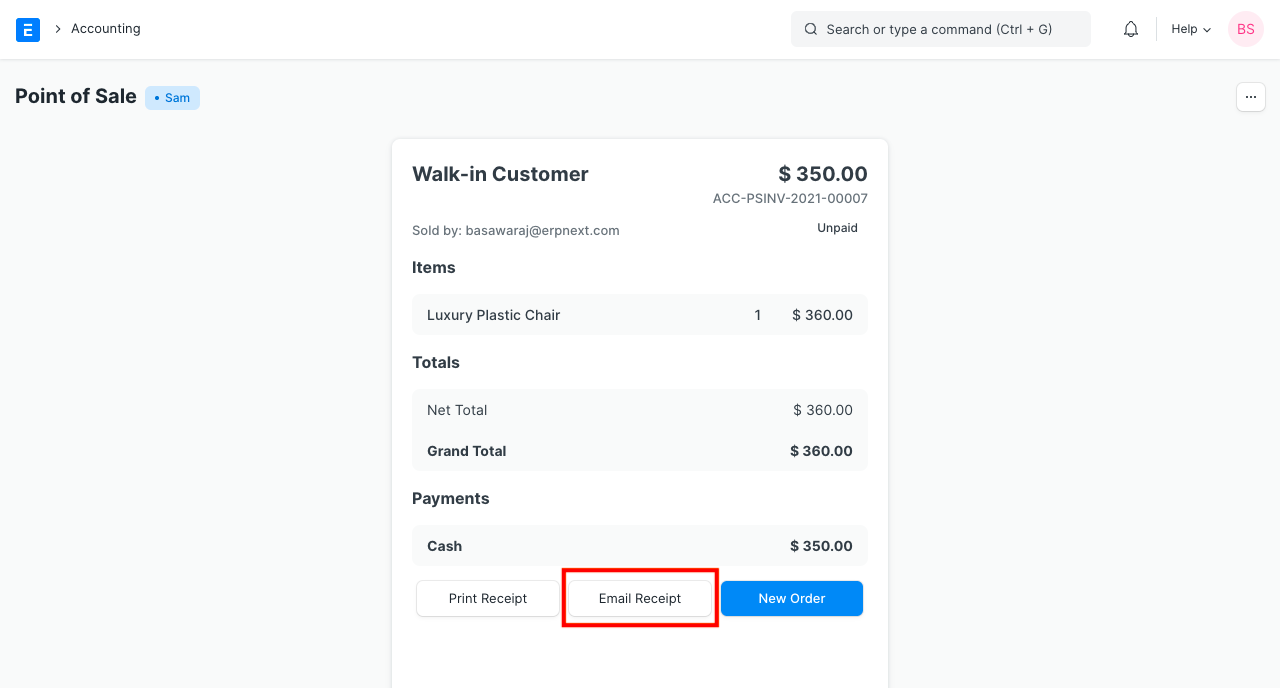
3.4 Create Return Credit Note
You can also create a return credit note against a POS Invoice in case of return of items or the entire order. Below are the steps for issuing a credit note against an invoice:
- Click on menu (3 dots) and then click on Toggle Recent Orders. Keyboard shortcut for the same is ⌘+O.
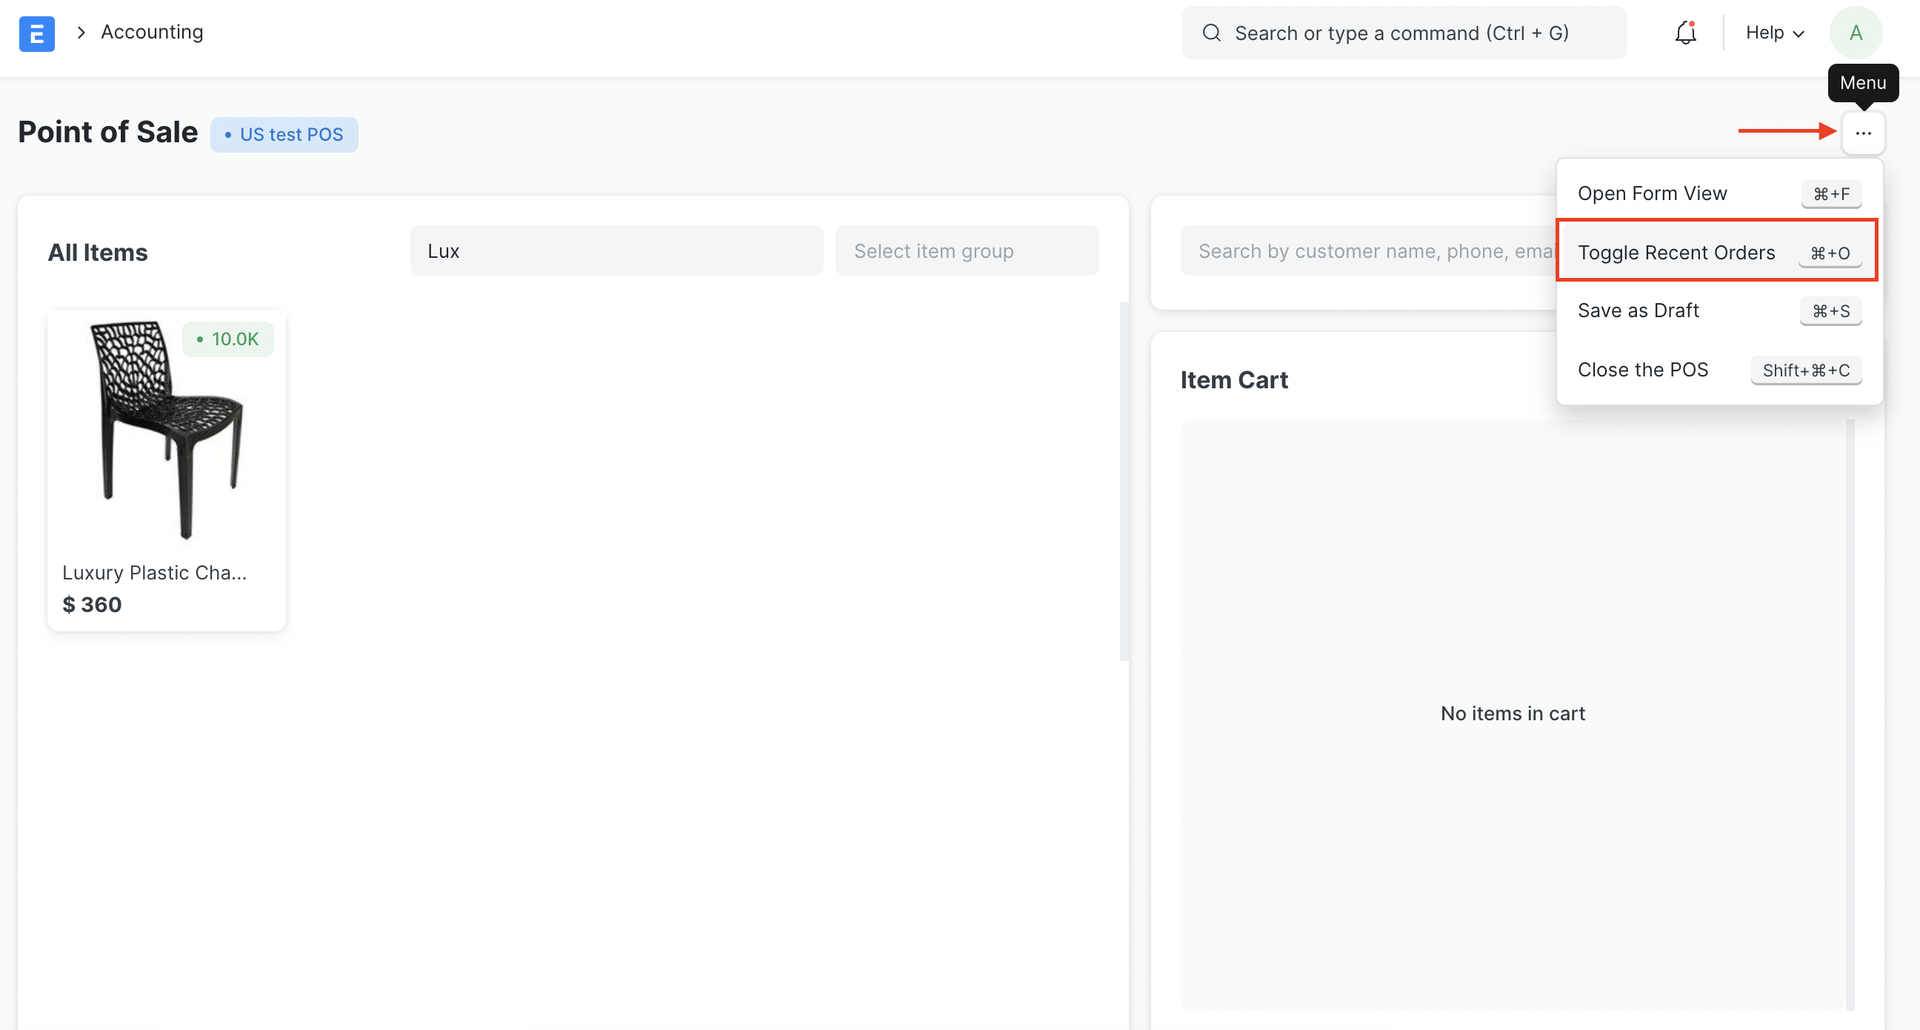
- All the invoices from recent POS transactions will be displayed under the Recent Orders pane. You can either search for the invoice directly with its name or filter search results as per the status of the invoice which can be Paid, Consolidated, Draft, Return.
- Select the invoice against which you need to create the credit note after which you will see the invoice details and the options to Print, Email the receipt and an option to make a Return. Click on ‘Return’.
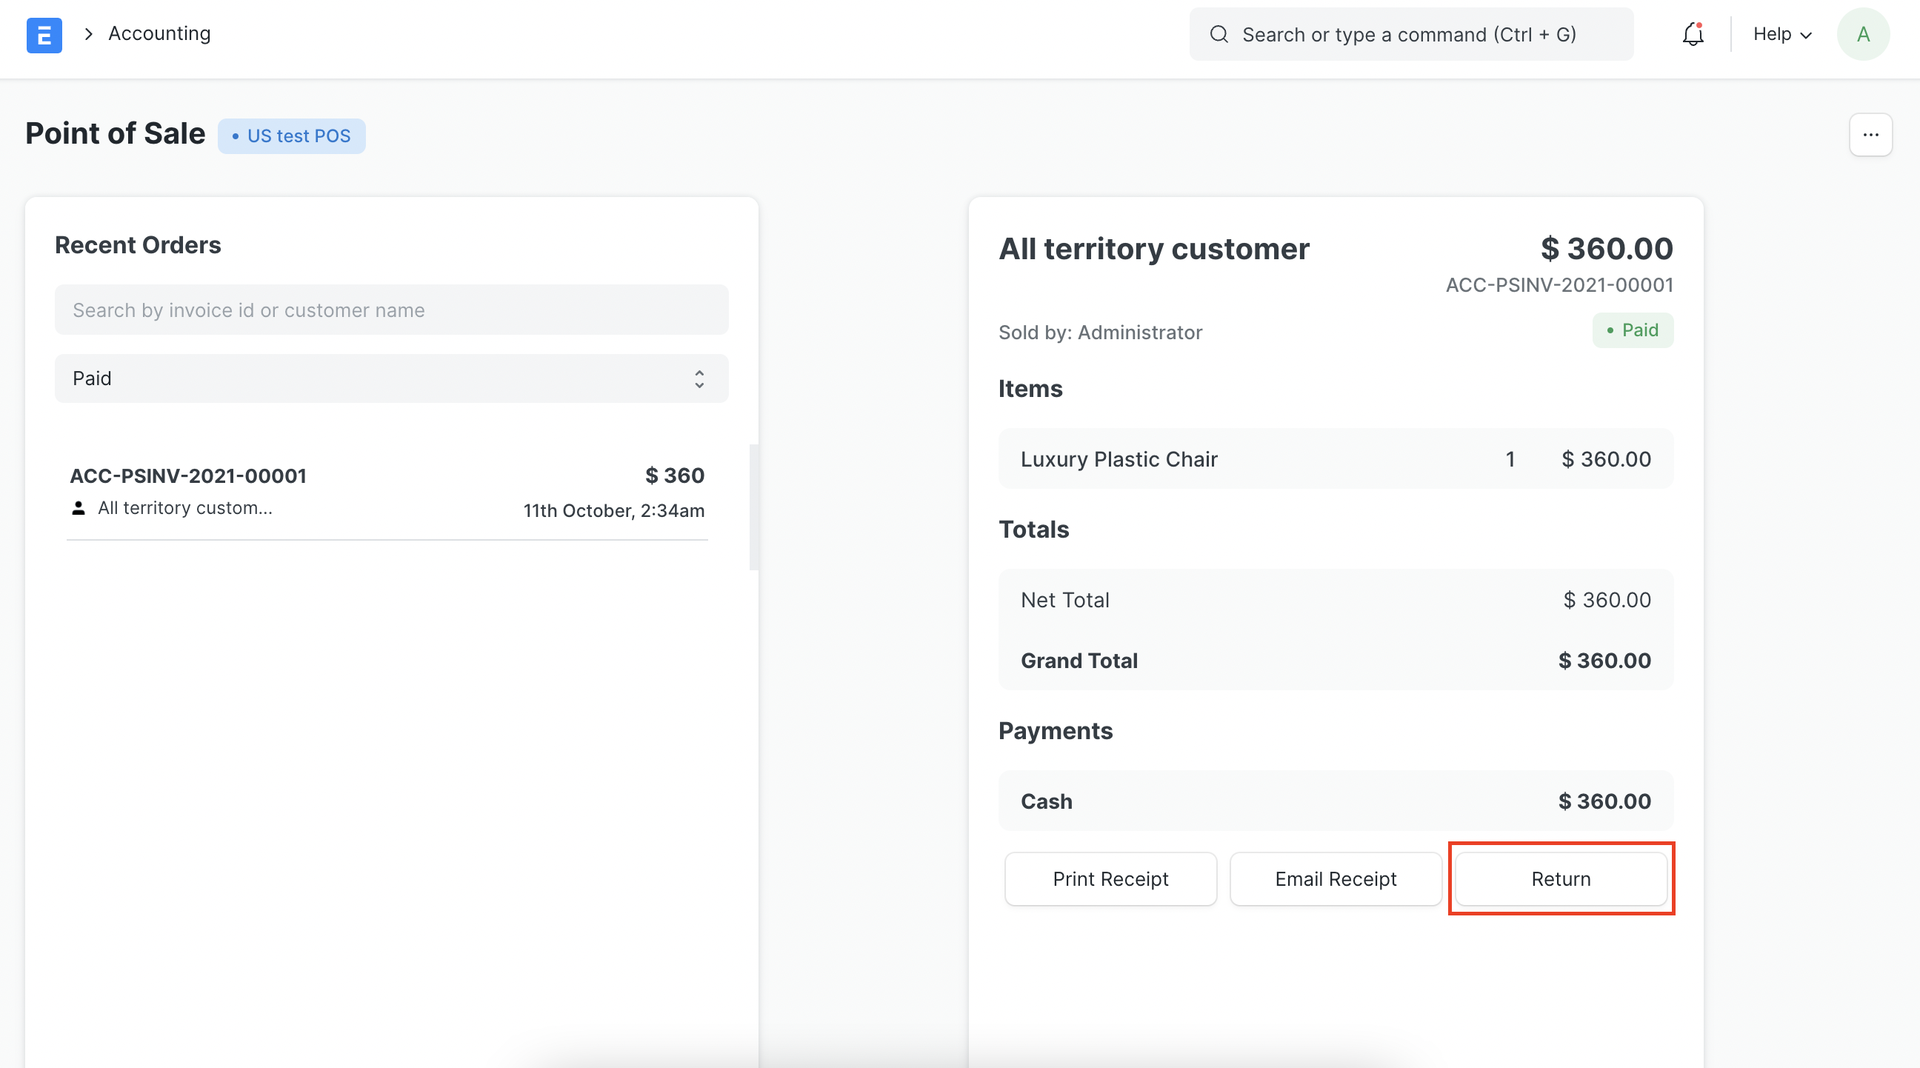
- The POS screen will display the items in the invoice, along with respective negative quantities and totals in the Item Cart which indicates that it is a return credit note.
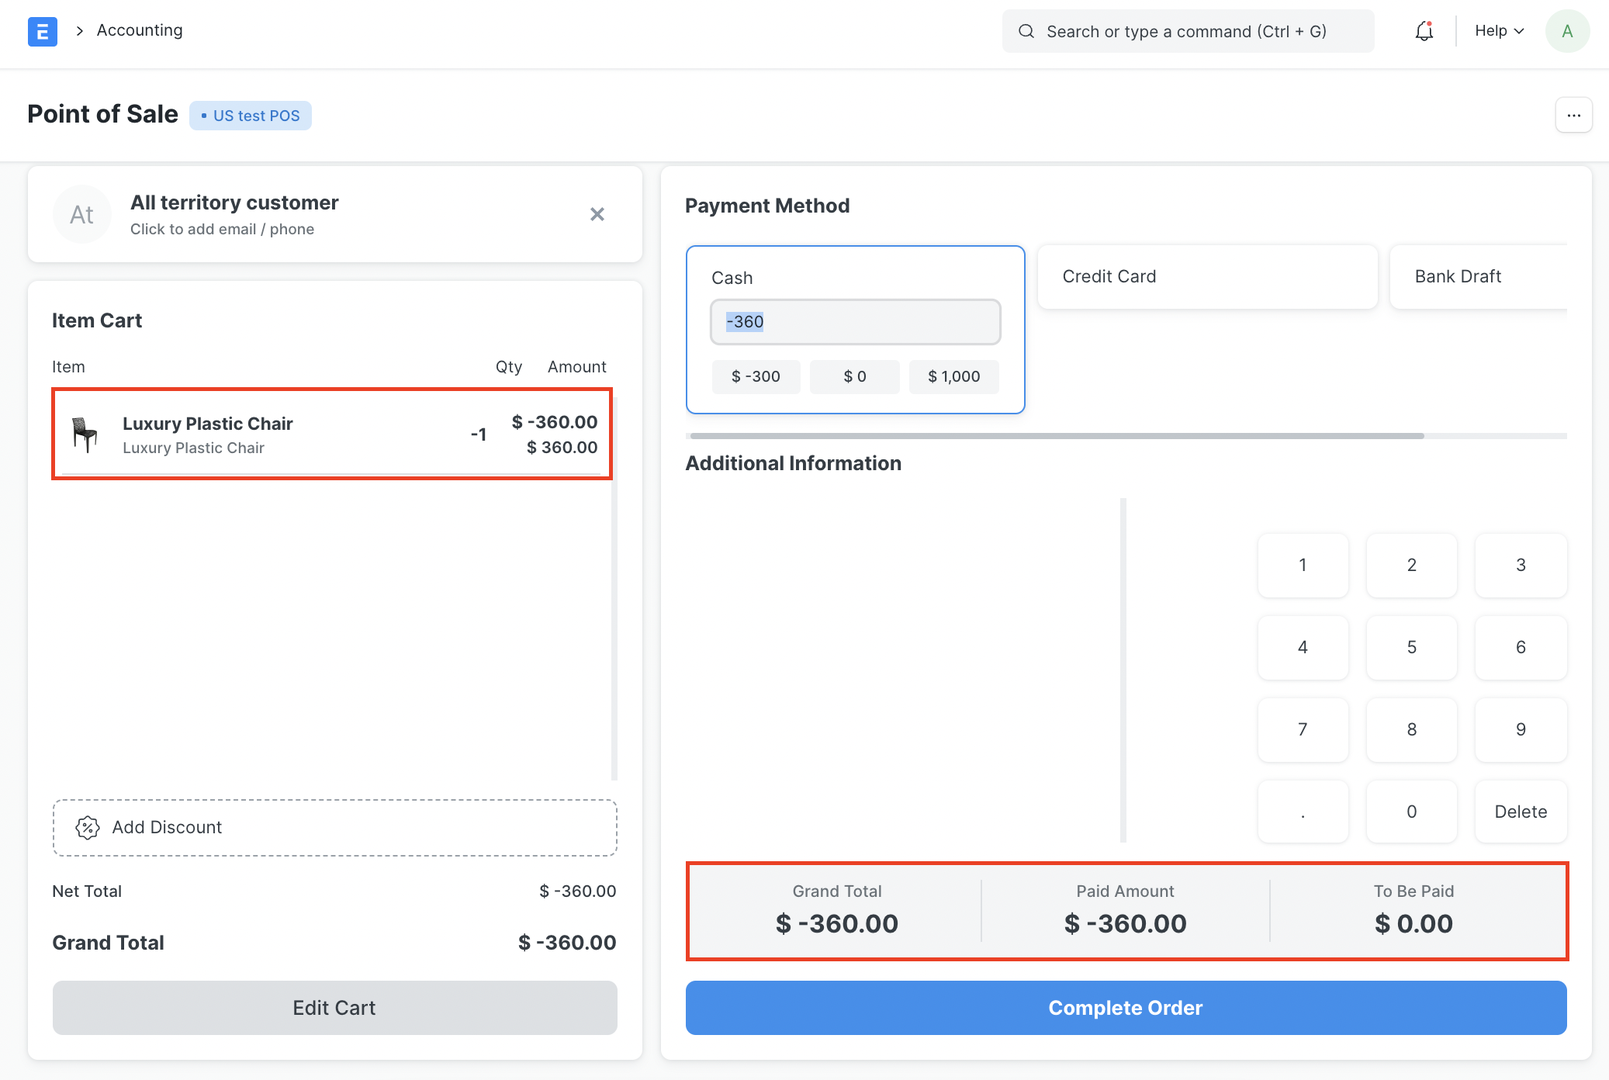
- Once you checkout, you’ll see the Grand Total, Paid Amount and Taxes too if applicable.
- Clicking on Complete Order will complete the process and create the final return credit invoice and display the bill on the screen like a normal order
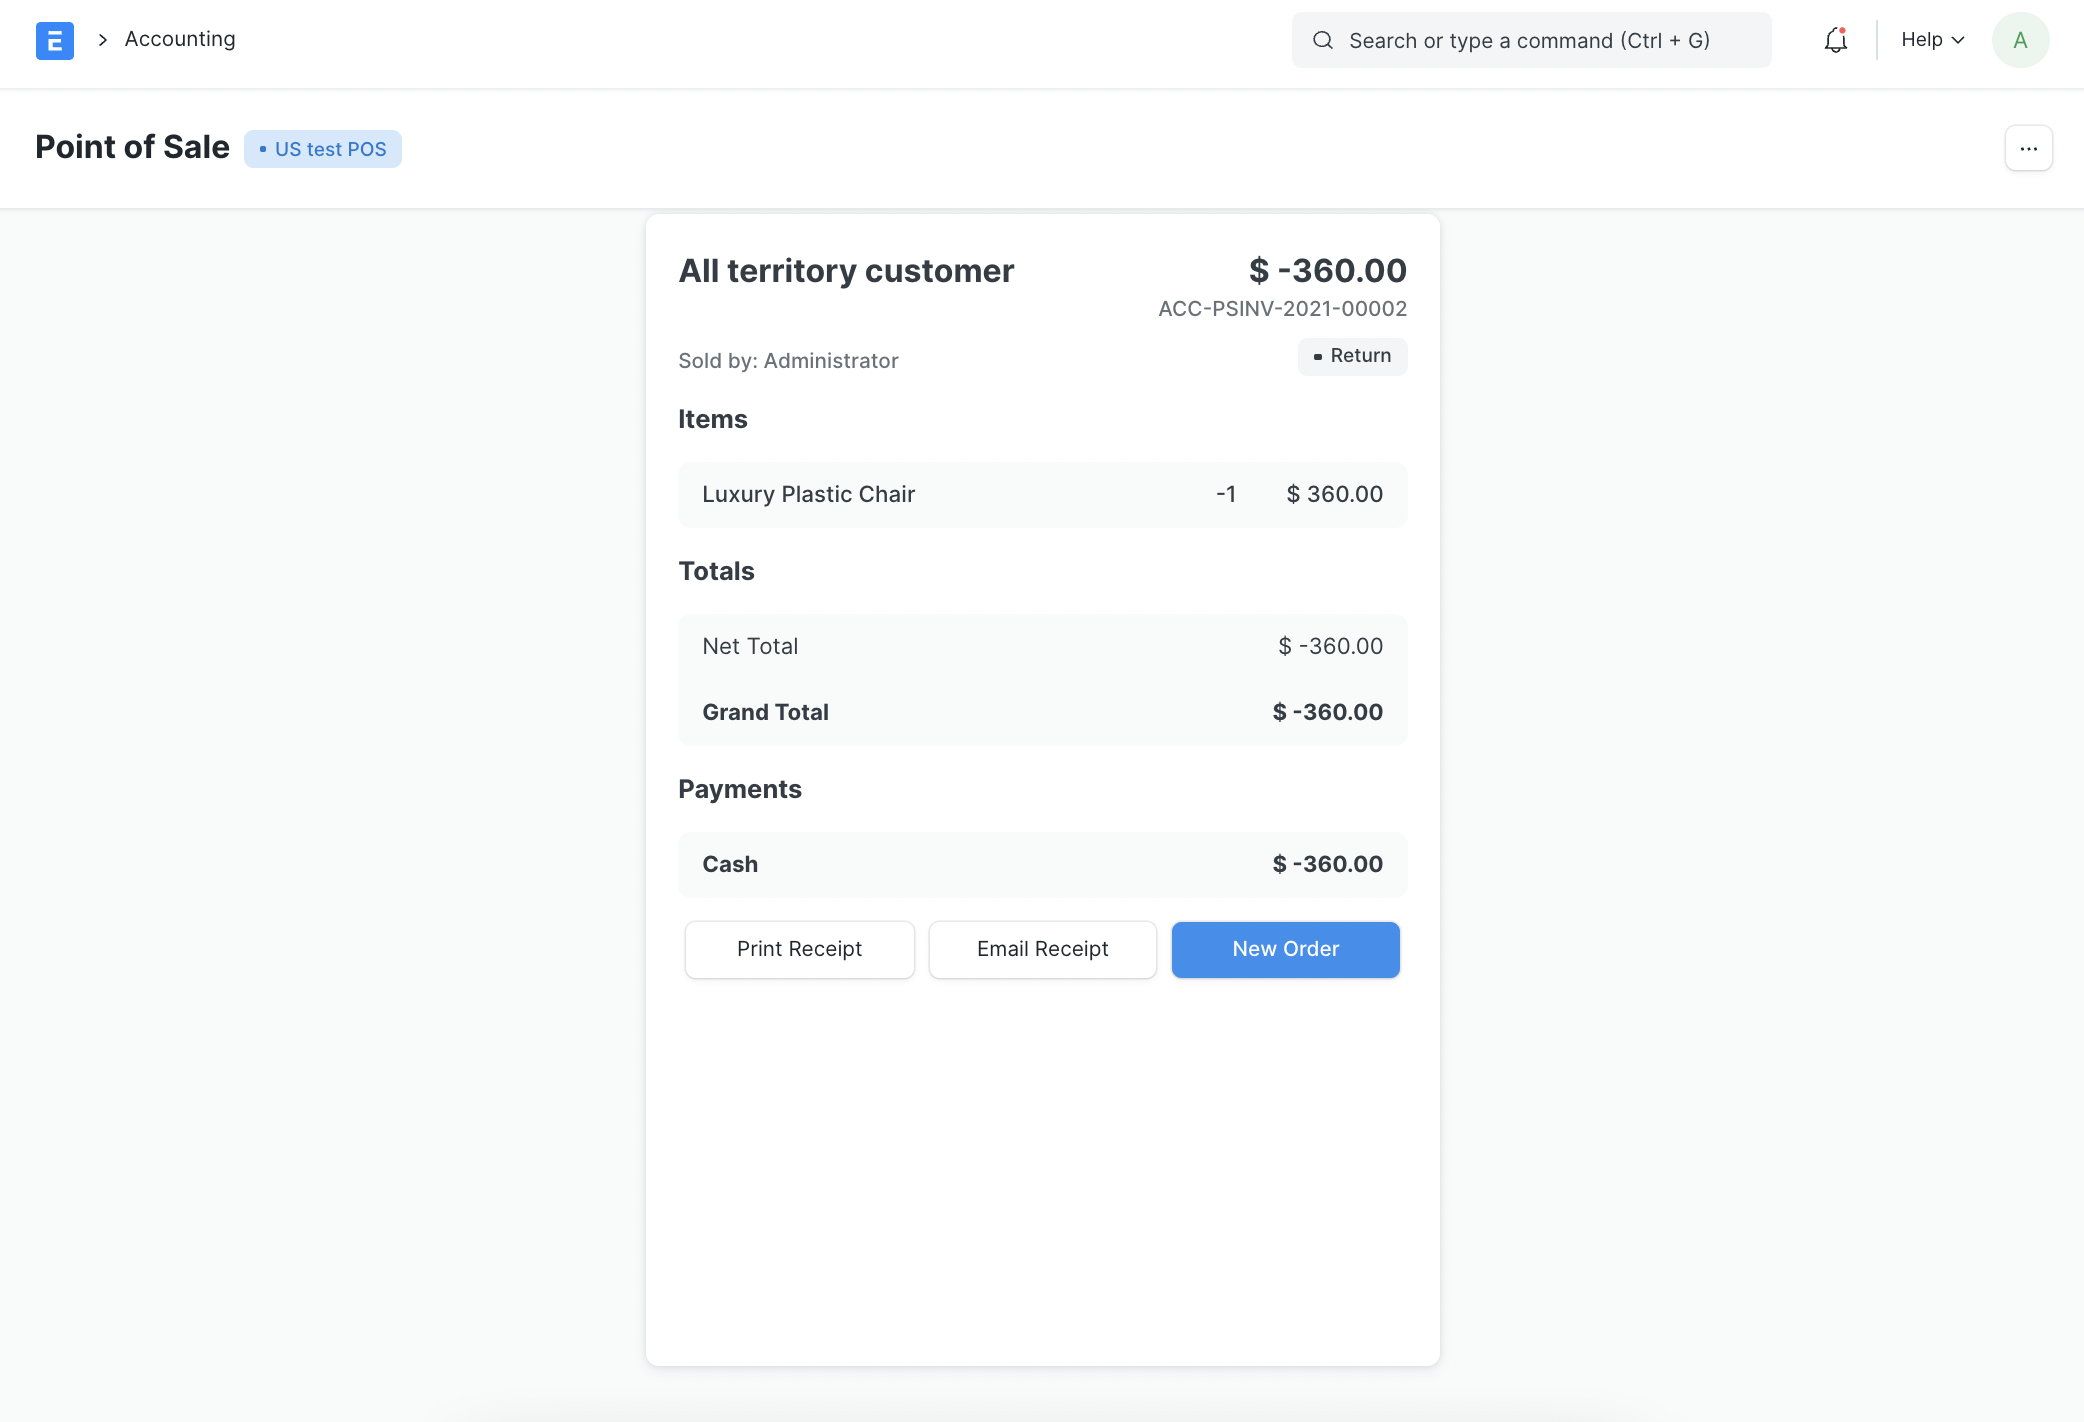
3.5 POS Closing Voucher
At the end of the day, the cashier can close his/her PoS by creating a POS Closing Voucher. Click on the Menu and select ‘Close the POS’. Select the period, your POS Profile and your user to retrieve all sales registered. At the end of the day, the cashier can close his/her shift by creating a POS Closing Voucher.
Click on the Menu and select ‘Close the POS’. Select the period, your POS Profile and your user to retrieve all sales registered.
On creating a POS Closing Voucher, all the POS invoices fetched for the selected period will be consolidated into one final Sales Invoice. The status of all the POS invoices will change from ‘Paid’ to ‘Consolidated’ once they are successfully consolidated into a sales invoice on closing.
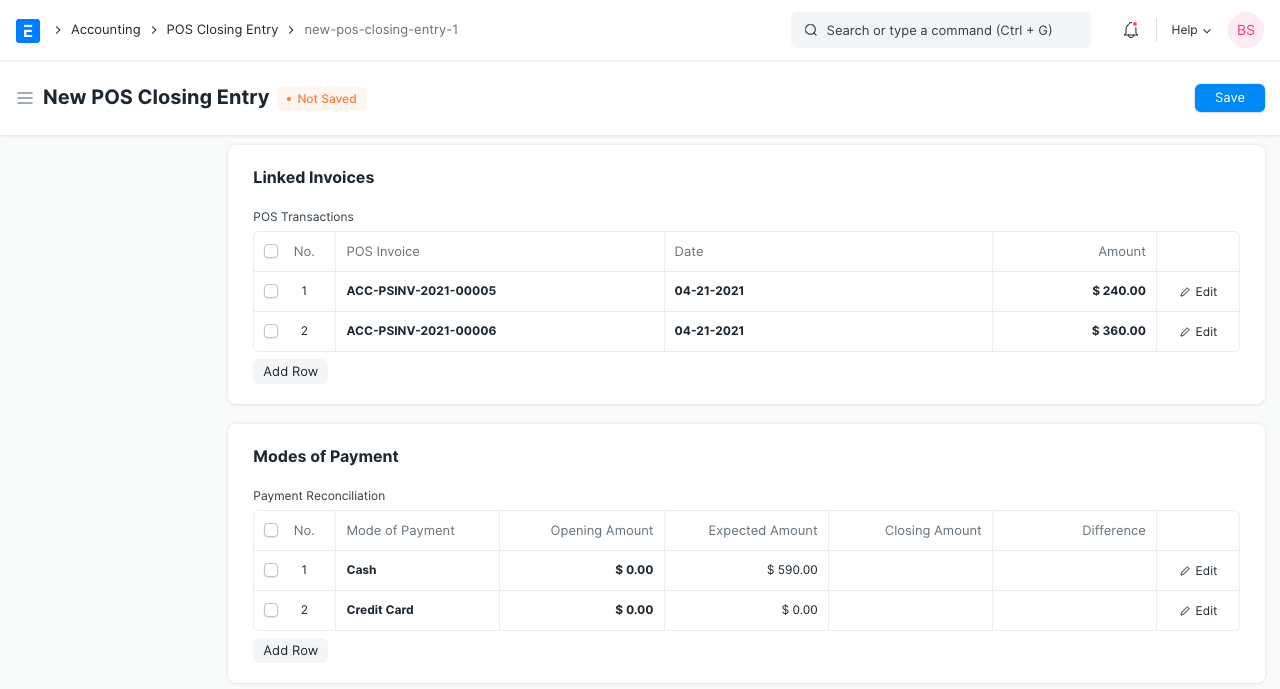
If there are more than 10 invoices while closing a POS, consolidation of the invoices will take place in a background job and would be subitted after the background job gets completed. The Accounting Ledgers would be affected only after the Closing Voucher is submitted successfully and the consolidated sales invoices are created.
POS Invoice Consolidation
In the version 13 refactor of the Point of Sale, in an effort to add speed to the Point of Sale, the sales from the POS session do not affect the stock and accounting ledgers until a Closing POS Voucher is submitted for that session. It functions like so:
- Each transaction from the POS screen now creates an intermediate invoice (called a POS Invoice) which doesn’t update the stock and accounting ledgers to keep it as fast as possible. This is also called a “sub-ledger”. Separating the POS ledger from the General Ledger makes the system a lot more scalable.
- The stock and accounting entries are now created at the end of day while closing a POS session by a single sales invoice which merges all the intermediate invoices created throughout the day.
- This single consolidated sales invoice only creates 3-4 ledger entries. The older system would create n x 3 ledger entries where ‘n’ is the number of invoices created throughout the day.
- Since drastically fewer ledger entries are made, the load on the general ledger is also eased, making it faster.
How Stock is Tracked Until a POS Session is Closed
While it is true that the Stock Ledger will disclude transactions from any active POS session, the stock levels from this “sub-ledger” update the Stock Projected Quantity Report.
Stock > Stock Reports > Stock Projected Quantity

In the above image, the “Actual Qty” column represents the value of the stock ledger. The “Reserved for POS Transactions” represents the “Actual Qty” less what quantities are currently reserved because of active POS sessions that have not yet made entries on the Stock Ledger because the sessions have not been closed. Note also that “Projected Qty” (“Active Qty” less quantities reserved for the POS, production, etc.) adds a quantity of 100 to the first line item because of an order for 100 units that has yet to be received.
Within the Point of Sale, however, quantities on order but not received will not be reflected in the “Available Qty at Warehouse” field in the Item Details view. In the instance below, as there’s not enough quantity on-hand, the transaction won’t be permitted. This applies to any and all open POS sessions active at any time and is applied globally (as in, the transaction from one session affects the quantities available for all other open sessions).


Pricing Rule
A Pricing Rule defines the discount/pricing rules that apply based on set conditions.
A Pricing Rule has many options using which you can control the pricing of an Item. Filters like quantity, date, groups, and other conditions can be set.
A Pricing Rule is somewhat similar to a Tax Rule.
Following are the few cases which can be addressed using Pricing Rule:
- As per a promotional sale policy, if the Customer purchases more than 10 units of an item, he enjoys 20% discount.
- For Customer “XYZ”, the selling price for the specific Item should be updated as ###.
- Items categorized under specific Item Group have same selling or buying price.
- Customers belonging to specific Customer Group should get ### selling price, or % of Discount on Items.
- Supplier categorized under specific Supplier Group should have ### buying rate applied.
To have Discount and Price List Rate for an Item auto-applied, create Pricing Rules for it.
To access the Pricing Rule list, go to:
Home > Accounting > Pricing Rule
1. Prerequisites
Before creating and using a Pricing Rule, it is advisable to create the following first:
- Item
- Item Group
- Customer
- Supplier
2. How to create a Pricing Rule
- Go to the Pricing Rule list and click on New.
- Set a title for the rule.
- Select what to Apply On from Item Code, Item Group, Brand, or Transaction.
- Select whether you want to apply Price discount or Product discount. If you want to give free products then select the product discount.
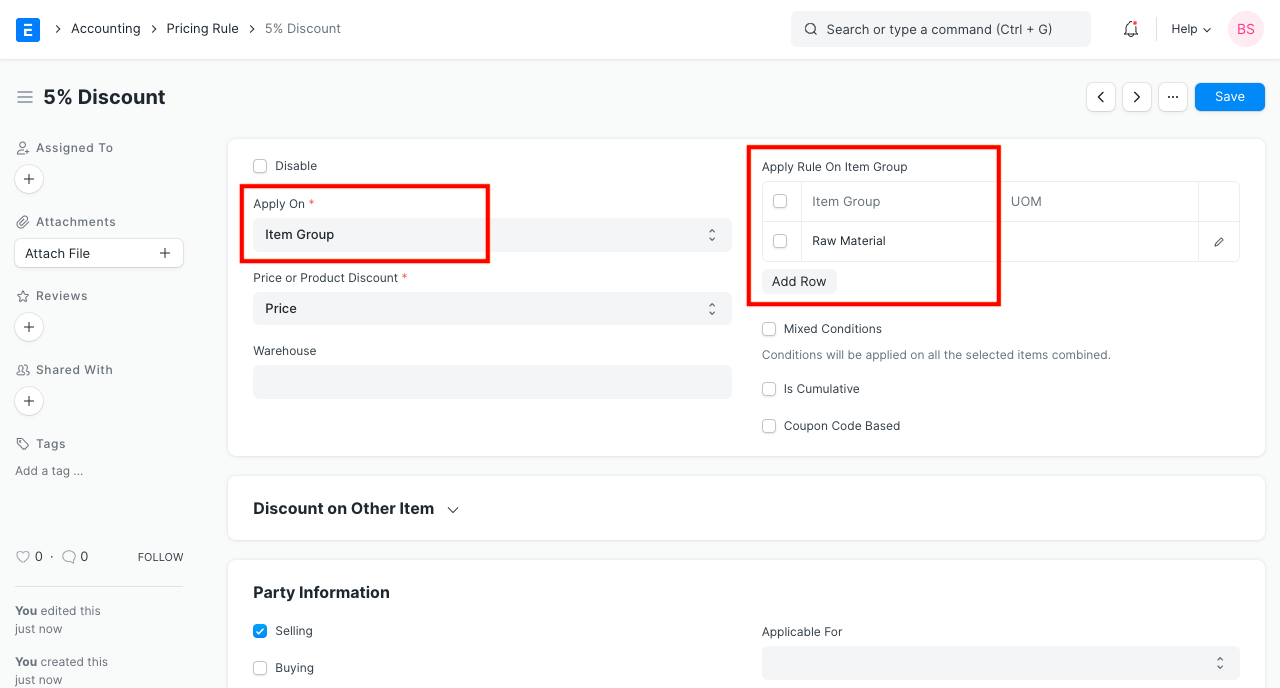
- For a single item, select Item Code and select the items.
- If you want Pricing Rule to be applied on all the items, select ‘Item Group’ and select All Item Group (parent Item Group).
- Set the discount/price to be applied. To know more, go to this section.
- Save.
2.1 Additional options when creating a Pricing Rule
Warehouse
Setting a Warehouse here will cause the Pricing Rule to be applied only if the Item is selected from the Warehouse specified here.
Apply Rule On
Based on the attribute selected in the ‘Apply On’ field, you can set the Pricing Rule based on one of these:
- Item
- Item Group
- Brand
- Transaction (on the total amount of the transaction)
In this table, you can select the specific Item/Item Group/Brand. For example, if you select Apply On ‘Item Group’ and select ‘Raw Materials’ in the table, this Pricing Rule will be applied only on Items that belong to the Group ‘Raw Materials’.
UoM: The Pricing Rule will apply only if the UoM set here matches with the transaction.
Condition
In this field you can add a condition in python to check against field values in the transaction doctype, like shown below for Sales Invoice:
customer=='Customer Name' and status!='Overdue'
Please note that only single line python conditions will work, using fieldnames of the target doctype.
Mixed Conditions
If you select two or more Items and set the Min and Max Quantity. The Pricing Rule will be applied only if the total sum of Items matches the set quantities. For example, you create a Pricing Rule on Item 1 and Item 2 and set the Min and Max Quantity as 30, the Pricing Rule will apply only if the total quantity is 30.
Is Cumulative
Enabling this options allows the Pricing Rule to be applied cumulatively. You need to set the ‘Min Amt’ and ‘Max Amt’ for this.
Consider a scenario where the Min Amt is 1,500 and Max Amt is 2,000. Now, if one transaction is created for 1,400 then Pricing Rule will not be applied. However, on creating a second invoice of amount 600, Pricing Rule will be applied. This happened since the total (cumulative) amount of the invoices added up to 2,000. Note that the discount will be applied only to the latest transaction that crosses the cumulative limit.
This can be useful to give discounts if a Customer buys an Item multiple times and you want to reward him with discounts/special prices.
3. Features
3.1 Apply Rule On Other
This feature checks condition on first Item but applies rule on another Item.
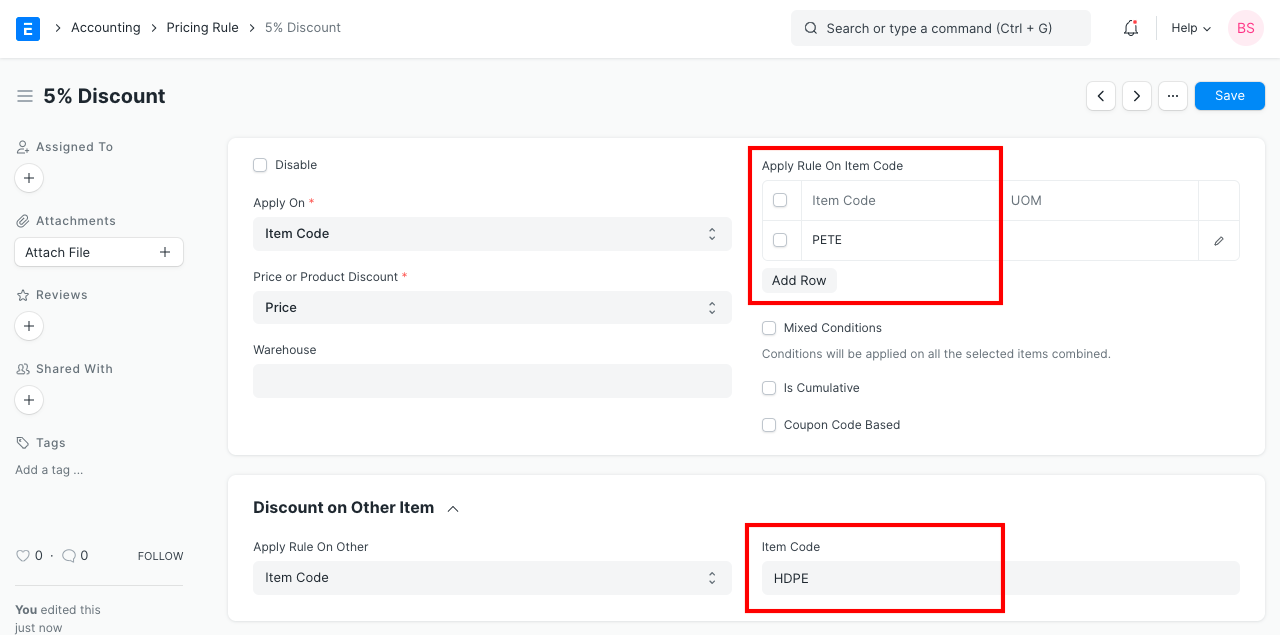
For example, set Item1 and Item2 in the ‘Apply Rule On’ table and set ‘Apply Rule On Other’ on Item3. Now, if the transaction has Item1, Item2, and Item3, the Pricing Rule will apply on Item3 since the first two Items were present in the transaction.
3.2 Party Information
Set whether the Pricing Rule is for Selling of Buying the Item.
Based on your selection you can set applicability to one of the following masters.
- Customer
- Customer Group
- Territory
- Sales Partner
- Campaign
- Supplier
- Supplier Group
3.3 Quantity and Amount
Specify minimum qty, maximum qty, minimum amount, or maximum amount of an Item when this Pricing Rule should be applied.
Note that if the quantity or amount falls short or exceeds the limits set here, the Pricing Rule will not be applied at all. However, it will be applied if you have enabled the options Mixed Conditions or Cumulative.

3.4 Validity
You can also set a date interval for when the Pricing Rule will be valid. This is useful for a sales promotion. On leaving the dates blank the Pricing Rule will not have any time frame limit.

3.5 Margin

- Margin Type: When selling an Item, you may sell it for a certain margin. If you don’t want to add selling prices to Items every time and would like to automatically set a margin, it can be done with this feature.
- Margin Rate or Amount: The margin set can be based on Percentage or Amount, eg: 5% margin or $50 fixed margin.
Read adding margin for more details.
3.6 Price Discount Scheme
The actual rule to be applied is set in this section.

- Rate: This will be the new rate for an Item. For example, if you sell an Item for 100 and want to sell it for 112 for a specific party, then select Rate and set the Rate as 112.
- Discount Percentage: A specific discount percentage can be set. The discount percentage can be set to a specific Price List. Leaving the ‘For Price List’ blank will apply the Pricing Rule to all Price Lists.
- Discount Amount: A fixed discount amount will be applied. For example if you sell an Item for 100 and want to sell it with a discount of 7, then this condition can be set using the Discount Amount option.
3.7 Advanced Settings
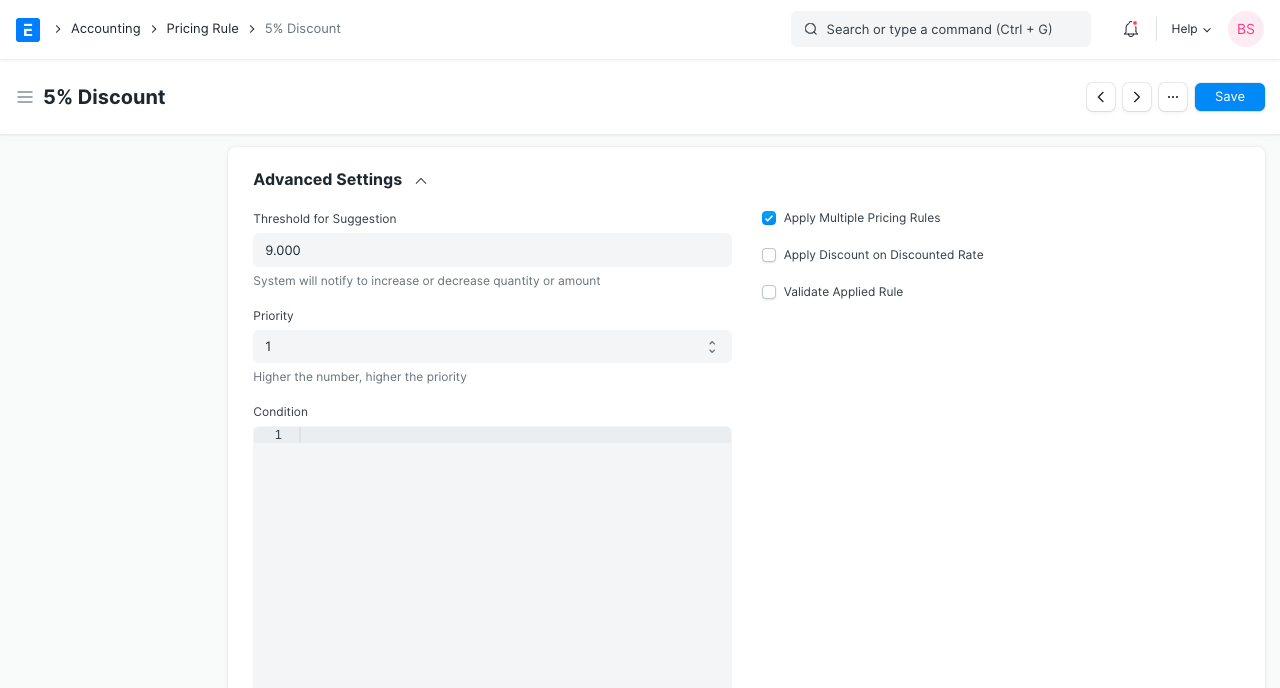
- Threshold for Suggestion: This is the threshold based on which the system will notify you to adjust Item Quantity for discount. For example, if the Min Quantity is 10 and the Threshold is 9, the system will notify to add 1 more Item for the discount to be applicable. This also applies to the amount set.
- Priority: Consider an Item Group, you want to set specific rules on one Item from the group. This can be done by creating a new Pricing Rule and setting a higher priority. This can also apply to Customer Group and Supplier Group.
- Apply Multiple Pricing Rules: To understand this, consider an Item of Rate 500. There are two Pricing Rules on it P1 and P2. P1 applies 10% discount and P2 applies 5%. Enabling this option will apply a total of 15% on the Item Rate which gives 425.
- Apply Discount on Rate: The discount will be compounded. Consider the same scenario as above. On enabling this option, 10% will be applied on 500 which will give 450, then 5% will be applied on 450 which will give 427.5.
- Validate Applied Rule: Shows the entered validation message if the discount/rate set manually by you in a transaction does not match the Pricing Rule.This is useful when the top distributor in the hierarchy decides the discount/rate to be applied and you are only validating if the Pricing Rule is applied correctly.
4. Pricing Rule Discount Types
4.1 Price Discount
- Under the Margin Type, you can set whether the margin is calculated as a percentage or an amount. Eg: 10% margin on supplier price list at the time of sales.
- Rate mentioned in Pricing Rule will be given priority over Item’s Price List (Item Price) rate.

- Discount Percentage can be applied for a specific Price List (Selling or Buying). To apply it for both, leave the ‘For Price List’ field blank.

- Discount can also be set in terms of amount.

4.2 Product Discount
- “Buy 2 quantities get 1 free quantity of the same item.” To configure such type of rules, set the Price or Product Discount as ‘Product discount’, tick the Same Item checkbox, and set the quantity.
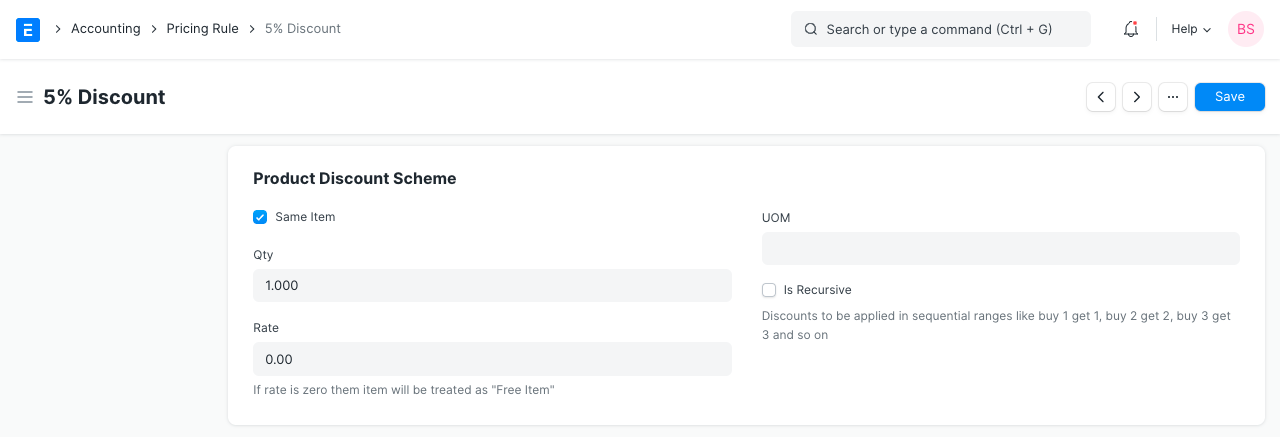
- “Buy 2 quantities get 1 free quantity of the another item.” To configure such type of rules. Set the Price or Product Discount as Product discount, untick the ‘Same Item’ checkbox and set the ‘Free Item’ and quantity.
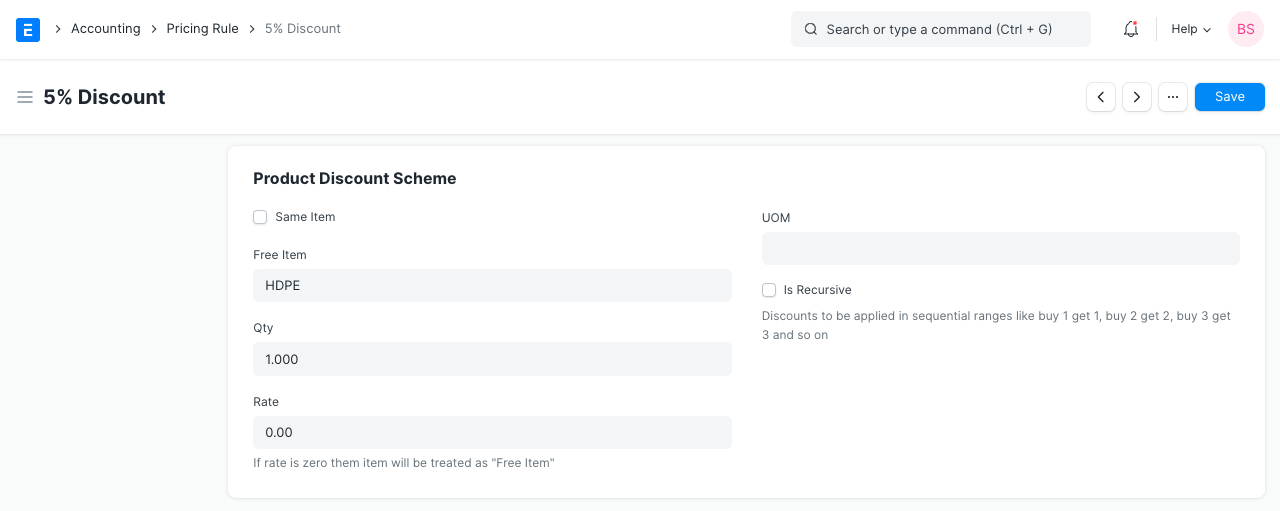
Promotional Scheme
Introduced in version 12
A Promotional Scheme is a temporary discount on one or more products.
Promotional schemes help businesses become successful as lower prices for a limited period of time to attract more Customers. They can be easily configured in IONIC ERP. A Promotional scheme is linked to a pricing rule, against each slab system that will generate the pricing rule.
On creating a Promotional Scheme, the system creates a Pricing Rule. A Promotional Scheme can have multiple Pricing Rules associated with it. In ERPNext, a Promotional Scheme is an easier way to manage pricing on multiple Item/Groups based on different parties and conditions.
To access the Promotional Scheme list, go to:
Home > Selling > Items and Pricing > Promotional Scheme
1. Prerequisites
Before creating and using a Promotional Scheme, it is advisable to create the following first:
- Item
- Item Group
- Customer
- Supplier
2. How to create a Promotional Scheme
- Go to the Promotional Scheme list and click on New.
- Enter a title for the rule.
- Select what to Apply On like Item Code, Item Group, Brand, or Transaction. Selecting Transaction will apply the scheme on the total amount of the transaction.
- Based on the ‘Apply On’, system will give you the provision to select the Item Code / Item Group / Brand in the table.
- Select whether the scheme is for Selling, Buying, or both and set the party information.
- In the Price Discount Slabs table, set the price discount, product discount.
- Users can also apply the discount on the other Item Code / Item Group / Brand by selecting the value for Apply Rule On Other field.
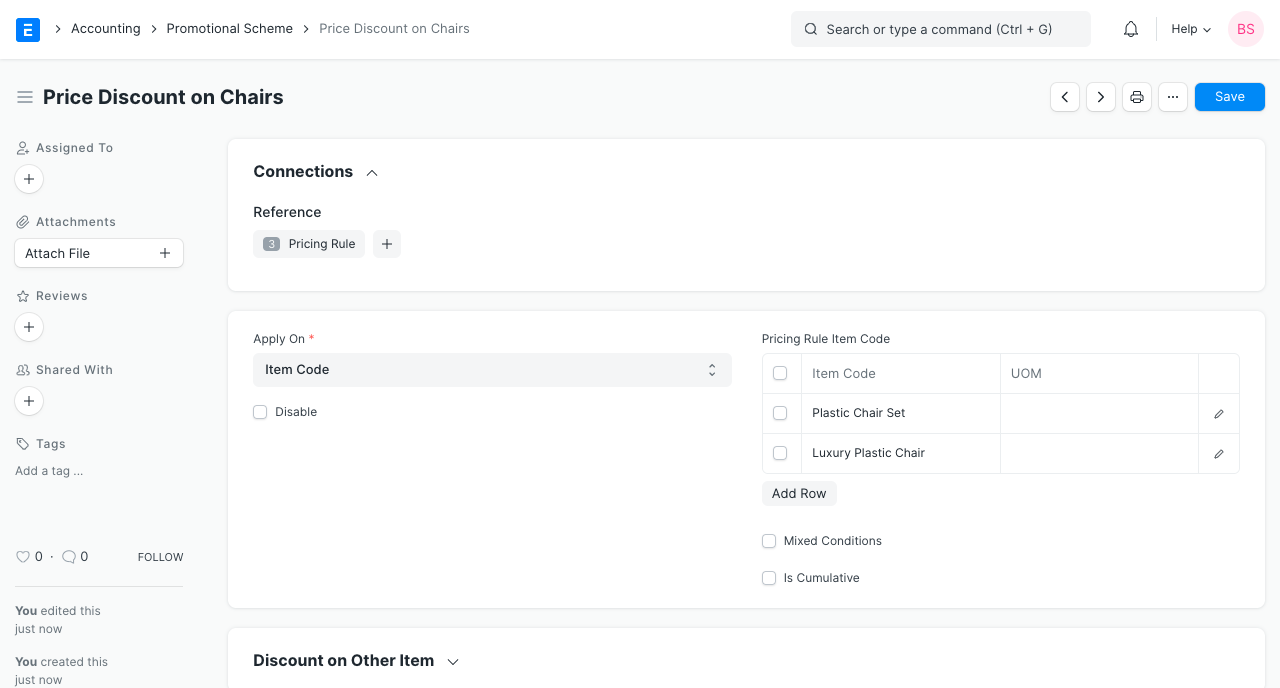
- Save.
Note: On saving a Promotional Scheme, a new Pricing Rule is created.
2.1 Additional fields when creating a Promotional Scheme
Mixed Conditions
If you select two or more Items and set the Min and Max Quantity. The Promotional Scheme will be applied only if the total sum of Items matches the set quantities. For example, you create a Promotional Scheme on Item 1 and Item 2 and set the Min and Max Quantity as 30, the Promotional Scheme will apply only if the total quantity is 30.
Is Cumulative
Enabling this options allows the Promotional Scheme to be applied cumulatively. You need to set the ‘Min Amt’ and ‘Max Amt’ for this.
Consider a scenario where the Min Amt is 1,500 and Max Amt is 2,000. Now, if one transaction is created for 1,400 then the Promotional Scheme will not be applied. However, on creating a second invoice of amount 600, Promotional Scheme will be applied. This happened since the total (cumulative) amount of the invoices added up to 2,000. Note that the discount will be applied only to the latest transaction that crosses the cumulative limit.
This can be useful to give discounts if a Customer buys an Item multiple times and you want to reward him with discounts/special prices.
3. Features
3.1 Apply Scheme On Other Item
This feature checks condition on the first Item but applies scheme/discount/rate on another Item.
For example, set Item1 and Item2 in the ‘Apply Rule On’ table and set ‘Apply Rule On Other’ on Item3. Now, if the transaction has Item1, Item2, and Item3, the Pricing Rule will apply on Item3 since the first two Items were present in the transaction.
3.2 Party Information
Set whether the Promotional Scheme is for Selling of Buying the Item.
Based on your selection you can set applicability to one of the following masters.
- Customer
- Customer Group
- Territory
- Sales Partner
- Campaign
- Supplier
- Supplier Group
3.3 Validity
You can also set a date interval for when the Promotional Scheme will be valid. This is useful for a sales promotion. On leaving the dates blank the Promotional Scheme will not have any time frame limit.
Currency: Setting a Currency here will cause the Promotional Scheme to be applied only when the Currency is the same in the transaction.
3.4 Price Discount Slabs
Rule Description: Enter a description to keep a not of what this Promotional Scheme entails.
Quantity and Amount
Specify minimum qty, maximum qty, minimum amount, or maximum amount of an Item when this Promotional Scheme should be applicable.
Note that if the quantity or amount falls short or exceeds the limits set here, the Promotional Scheme will not be applied at all. However, it will be applied if you have enabled the options Mixed Conditions or Cumulative.
Setting the Discount/Rate
- Rate: This will be the new rate for an Item. For example, if you sell an Item for 100 and want to sell it for 112 for a specific party, then select Rate and set the Rate as 112.
- Discount Percentage: A specific discount percentage can be set. For example, a 10% discount on an Item worth 500 would result in a price of 450.
- Discount Amount: A fixed discount amount will be applied. For example if you sell an Item for 100 and want to sell it with a discount of 7, then this condition can be set using the Discount Amount option.
Filters for setting discount
- Warehouse: Setting a Warehouse here will cause the Promotional Scheme to be applied only if the Item is selected from the Warehouse specified here.
- Priority: Consider an Item Group, you want to set specific rules on one Item from the group. This can be done by creating a new Promotional Scheme and setting a higher priority.
- Threshold for Suggestion: This is the threshold based on which the system will notify you to adjust Item Quantity for discount. For example, if the Min Quantity is 10 and the Threshold is 9, the system will notify to add 1 more Item for the discount to be applicable. This also applies to the amount set.
- Validate Applied Rule: If the entered price is not valid for the Item, the system will not allow you to apply a different rate/discount.
3.5 Product Discount Slabs
A Product Discount is applicable when one or more Items are free on the purchase of other Items. Most fields in this table are the same as the previous section.
The additional options are: * Same Item: If you want to give the same Item as free (product discount) on purchase of an Item, enable this checkbox. If you want to give another Item, untick and select the Item to be given as free.
- Apply Multiple Pricing Rules: To understand this, consider an Item of Rate 500. There are two Pricing Rules on it P1 and P2. P1 applies 10% discount and P2 applies 5%. Enabling this option will apply a total of 15% on the Item Rate which gives 425.
- UoM: The Promotional Scheme will apply only if the UoM set here matches with the transaction.
- Rate: An Item may be offered free of cost by the Supplier but there may be some tax applicable. Entering a Rate here means that the Customer will have to pay the applicable taxes.
4. Promotional Scheme types
4.1 Price Discount
In this type of promotional scheme, the user gets an option to set the discount in terms of percentage or amount based on the min quantity, max quantity, min amount and max amount on the products. Users can also configure the scheme where they can set the flat rate for the product based on the quantity or the amount of the product.
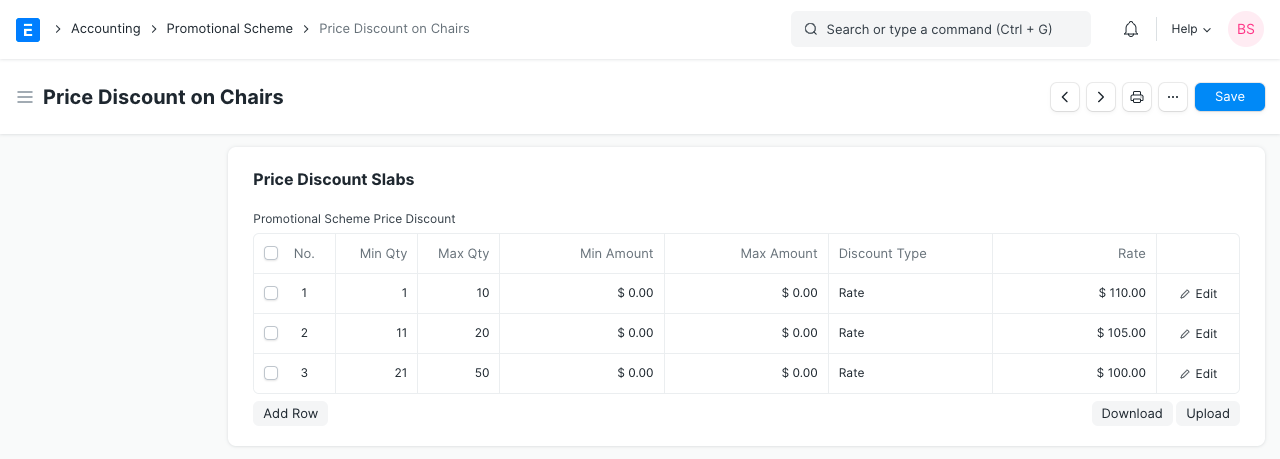
4.2 Product Discount
In this type of promotional scheme, the user gets an option to give a free product on purchase of the same or different product with conditions like min quantity, max quantity, min amount, max amount.
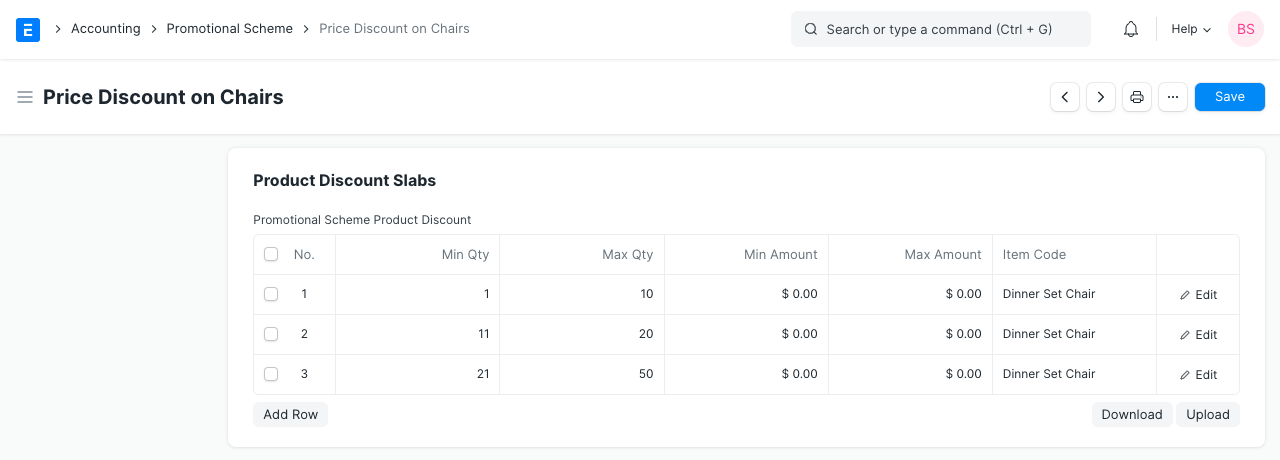
5. How to configure a Promotional Scheme (Examples)
Let’s understand how to configure a promotional scheme in ERPNext using some examples.
5.1 Mixed Conditions Schemes
Customer A has purchased 10 quantities of Britannia Cake 5 Rs packet and 5 quantities of Britannia Cake 10 Rs packet. Now, the Supplier wants to give a discount of 10% to Customer A. This Supplier also wants to give a 10 % discount to Customer B who has purchased 15 quantities of Britannia Cake 5 Rs packet.
So, the Supplier wants to apply the discount on products Britannia Cake 5 Rs, Britannia Cake 10 Rs only if his Customers have purchased 15 quantities of any product or sum of both products.
To configure this in ERPNext the steps are as follows:
- Set Apply On as Item Code.
- Set the Item Code Britannia Cake 5 Rs, Britannia Cake 10 Rs in the Pricing Rule Item Code table.
- Enable the “Mixed Conditions” field.
- In the price discount table, set the min qty, max qty as 15.
- Set the discount type as Discount Percentage and rate as 10.
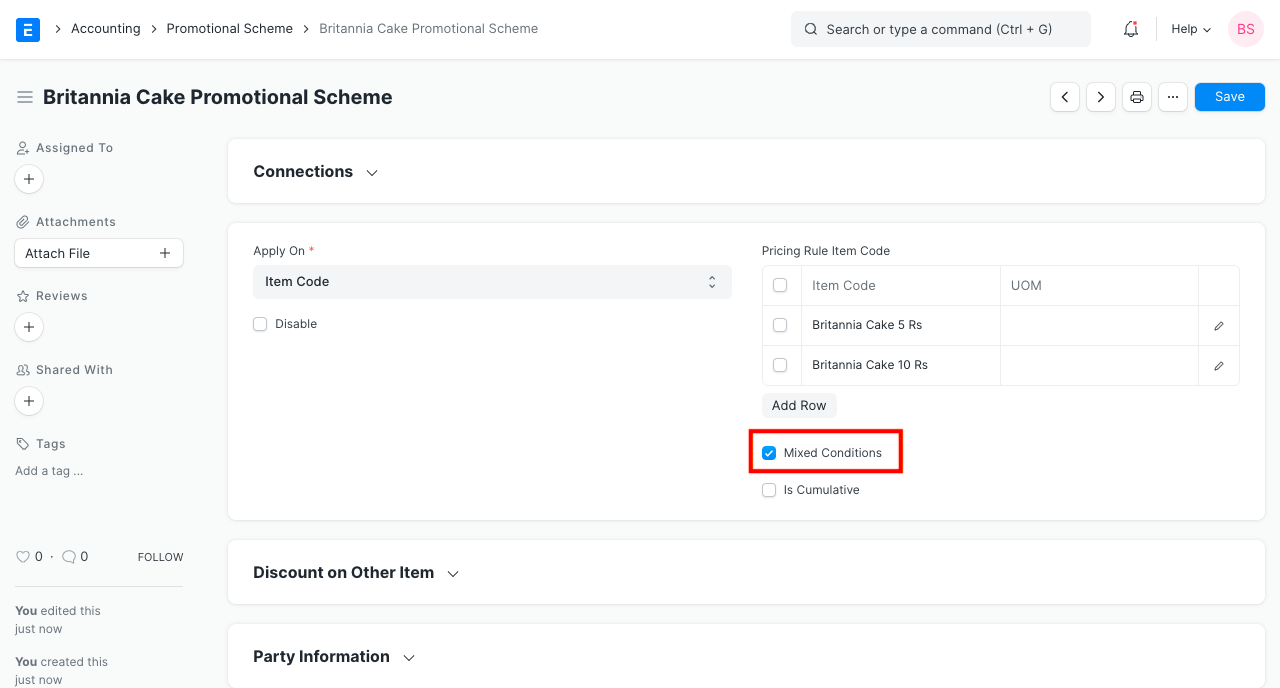
5.2 To apply a discount on other Item
Customer A has purchased 30 quantities of Britannia Cake 5 Rs packet and 2 quantities of Britannia Cake 15 Rs. The Supplier wants to sell the product Britannia Cake 15 Rs at the flat rate 12. Here the original price for the product Britannia Cake 15 Rs is 15.
The Supplier wants to apply the rule only if the Customer has purchased min 30 quantities of the product Britannia Cake 5 Rs or Britannia Cake 10 Rs.
To configure this in ERPNext the steps are as follows
- Set Apply On as Item Code.
- Set the item code Britannia Cake 5 Rs, Britannia Cake 10 Rs in the Pricing Rule Item Code table.
- Apply Rule On Other as Item Code and set Item Code as Britannia Cake 15 Rs.
- In the price discount table, set the min qty as 30.
- Set the discount type as Rate and rate as 12.
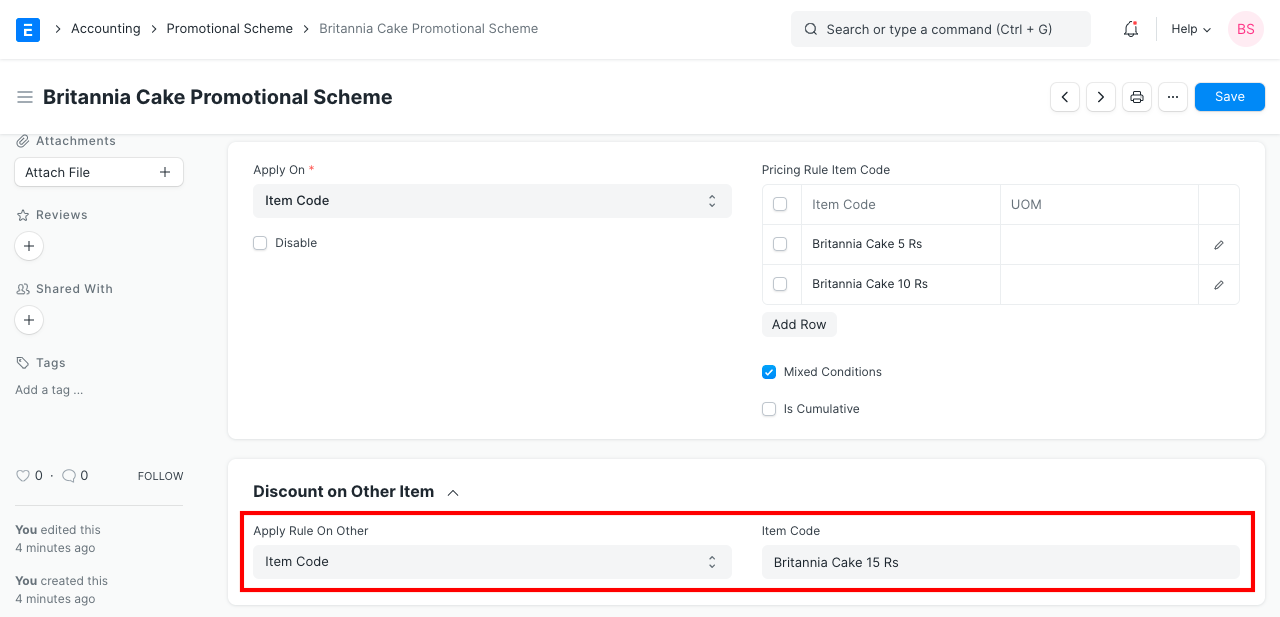
Setting up “Buy 1 Get 1 Free” Pricing Rule
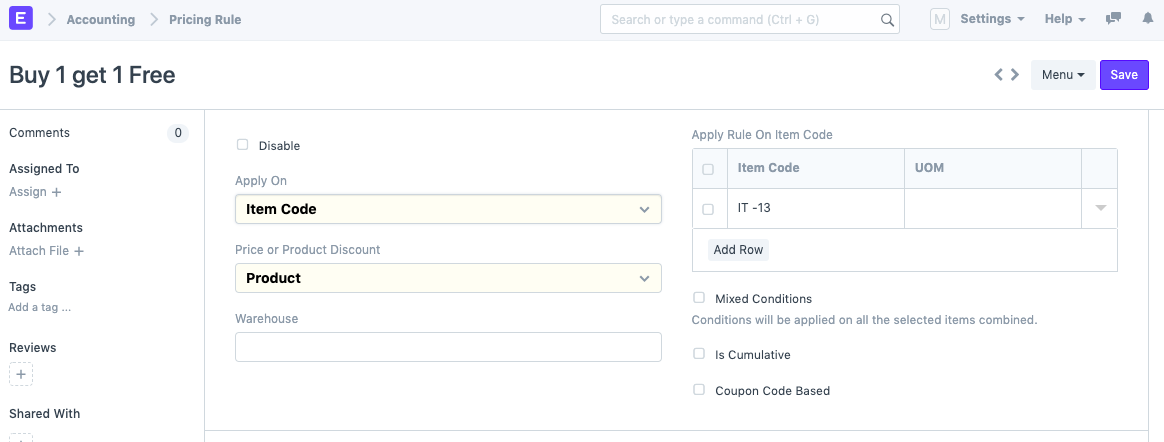


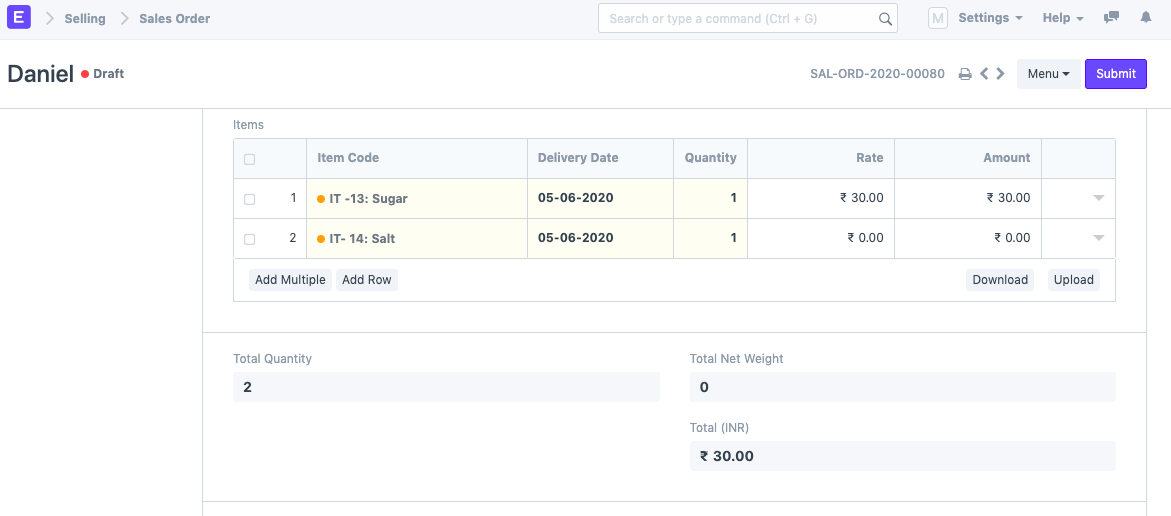
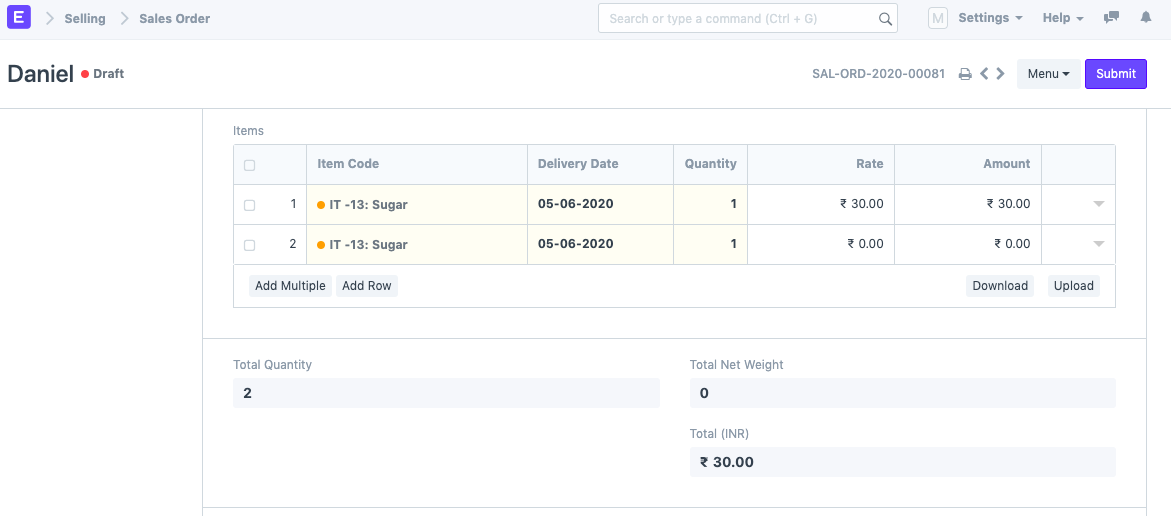
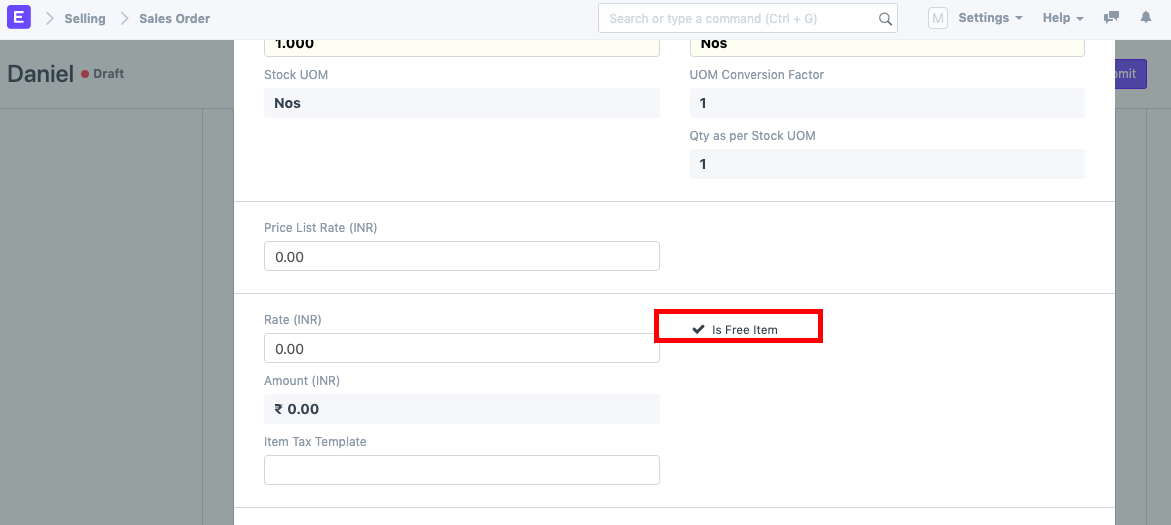
Currency
In IONIC ERP, the Currency list stores the currency value, it’s symbol and fraction unit. Most of the commonly used currencies are already present in ERPNext. The exchange rates are fetched automatically according to the current market rate. You can also configure the system to use older fixed exchange rates by creating them in the Currency Exchange form.
To access the Currency list, go to:
Home > Accounting > Multi Currency > Currency
For example, this is how the Currency page for Euro:
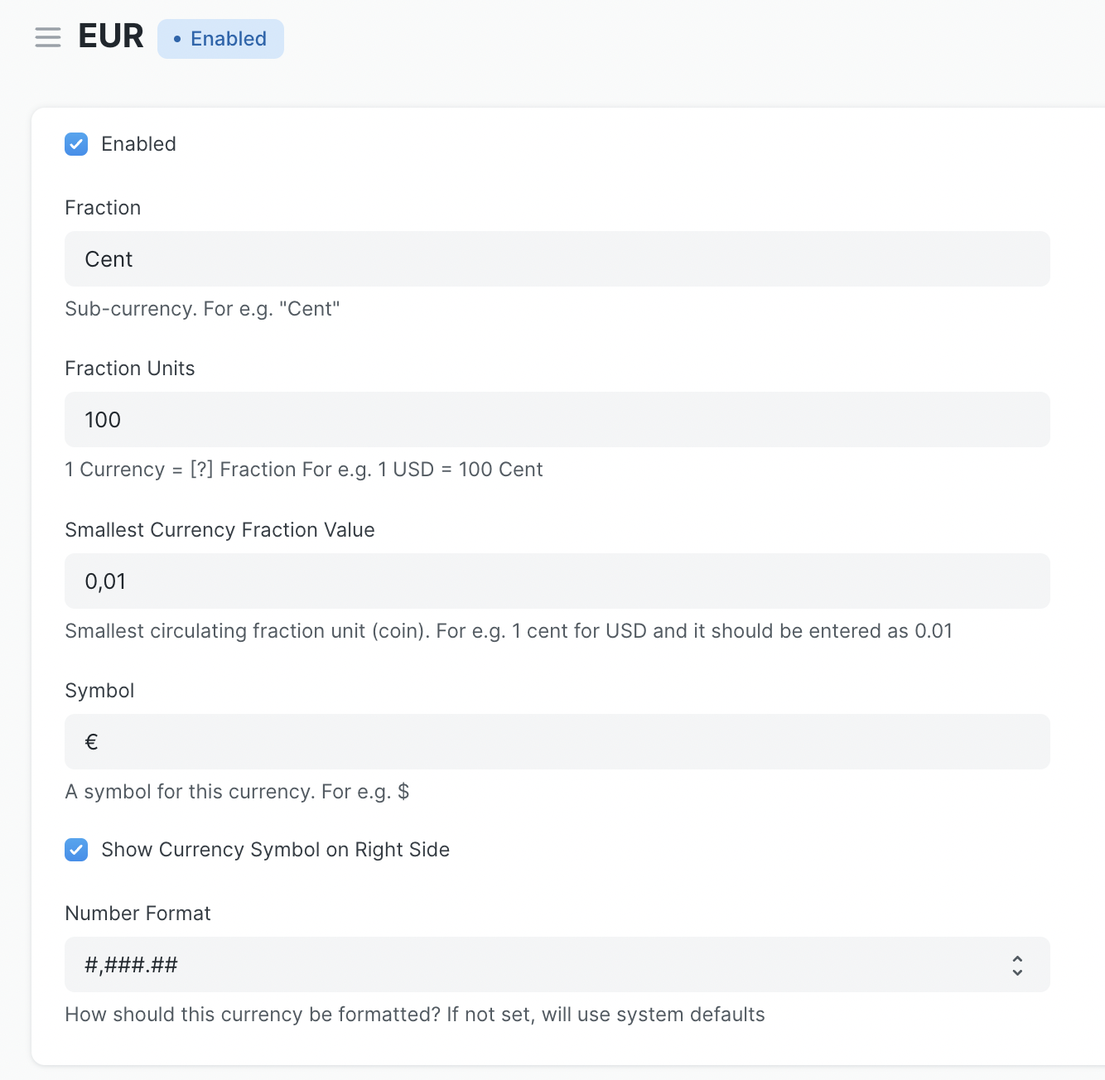
Configurations
Each currency has defaults set based on widely accepted configurations. You can however modify the configuration to suit your requirements.
Enable / Disable
By default only few popular currencies and your company’s currencies are enabled. To Enable more go to currency list and check “Enabled”.
Fractional units
Some currencies have fractional units like “Cent”, you can configure what this fractional unit will be called when converting numbers into words.
Symbol
Standard currency symbol are populated by default, if you need to change the currency symbol you can update it on Currency document.
You can configure position of currency symbol to the right by checking “Show currency symbol on right”.
You can also hide all currency symbols from “Global Defaults”.
Batch
Batch feature in IONIC ERP allows you to group multiple units of an Item and assign them a unique value/number/tag called Batch No.
This is done based on the Item. If the Item is batched, then a Batch number must be mentioned in every stock transaction. Batch numbers can be maintained manually or automatically. This feature is useful to set the expiry date of multiple Items or move them together to different Warehouses.
To access the Batch No list, go to:
Home > Stock > Serial No and Batch > Batch
1. Prerequisites
Before creating and using a Batch, it is advised that you create the following first:
- Item
- Enable ‘Has Batch No’ in the Item master
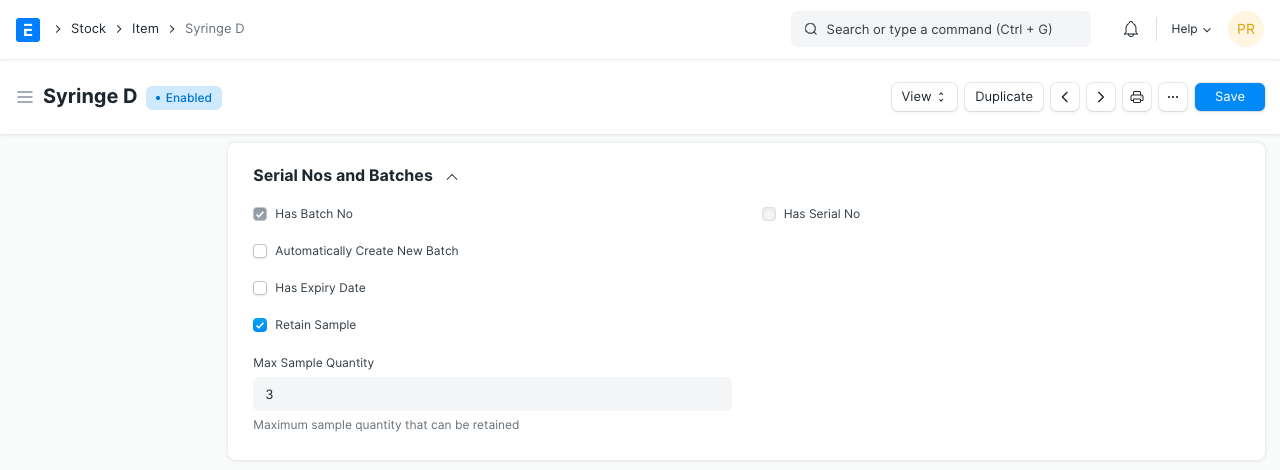
2. How to create a new Batch
To set item as a batch item, “Has Batch No” field should be checked in the Item master. If you have not selected “Automatically Create New Batch” when creating an Item, you will have to make Batches Manually as you go along.
To create new Batch No. master for an item, go to:
- Go to the Batch list, click on New.
- Set the Batch ID.
- Select the Item.
- If any transaction is done with an item, the batch cannot be set or unset.
- Save.
When Batches are enabled for an Item, the option to retain sample stock also becomes available.
2.1 Batch Auto Creation
If you want automatic batch creation at the time of Purchase Receipt, you must tick ‘Automatically Create New Batch’ in the Item master:
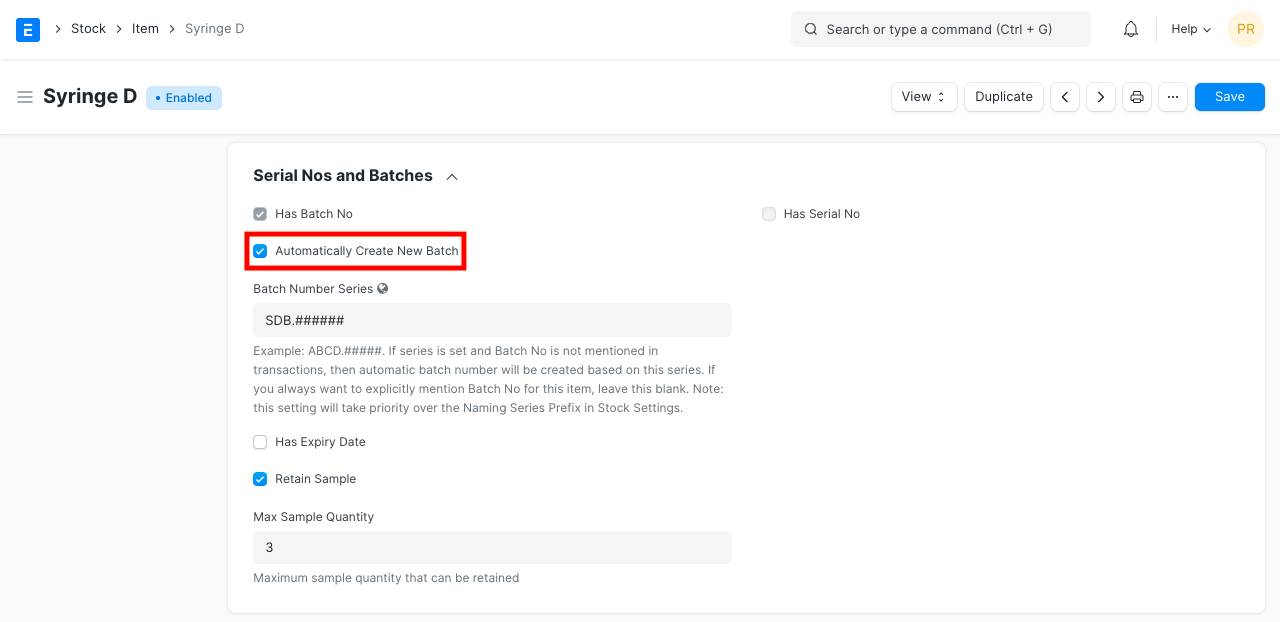
3. Features
3.1 Splitting and Moving Batches
When you open a batch, you will see all the quantities that belong to that batch on the page.

- To move the batch from one Warehouse to another, you can click on the Move button.
- You can also split the batch into smaller one by clicking on the Split button. This will create a new Batch based on this Batch and the quantities will be split between the batches.

- If you set expiry date, the Batch will show ‘Not Expired’ until the expiry date, after which it’ll show ‘Expired’. If a date is not set, the Batch will show ‘Not Set’.
3.2 Transacting Items with Batches
A Batch master should be created before the creation of Purchase Receipt. Hence, every time a Purchase Receipt or Work Order is being made for a batch item, you will first create its Batch No, and then select it in the Purchase order or Stock Entry.
On every stock transaction (Purchase Receipt, Delivery Note, Invoice) with a batch item, you should provide the Item’s Batch No.
Note: In stock transactions, Batch IDs will be filtered based on Item Code, Warehouse, Batch Expiry Date (compared with a Posting date of a transaction) and Actual Qty in Warehouse. While searching for Batch ID without value in the Warehouse field, Actual Qty filter won’t be applied.
Serial Number
As discussed in the Item page, if an Item is serialized, a Serial Number (Serial No) record is maintained for each quantity of that Item. This information helps track the location of the Serial No, its warranty and end-of-life (expiry) information.
Serial Nos are also useful to maintain fixed assets. Maintenance Schedules can also be created against Serial Numbers for planning and scheduling maintenance activity for these assets (if they require maintenance).
You can also track from which Supplier you purchased the Serial No and to which Customer you have sold it. The Serial No status will tell you its current inventory status.
If your Item is serialized you will have to enter the Serial Nos in the related column with each Serial No in a new line. You can maintain single units of serialized items using Serial Number.
To access the Serial Number list, go to:
Home > Stock > Serial No and Batch > Serial No
1. Prerequisites
Before creating and using a Serial Number, it is advised that you create the following first:
- Item
- Enable ‘Has Serial No’ in the Item master

2. How to create a Serial Number
Usually, Serial Numbers are auto-created when transactions are made against a serialized Item. This works only when ‘Has Serial No’ is enabled and a series is set in the Item master.
For example, a series was set for the following Item as ‘PB2L.#####’. Then a Stock Entry was submitted to receive the Item. The Serial Numbers were created accordingly.
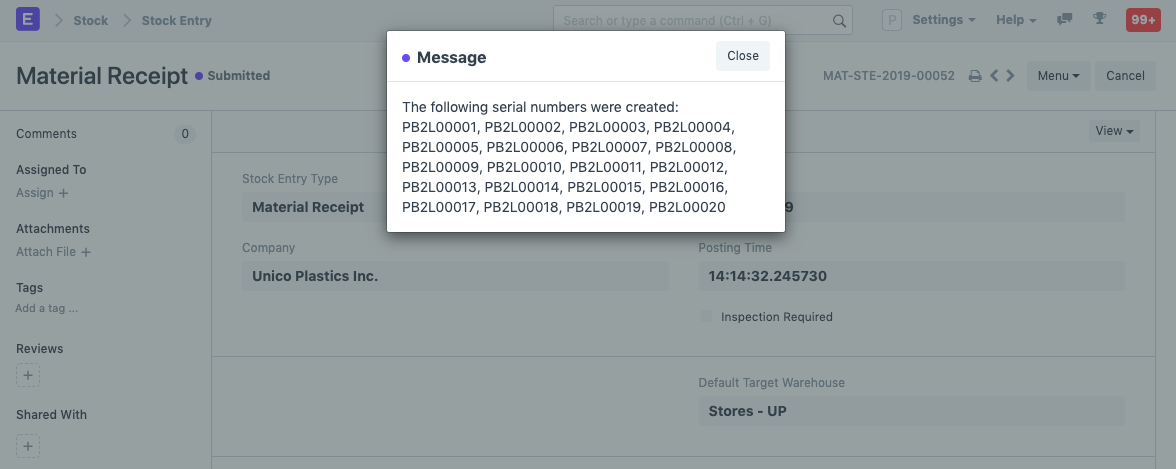
However, if you want to create a Serial No manually follow these steps:
- Go to the Serial Number list, click on New.
- Enter a Serial Number.
- Enter the Item Code and details will be fetched.
- If any transaction is done with an item, Serial No cannot be set or unset.
- Save.
Inventory of an Item can only be affected if the Serial No is transacted via a Stock transaction (Stock Entry, Purchase Receipt, Delivery Note, Sales Invoice). When a new Serial No is created directly, its Warehouse cannot be set.

2.1 Notes about Serial Number
- The Status is set based on Stock Entry.
- Only Serial Numbers with status ‘Available’ can be delivered.
- Serial Nos can automatically be created from a Stock Entry or Purchase Receipt. If you mention Serial No in the Serial Nos column, it will automatically create those serial Nos.
- If in the Item Master, the Serial No Series is mentioned, you can leave the Serial No column blank in a Stock Entry / Purchase Receipt. Serial Nos will automatically be set from that series.
3. Features
3.1 Purchase/Manufacture details
The document from which the Serial No was created will be shown. If you purchased it from a Supplier, it’ll be linked here.
3.2 Delivery Details
If the Serial No was generated from a Sales Order, the Customer will be linked here.
3.3 Warranty/AMC Details
If the Item is under warranty or AMC (Annual Maintenance Contract), the expiry dates for these can be set.
3.4 More Information
Any additional information about this specific Item unit can be set under ‘Serial No Details’.
Installation Note
An Installation Note can be created when a product/item is being installed or set up at the Customer’s place.
For example, if you sell an Air Conditioner, a service person generally accompanies the delivery to install the Air Conditioner at the Customer’s place. The service person can create an “Installation Note”, to track the date and details of the installation.
To access the Installation Note list, go to:
Home > Stock > Serial No and Batch > Installation Note
1. How to create an Installation Note
An Installation Note is usually created from a Delivery Note. You can also create it manually and click on the ‘From Delivery Note’ button to fetch details from a selected Delivery Note.
- Go to the Installation Note list, click on New.
- The Customer, Item, and quantity will be fetched from the Delivery Note.
- The date and time are set to when the note is created.
- Save and submit.
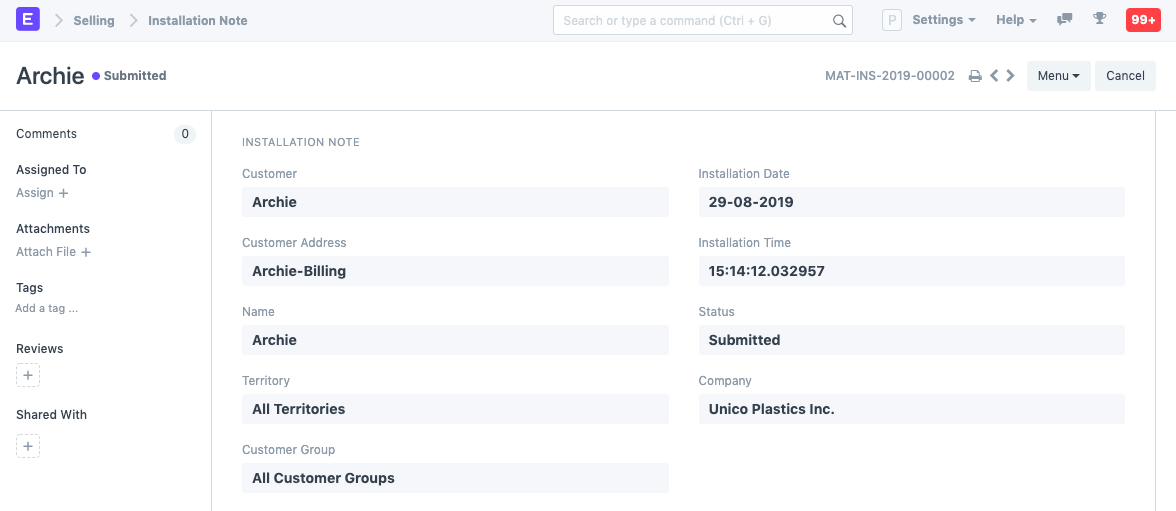
Any additional remarks about the installation can be added. If the Item is serialized, the serial numbers can be added in Items table.
